Deprecated: Accessing static trait property MatthiasWeb\RealMediaLibrary\Vendor\MatthiasWeb\Utils\Localization::$PACKAGE_INFO_BACKEND is deprecated, it should only be accessed on a class using the trait in /var/www/html/public_html/wp-content/plugins/real-media-library/vendor/devowl-wp/utils/src/PackageLocalization.php on line 37
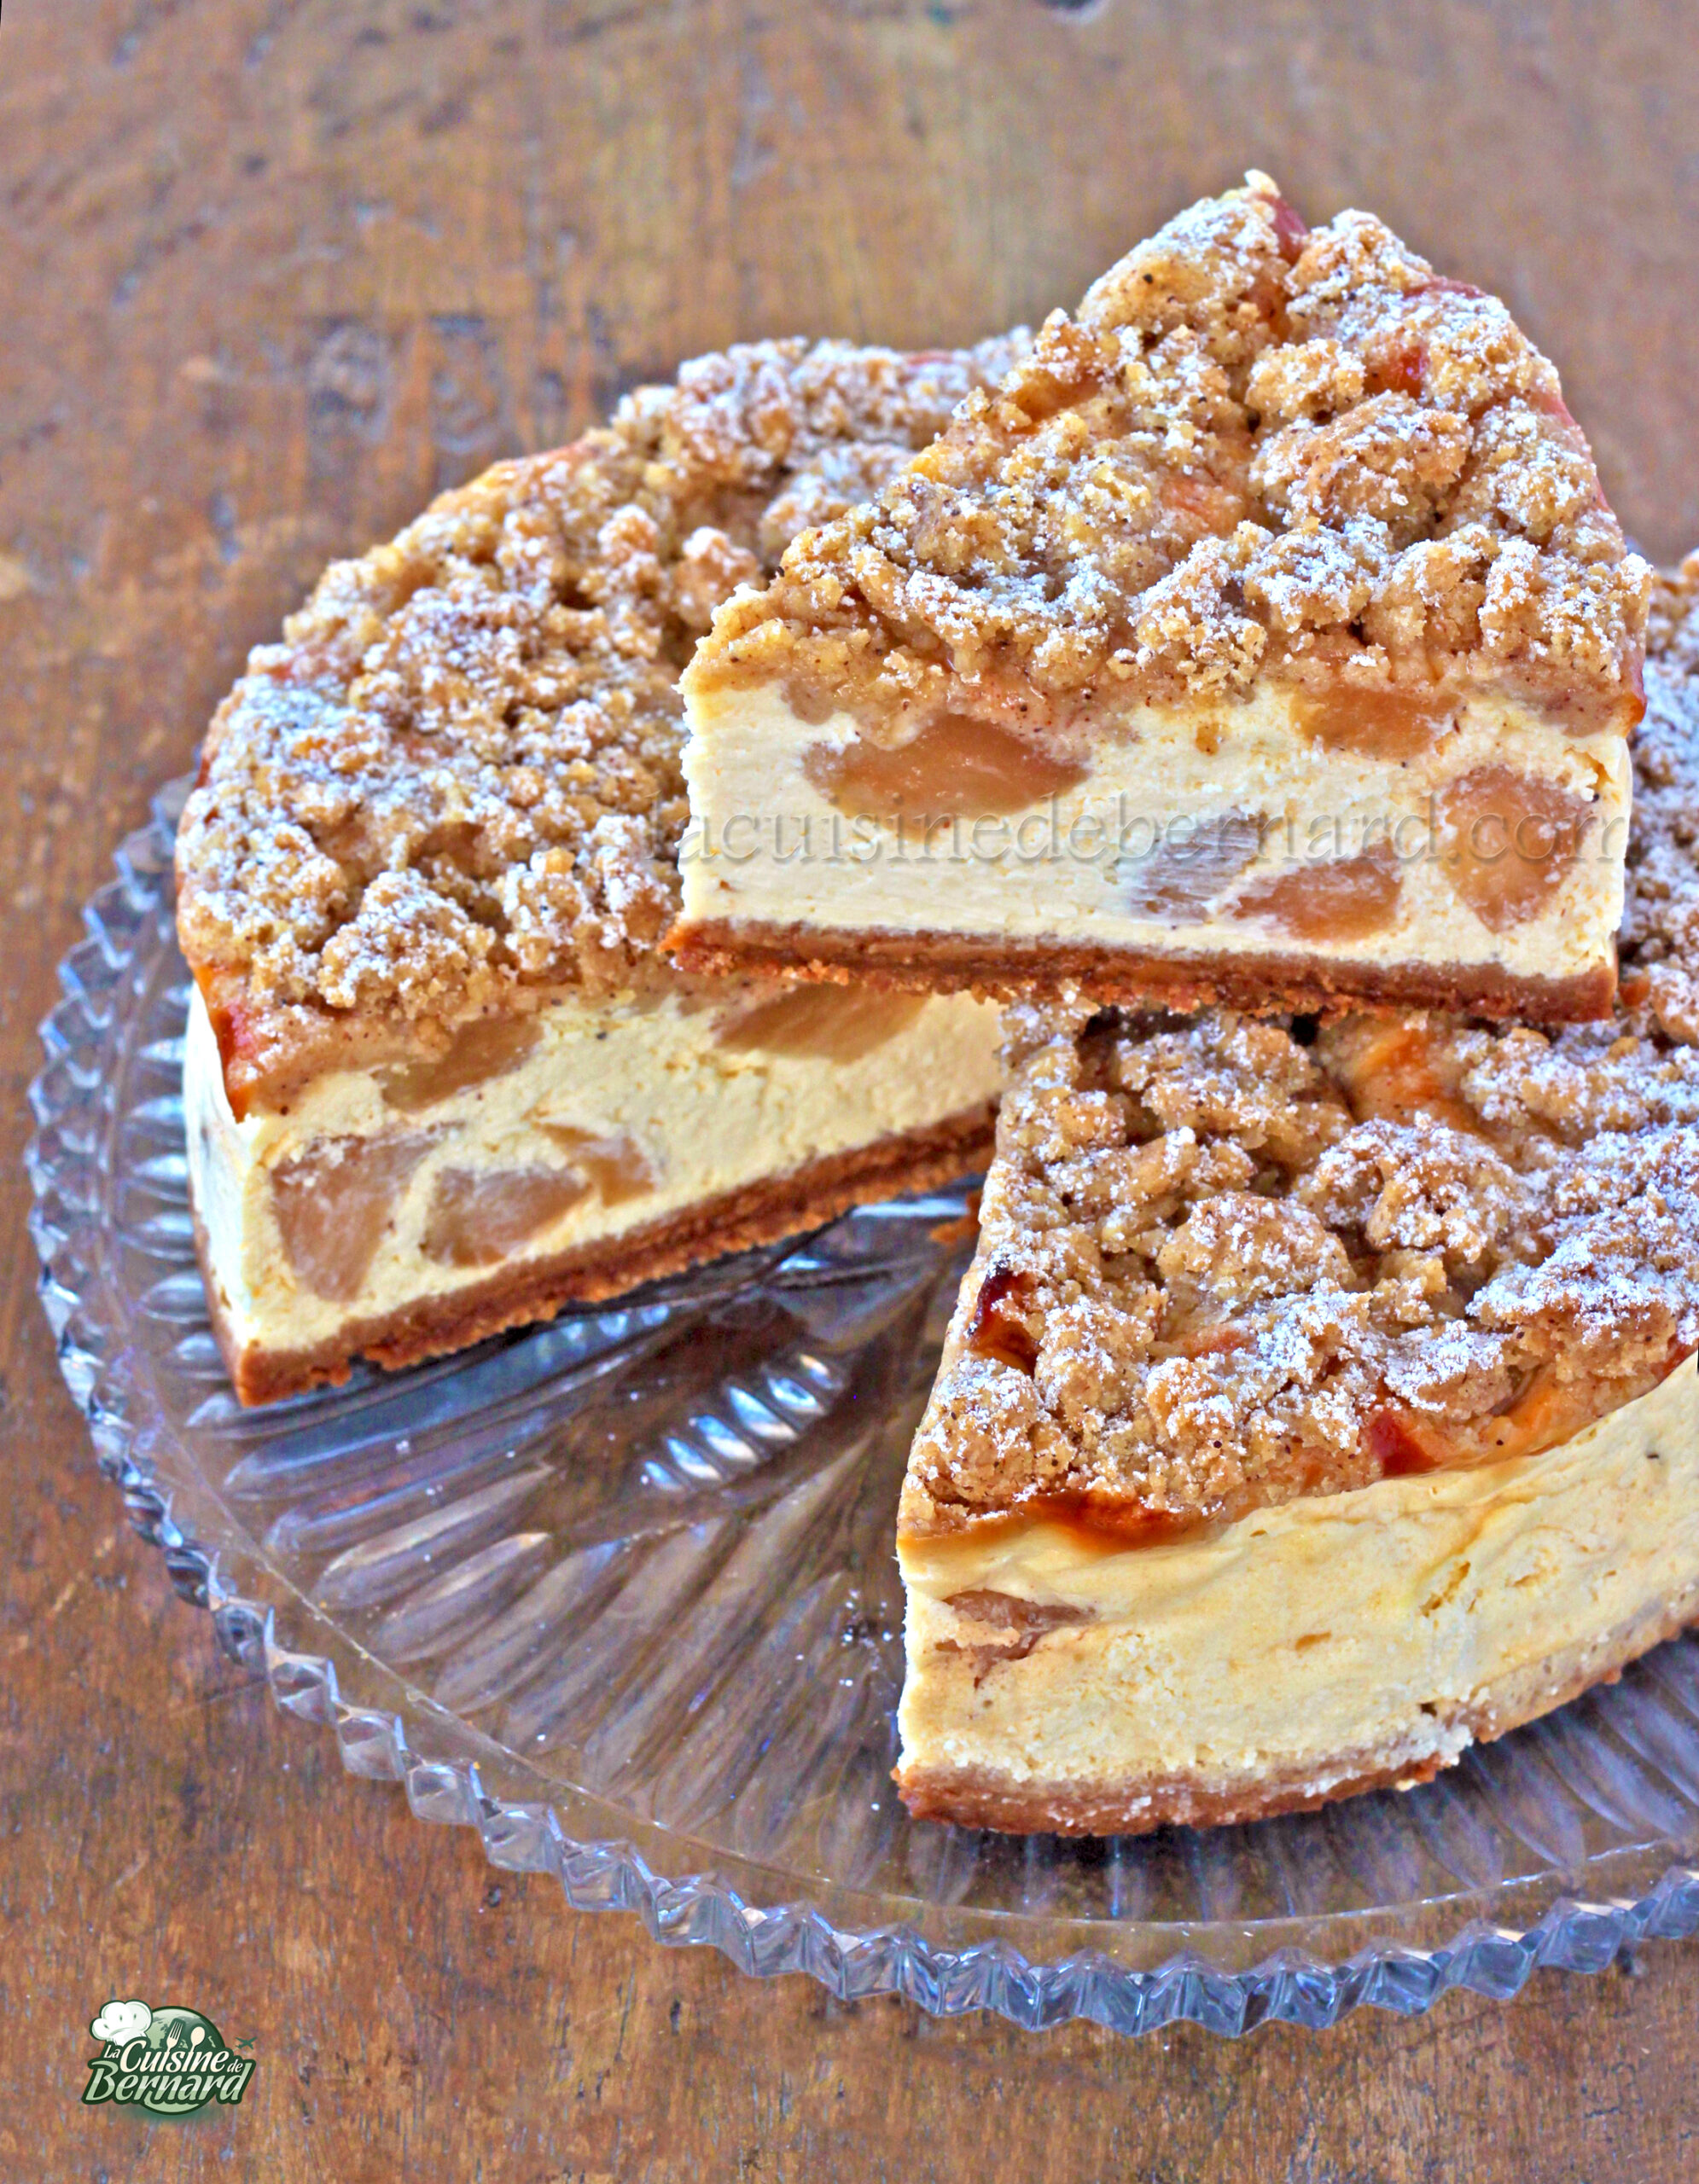
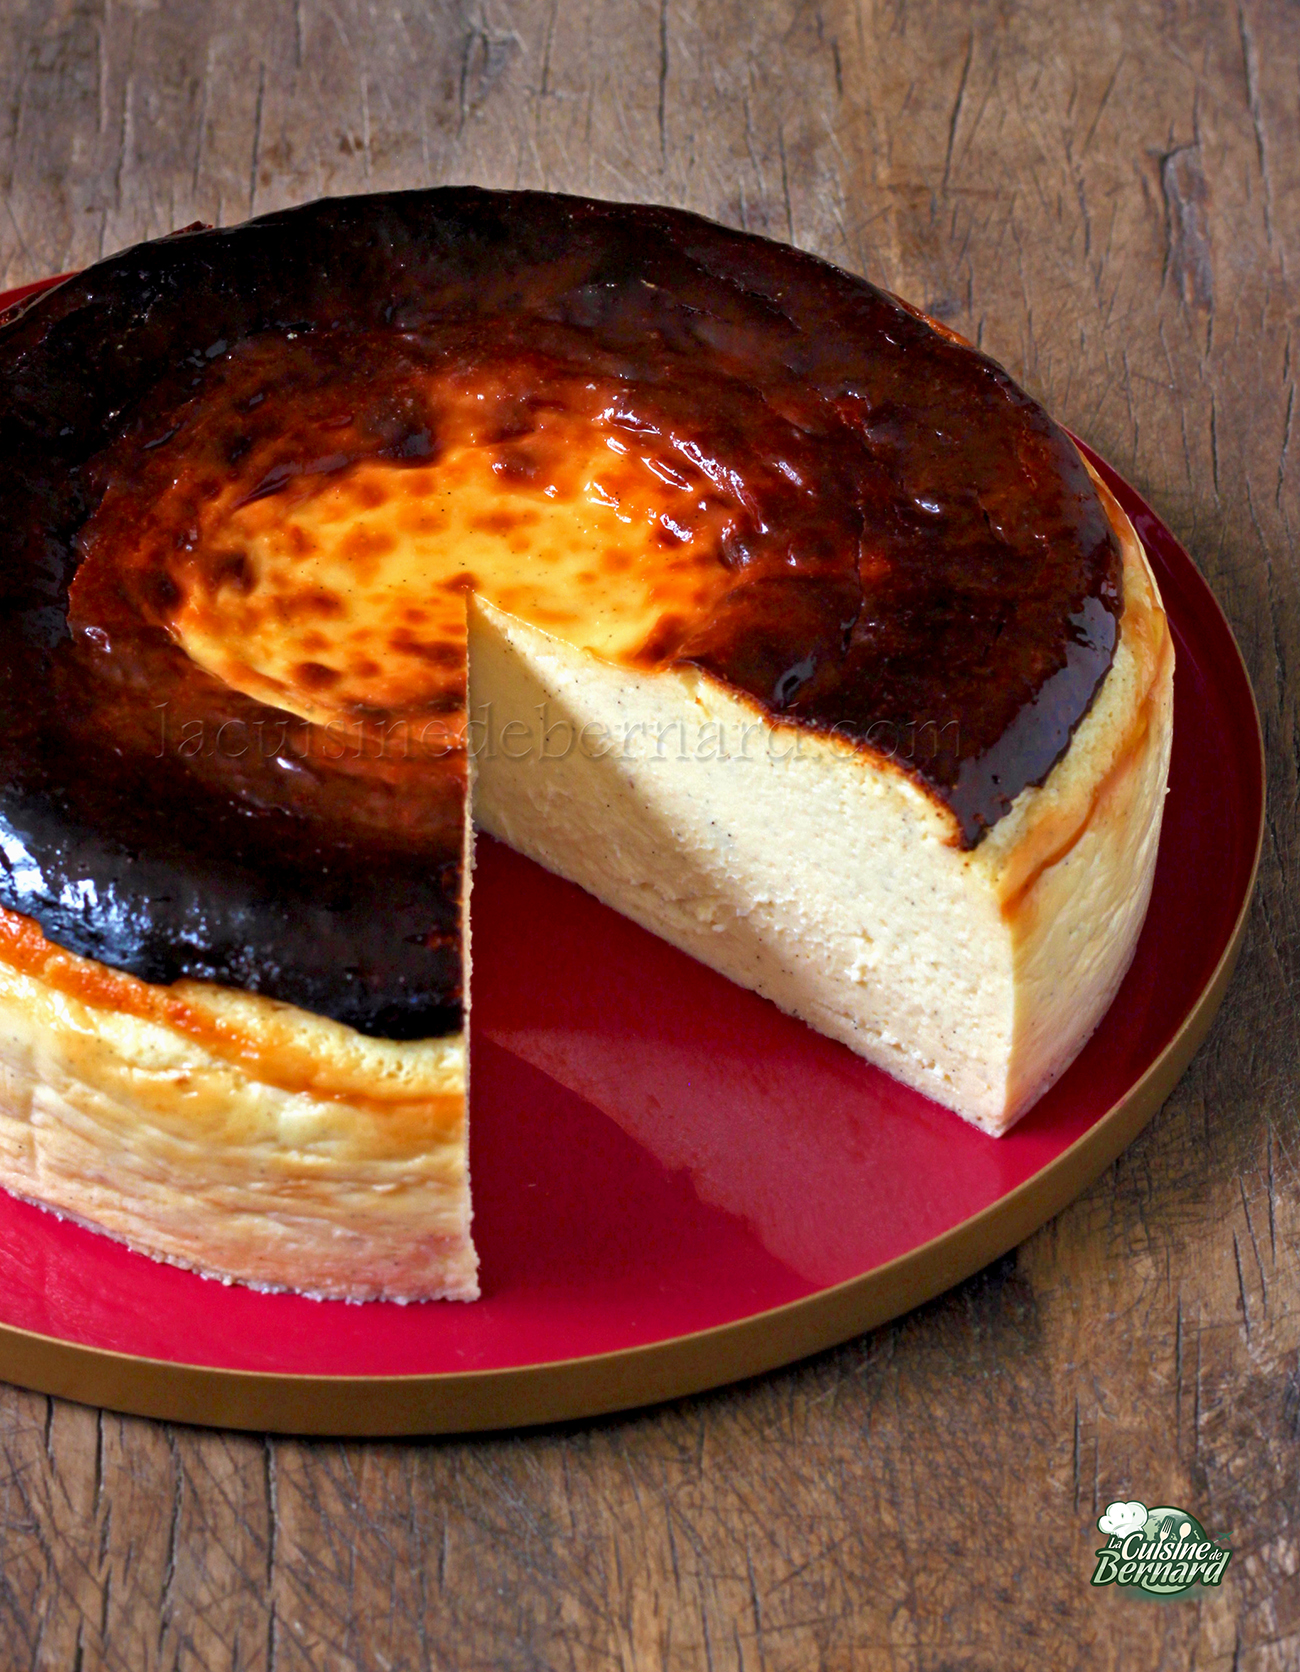
An autumn cheesecake with everything I love about it. A chewy texture, but also crunchy on top with the addition of a cinnamon crumble, all on a speculo base. It’s an irresistible delight for all cheesecake lovers. The melting apples add a touch of freshness to this rich, flavorful cake.
For a 23cm diameter mould (12 portions) :
Base de pâte :
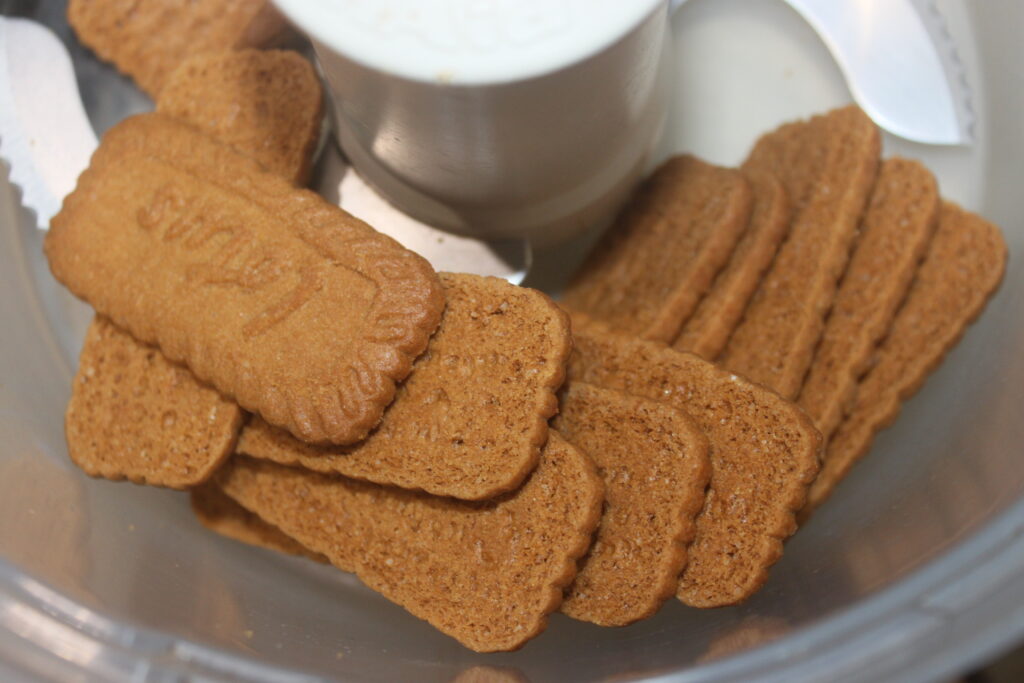
- 210g speculos
- 20g of sugar
- 40g melted butter
Crème au cream cheese :
- 600g Philadelhia cream
- 100g of full cream
- 1 teaspoon of liquid vanilla
- 3 eggs
- 60g of sugar
Crumble :
- 40g of semi-salted butter
- 75g of flour
- 70g brown sugar
- 1 teaspoon cinnamon powder
Pommes à la cannelle :
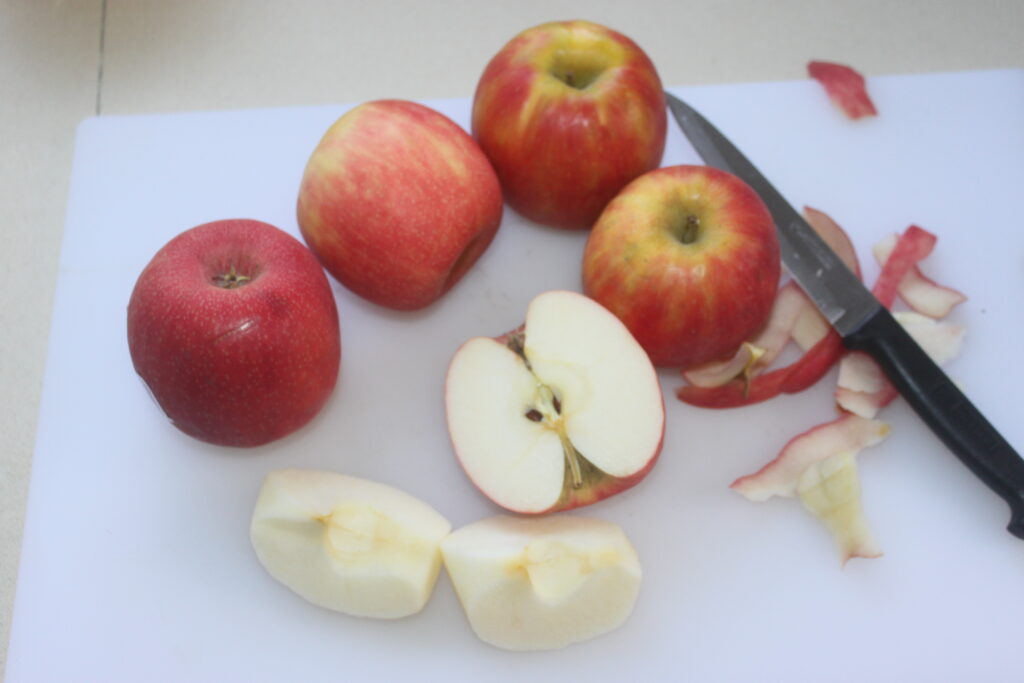
- 3-4 apples
- 20g of semi-salted butter
- 1 tablespoon of sugar
- 1 teaspoon cinnamon powder
Commencez par préparer les pommes.
I prepared many more to eat as they were, without putting them all in the pannukakku. Peel them and cut them into quarters.
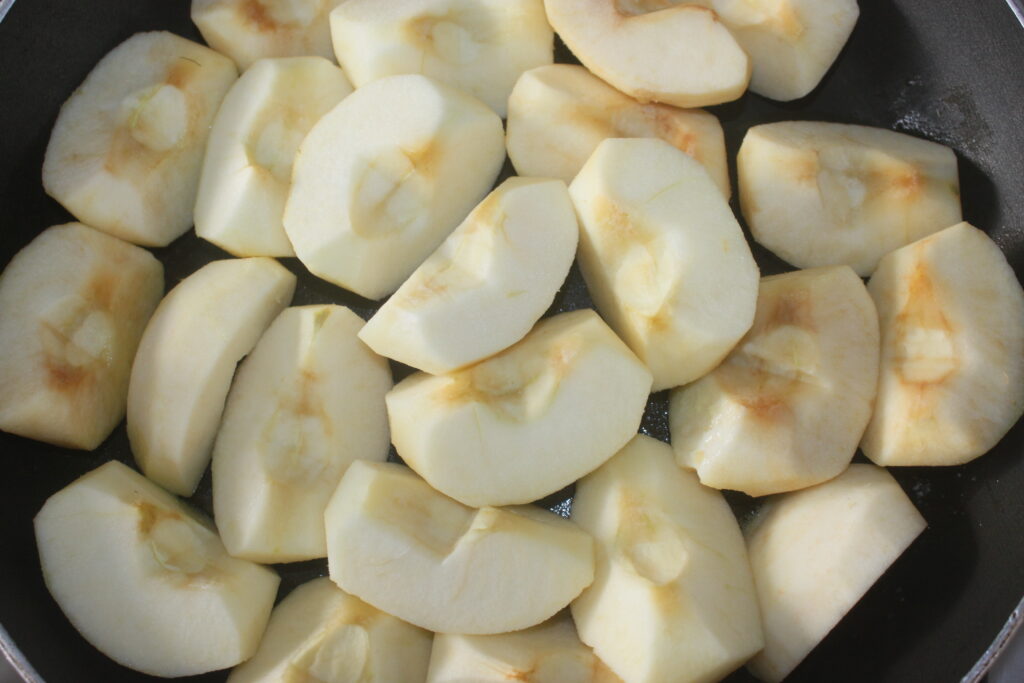
Place in a frying pan with the butter, sugar and cinnamon.

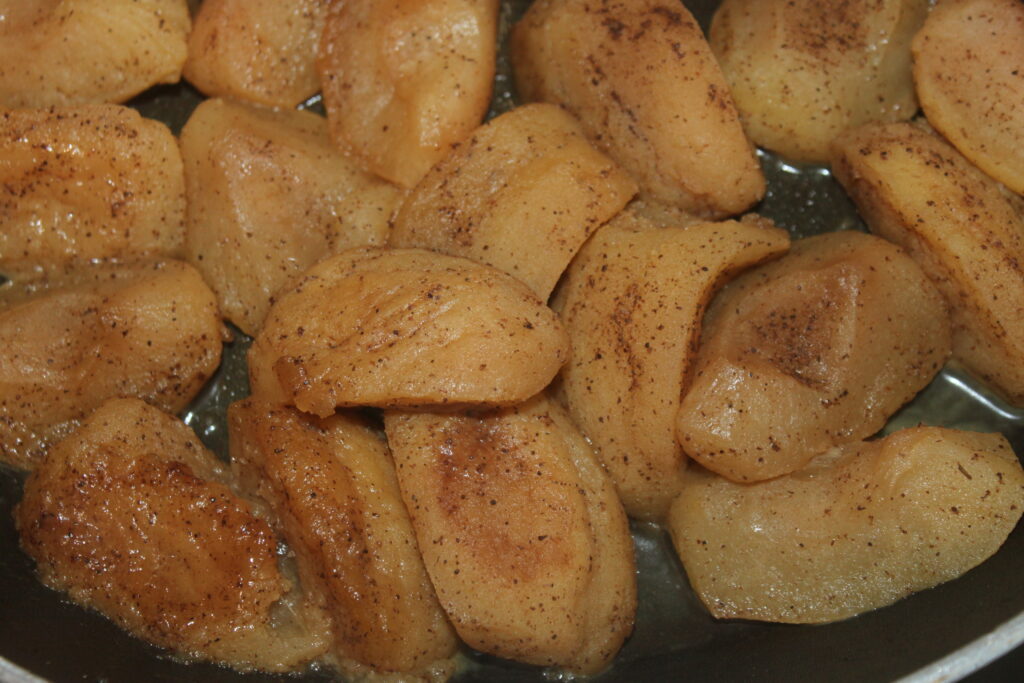
Cook for 30 minutes over low heat, with a lid, shaking the pan from time to time. They should become very tender.
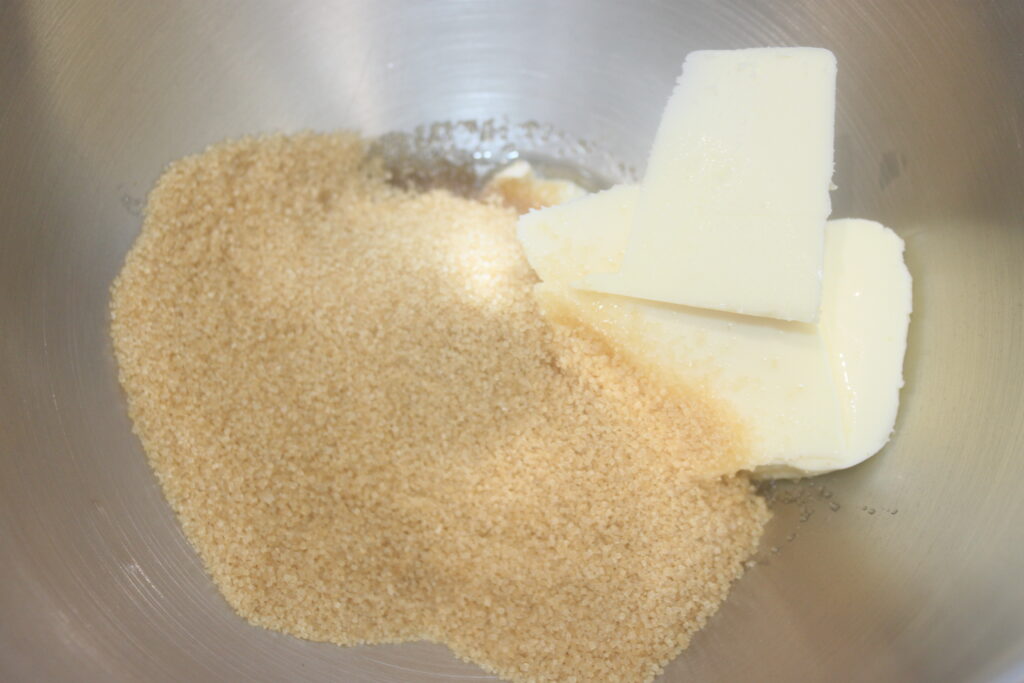
Préparez la base du cheesecake.
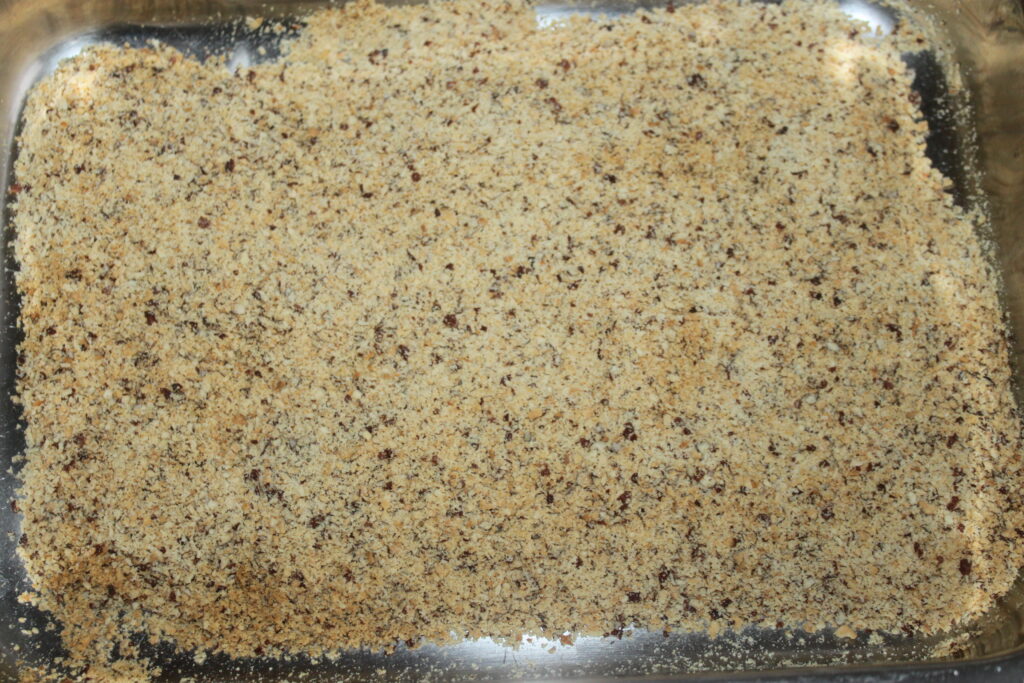
Put the speculos in a blender to reduce them to a powder.

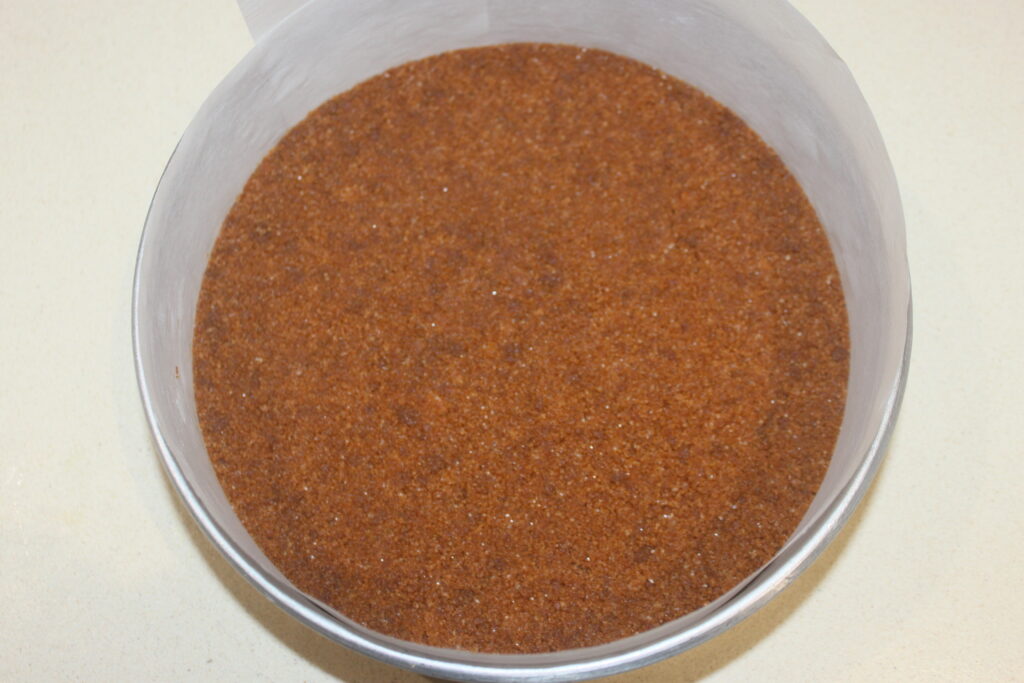
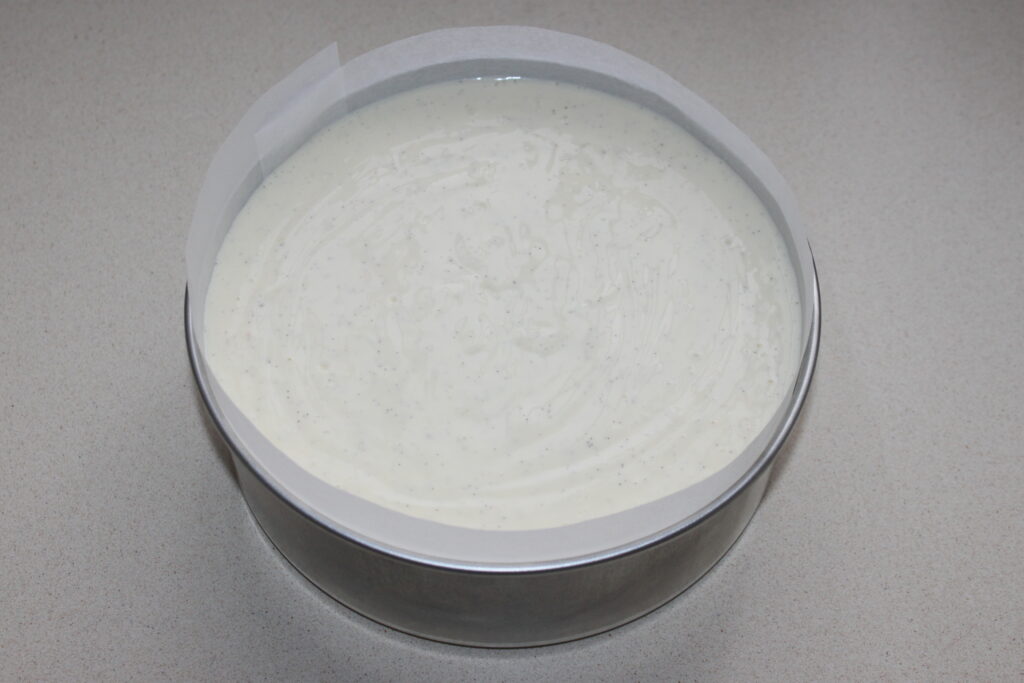
Pour the melted butter, sugar and specula powder into a small bowl.

Mix well, then pour into a 23cm removable-bottom mold lined with parchment paper.
Bake for 15 minutes at 170°C.
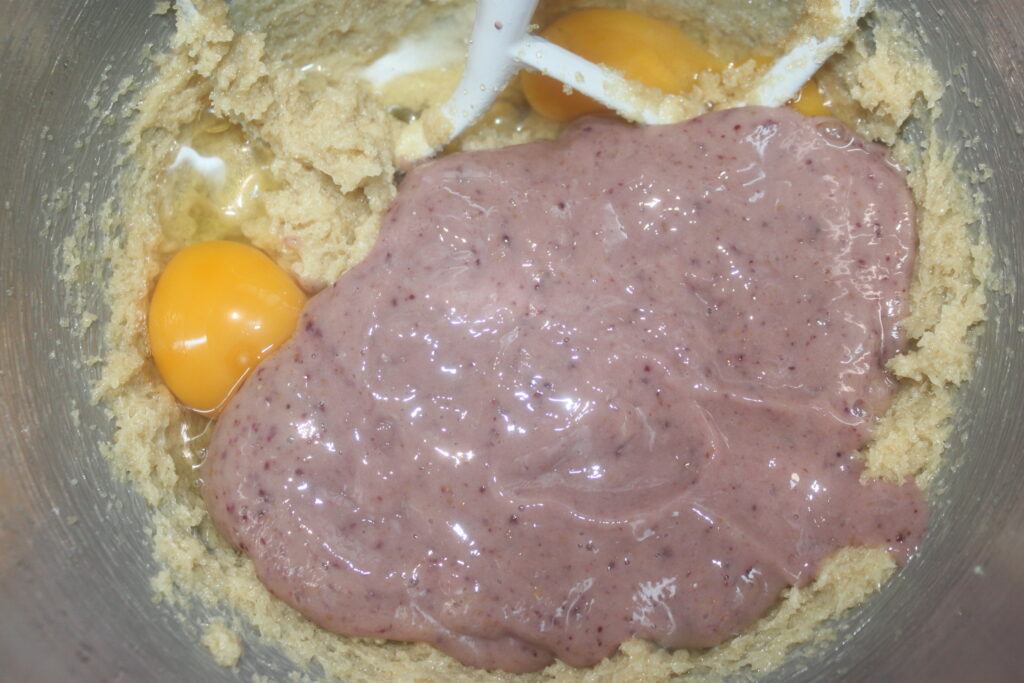
Préparez la crème à cheesecake.
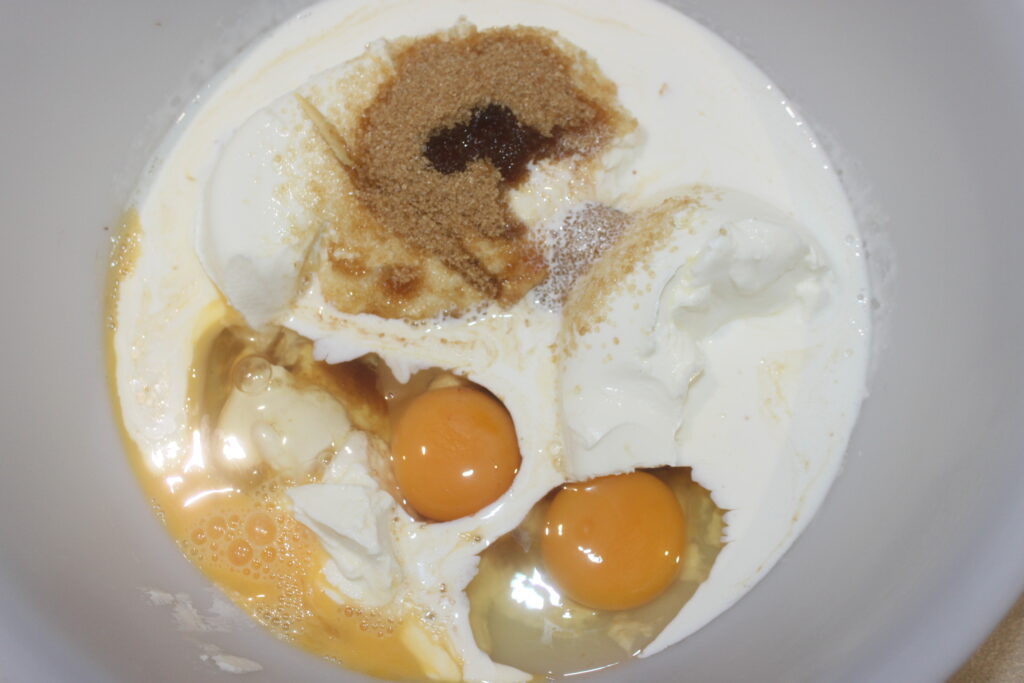
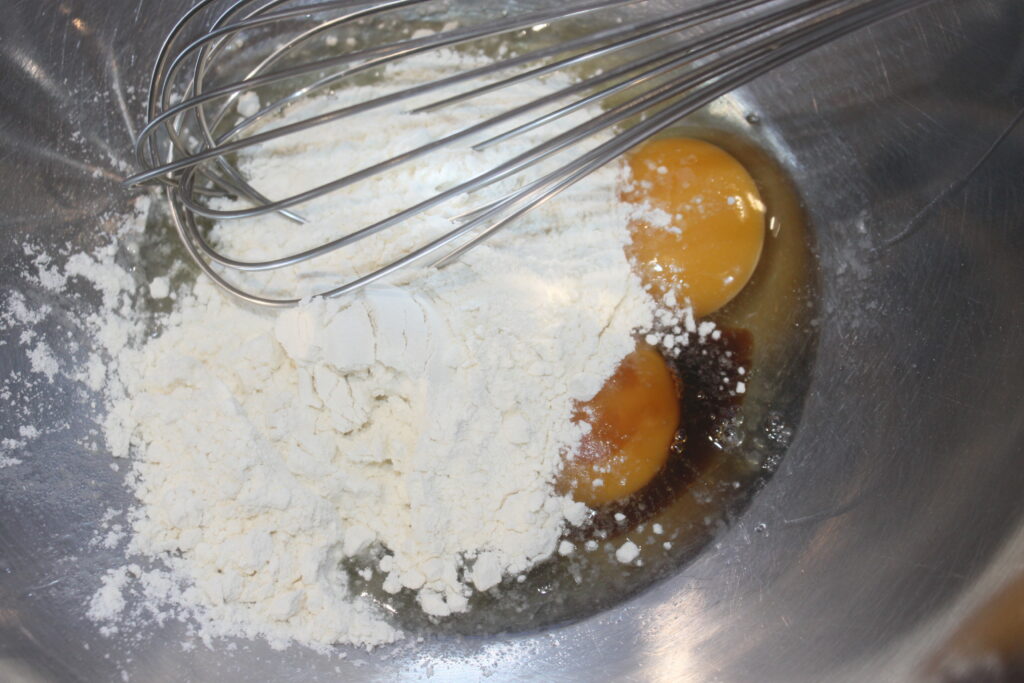
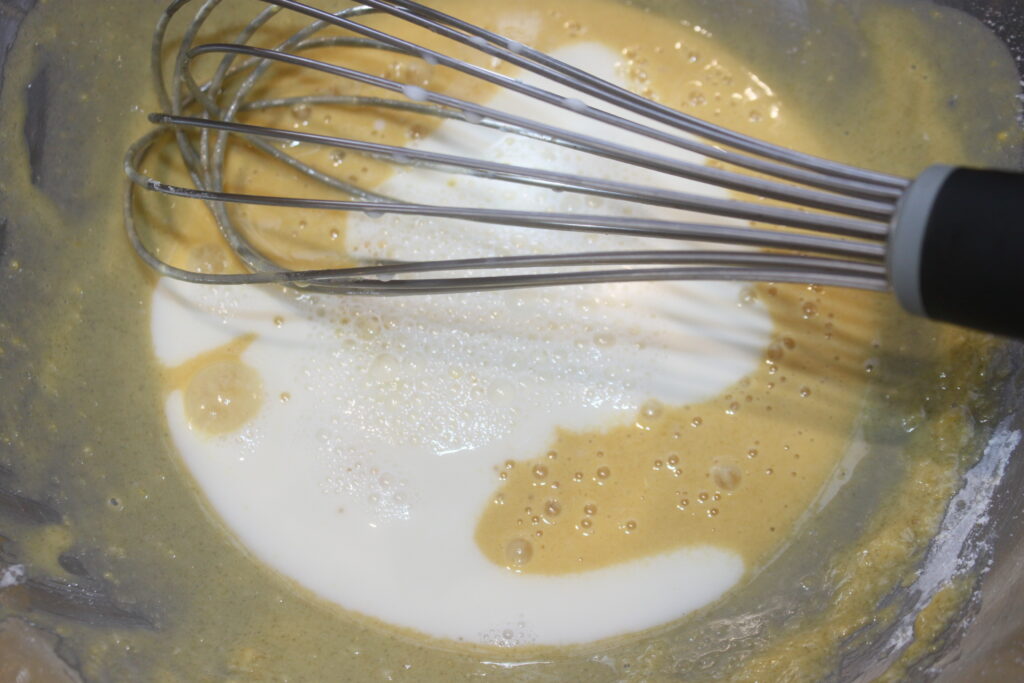
In a bowl, mix the cream cheese, which has been out of the fridge for at least 2 hours, with all the ingredients: cream, eggs, sugar and vanilla.
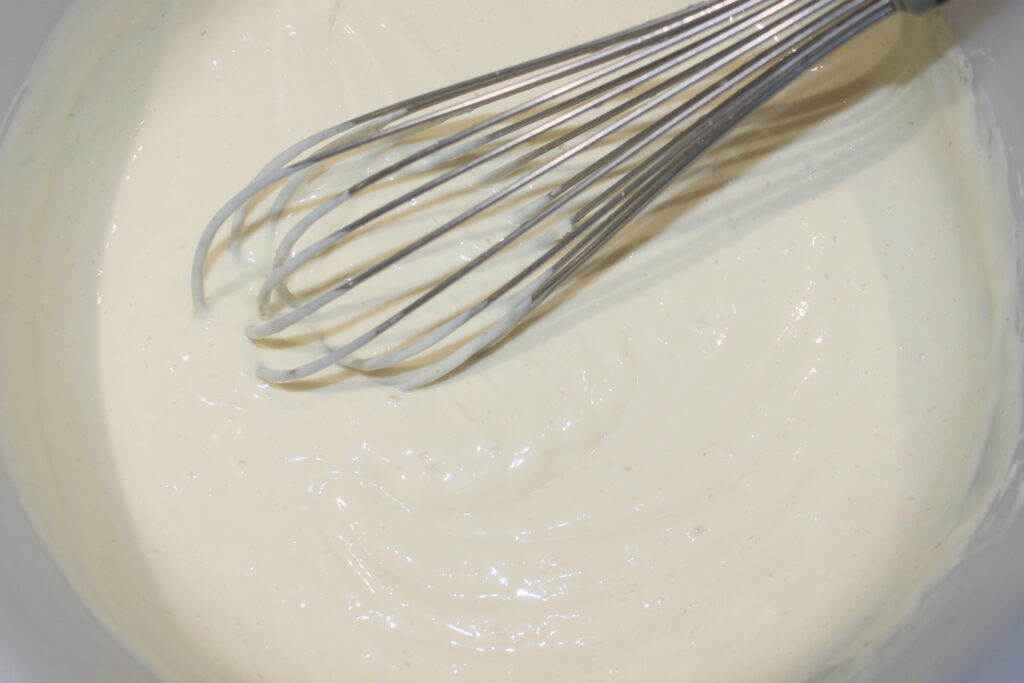
Mix well with a whisk.
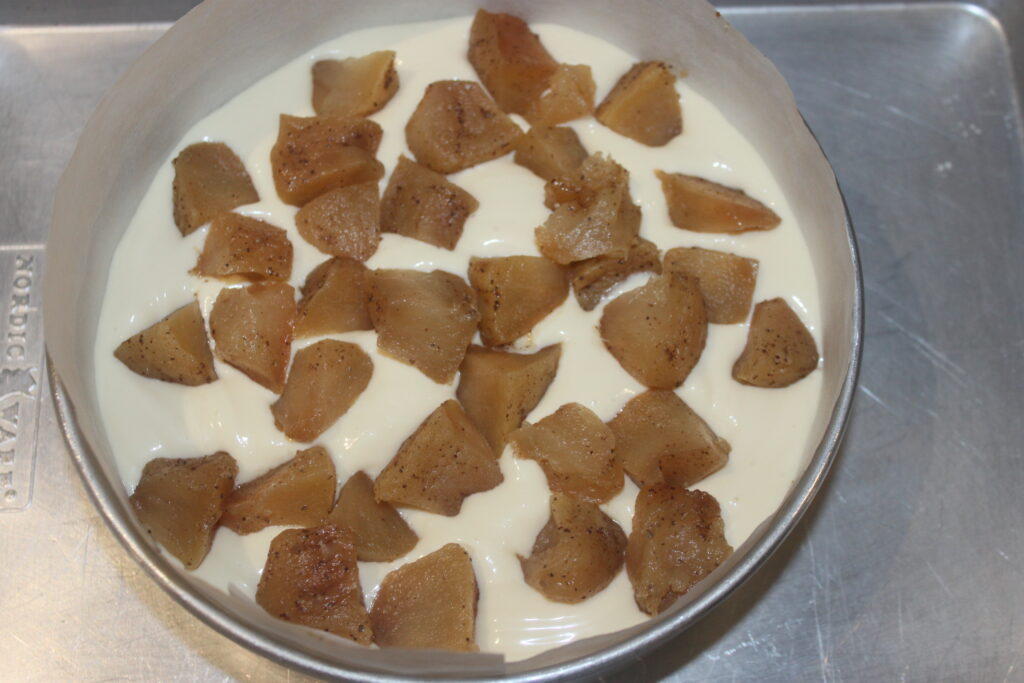
Pour half over the pre-cooked speculo base.

Sprinkle with chopped cooked apples.
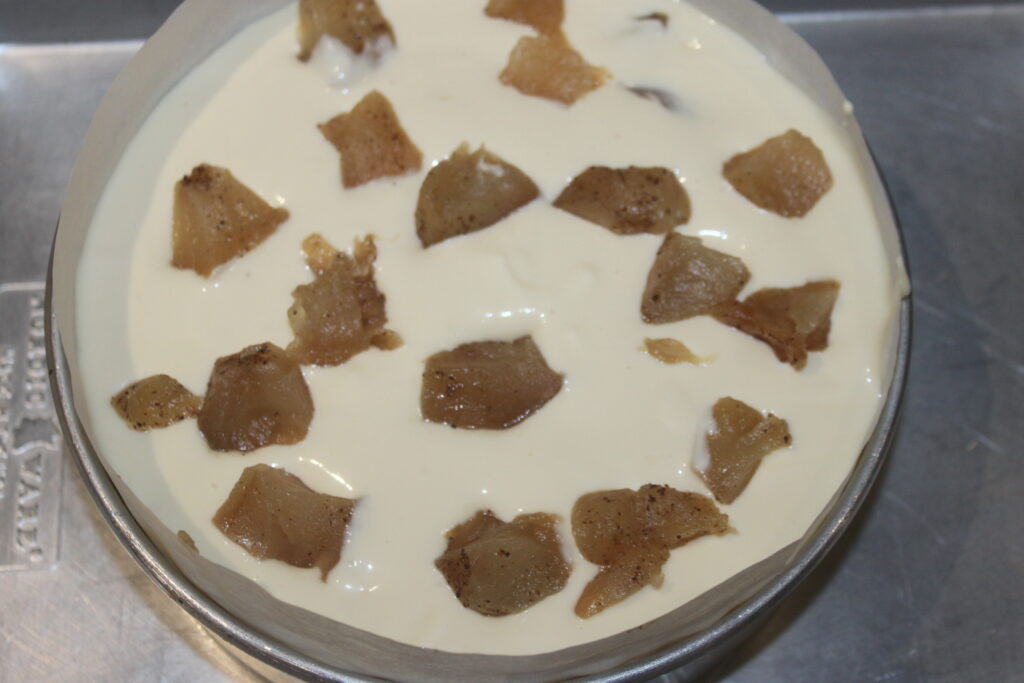
Pour over the remaining cream and sprinkle with apples.
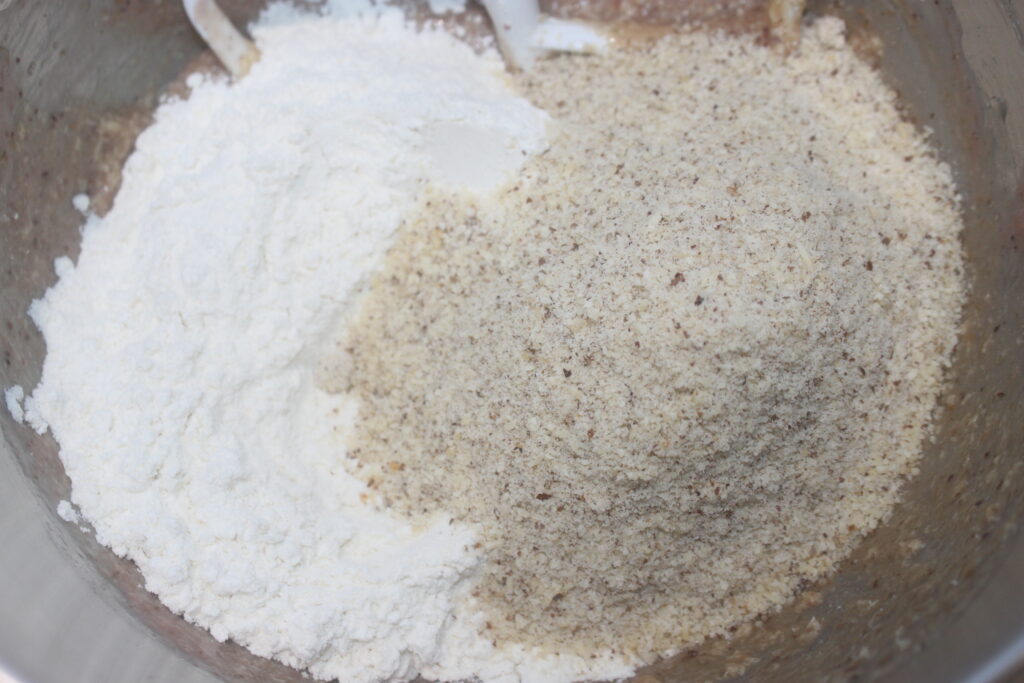
Pour le crumble :
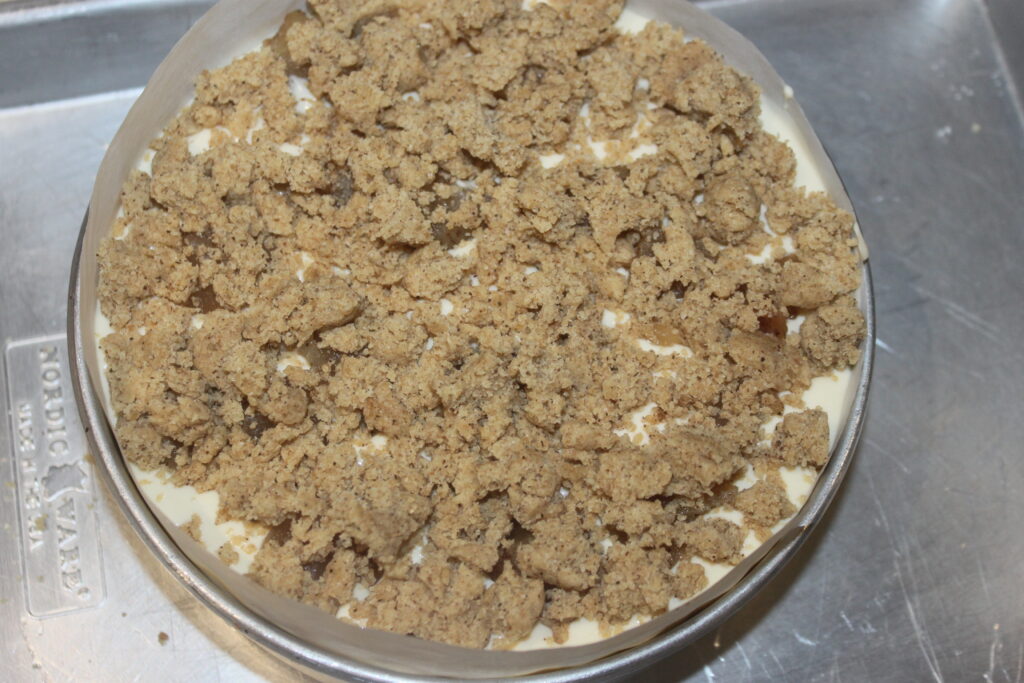
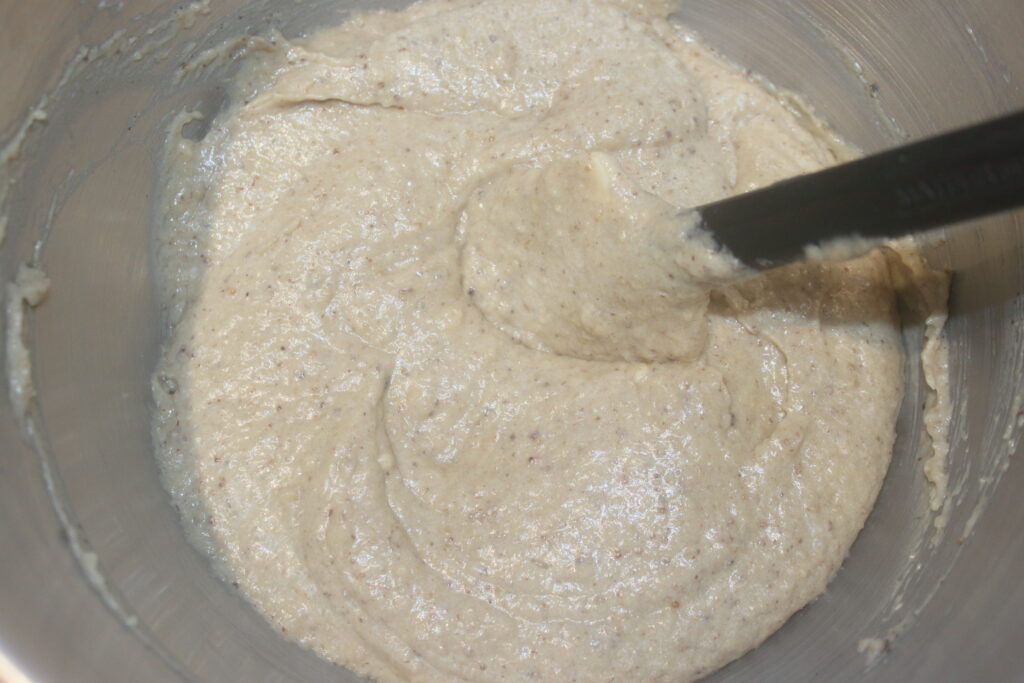
Mix the butter, flour, brown sugar and cinnamon powder by hand.

Compact the dough between your hands, then break into pieces to sprinkle over the top of the cake.
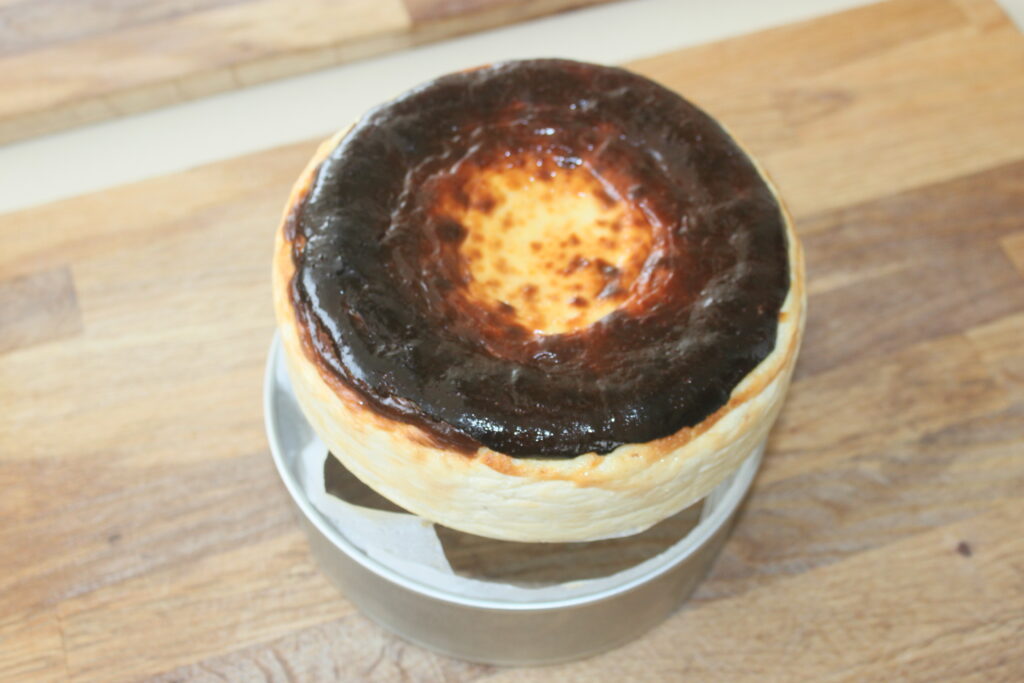
Cuisson :
Bake for 1h15 to 1h30 at 170°C over static heat (not ventilated heat).
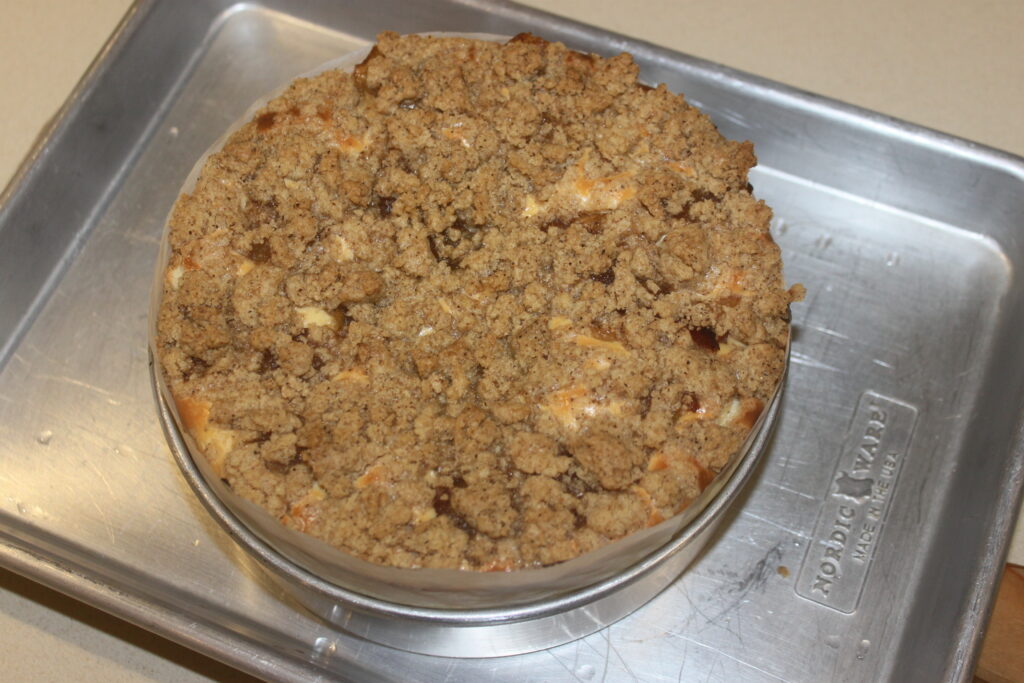
Leave to cool completely, then chill for at least 3 hours. Add a little powdered sugar for decoration!
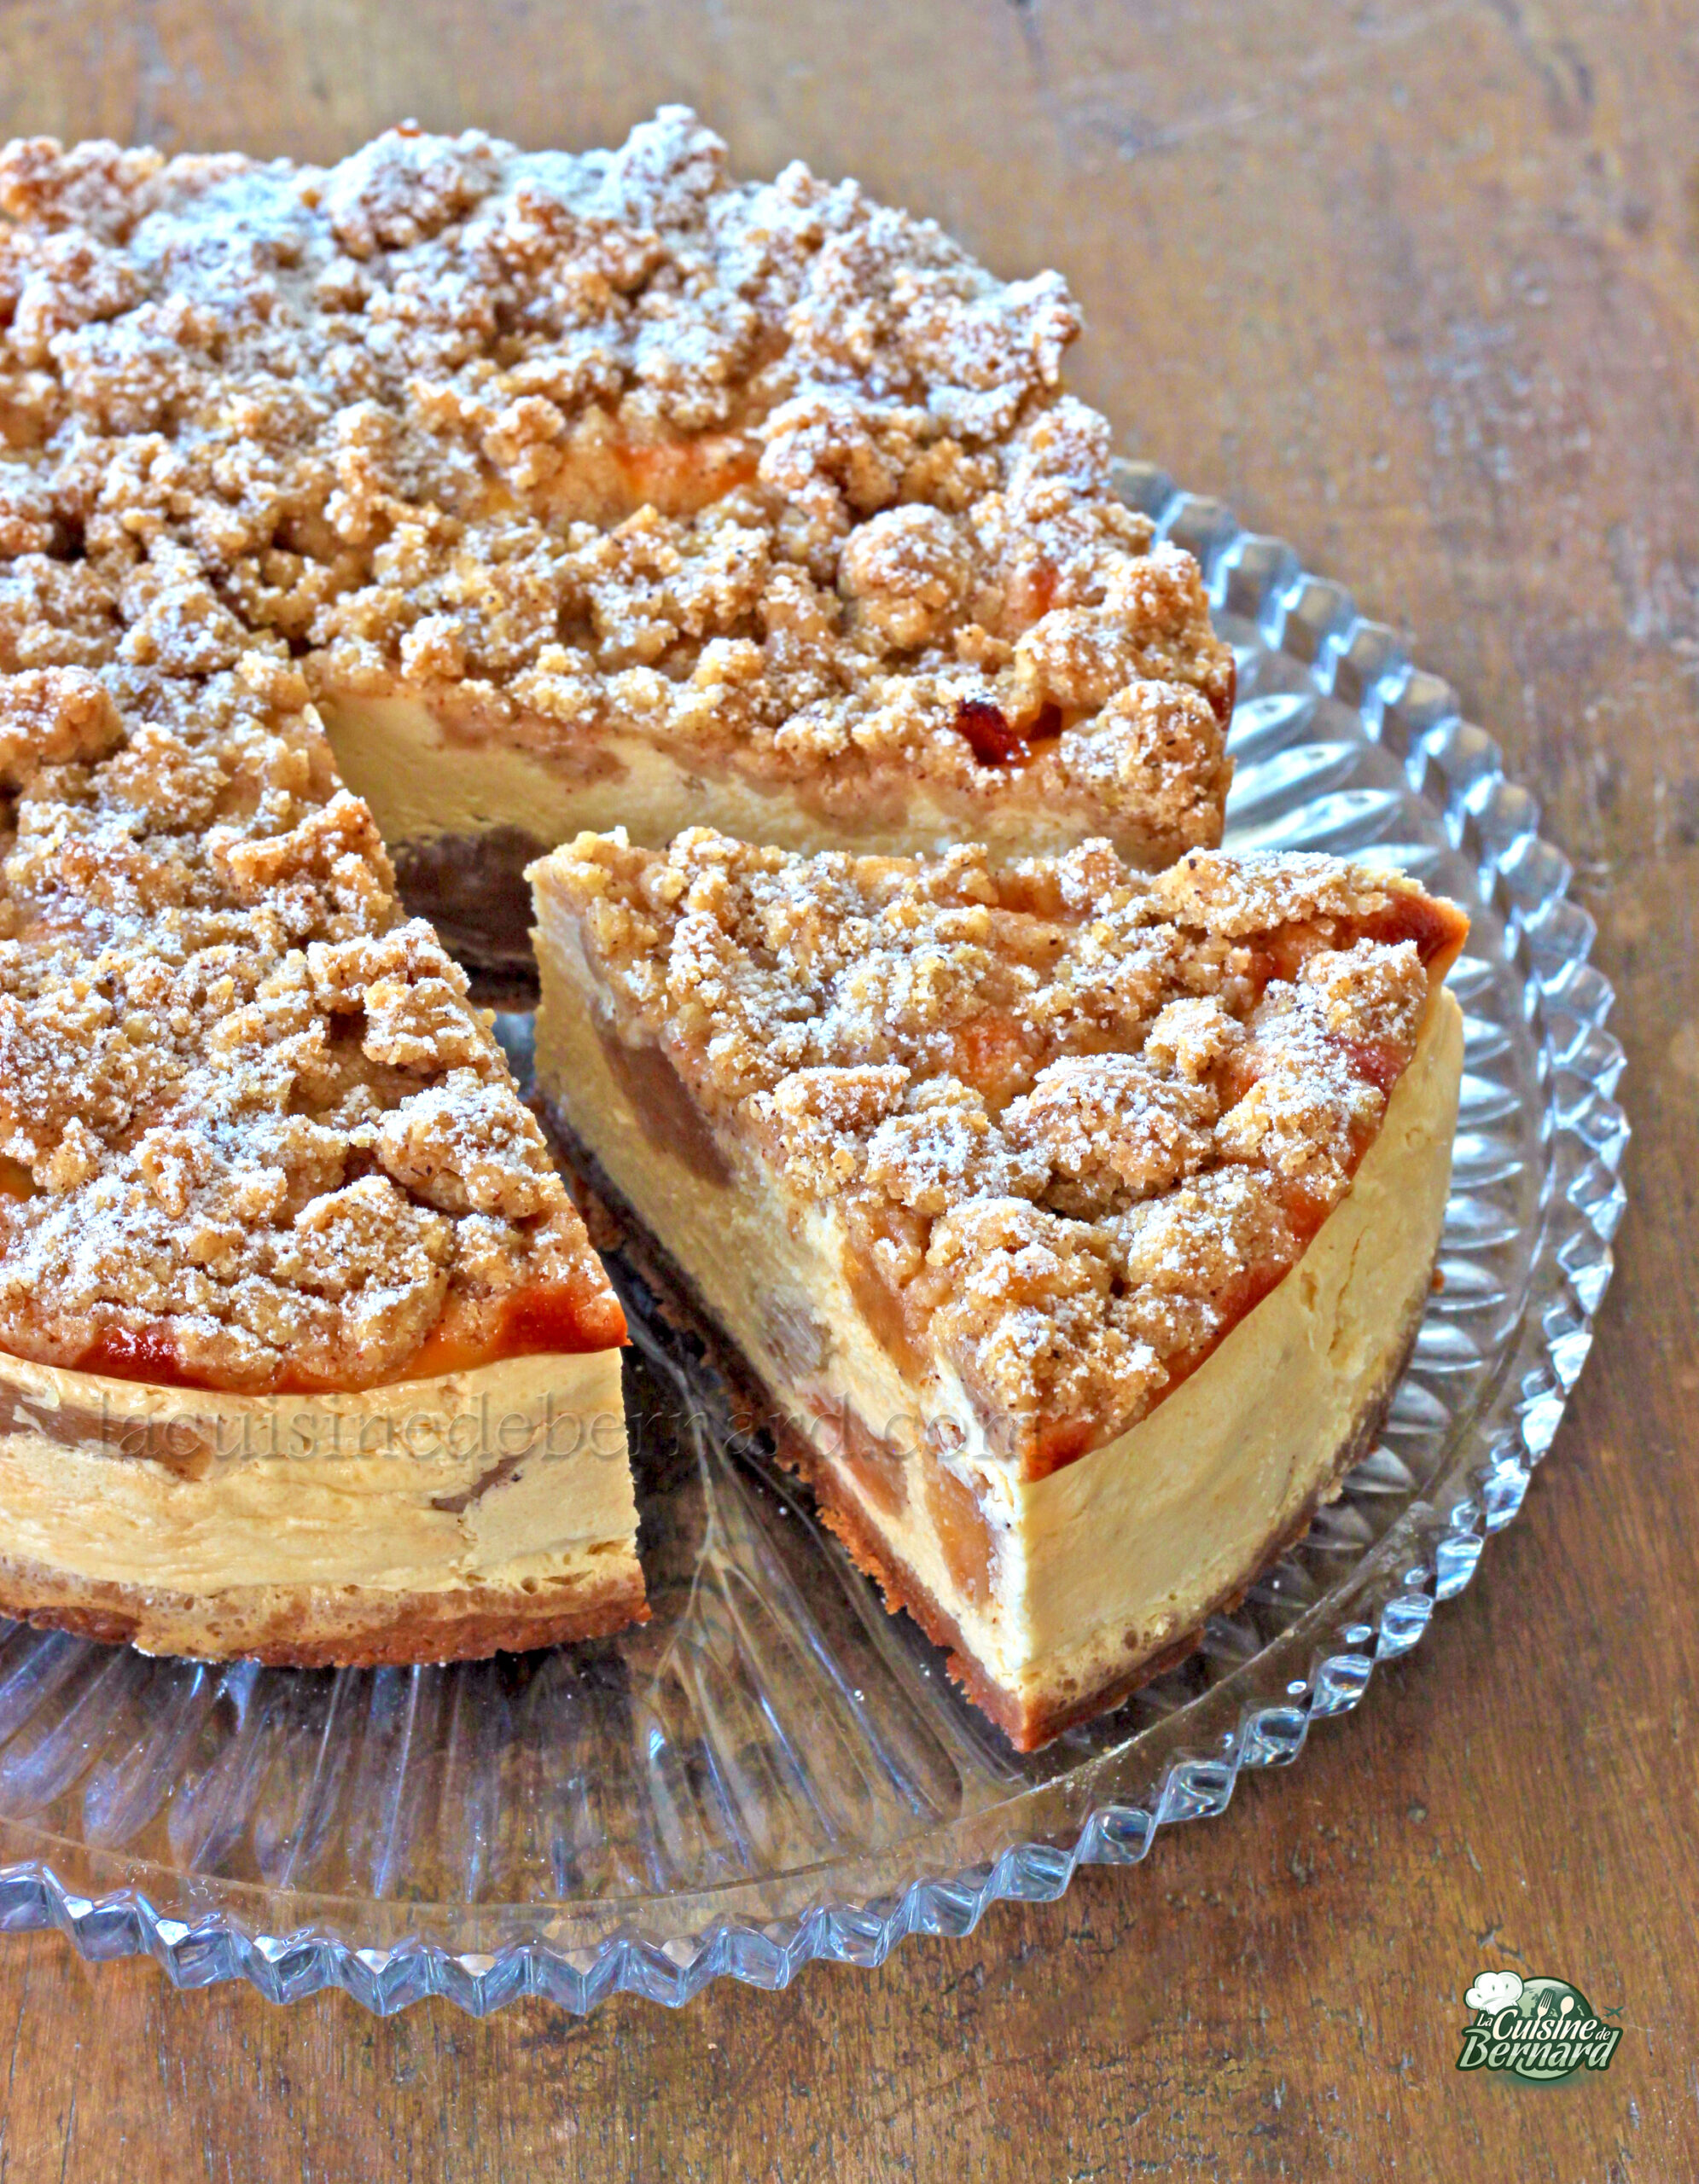
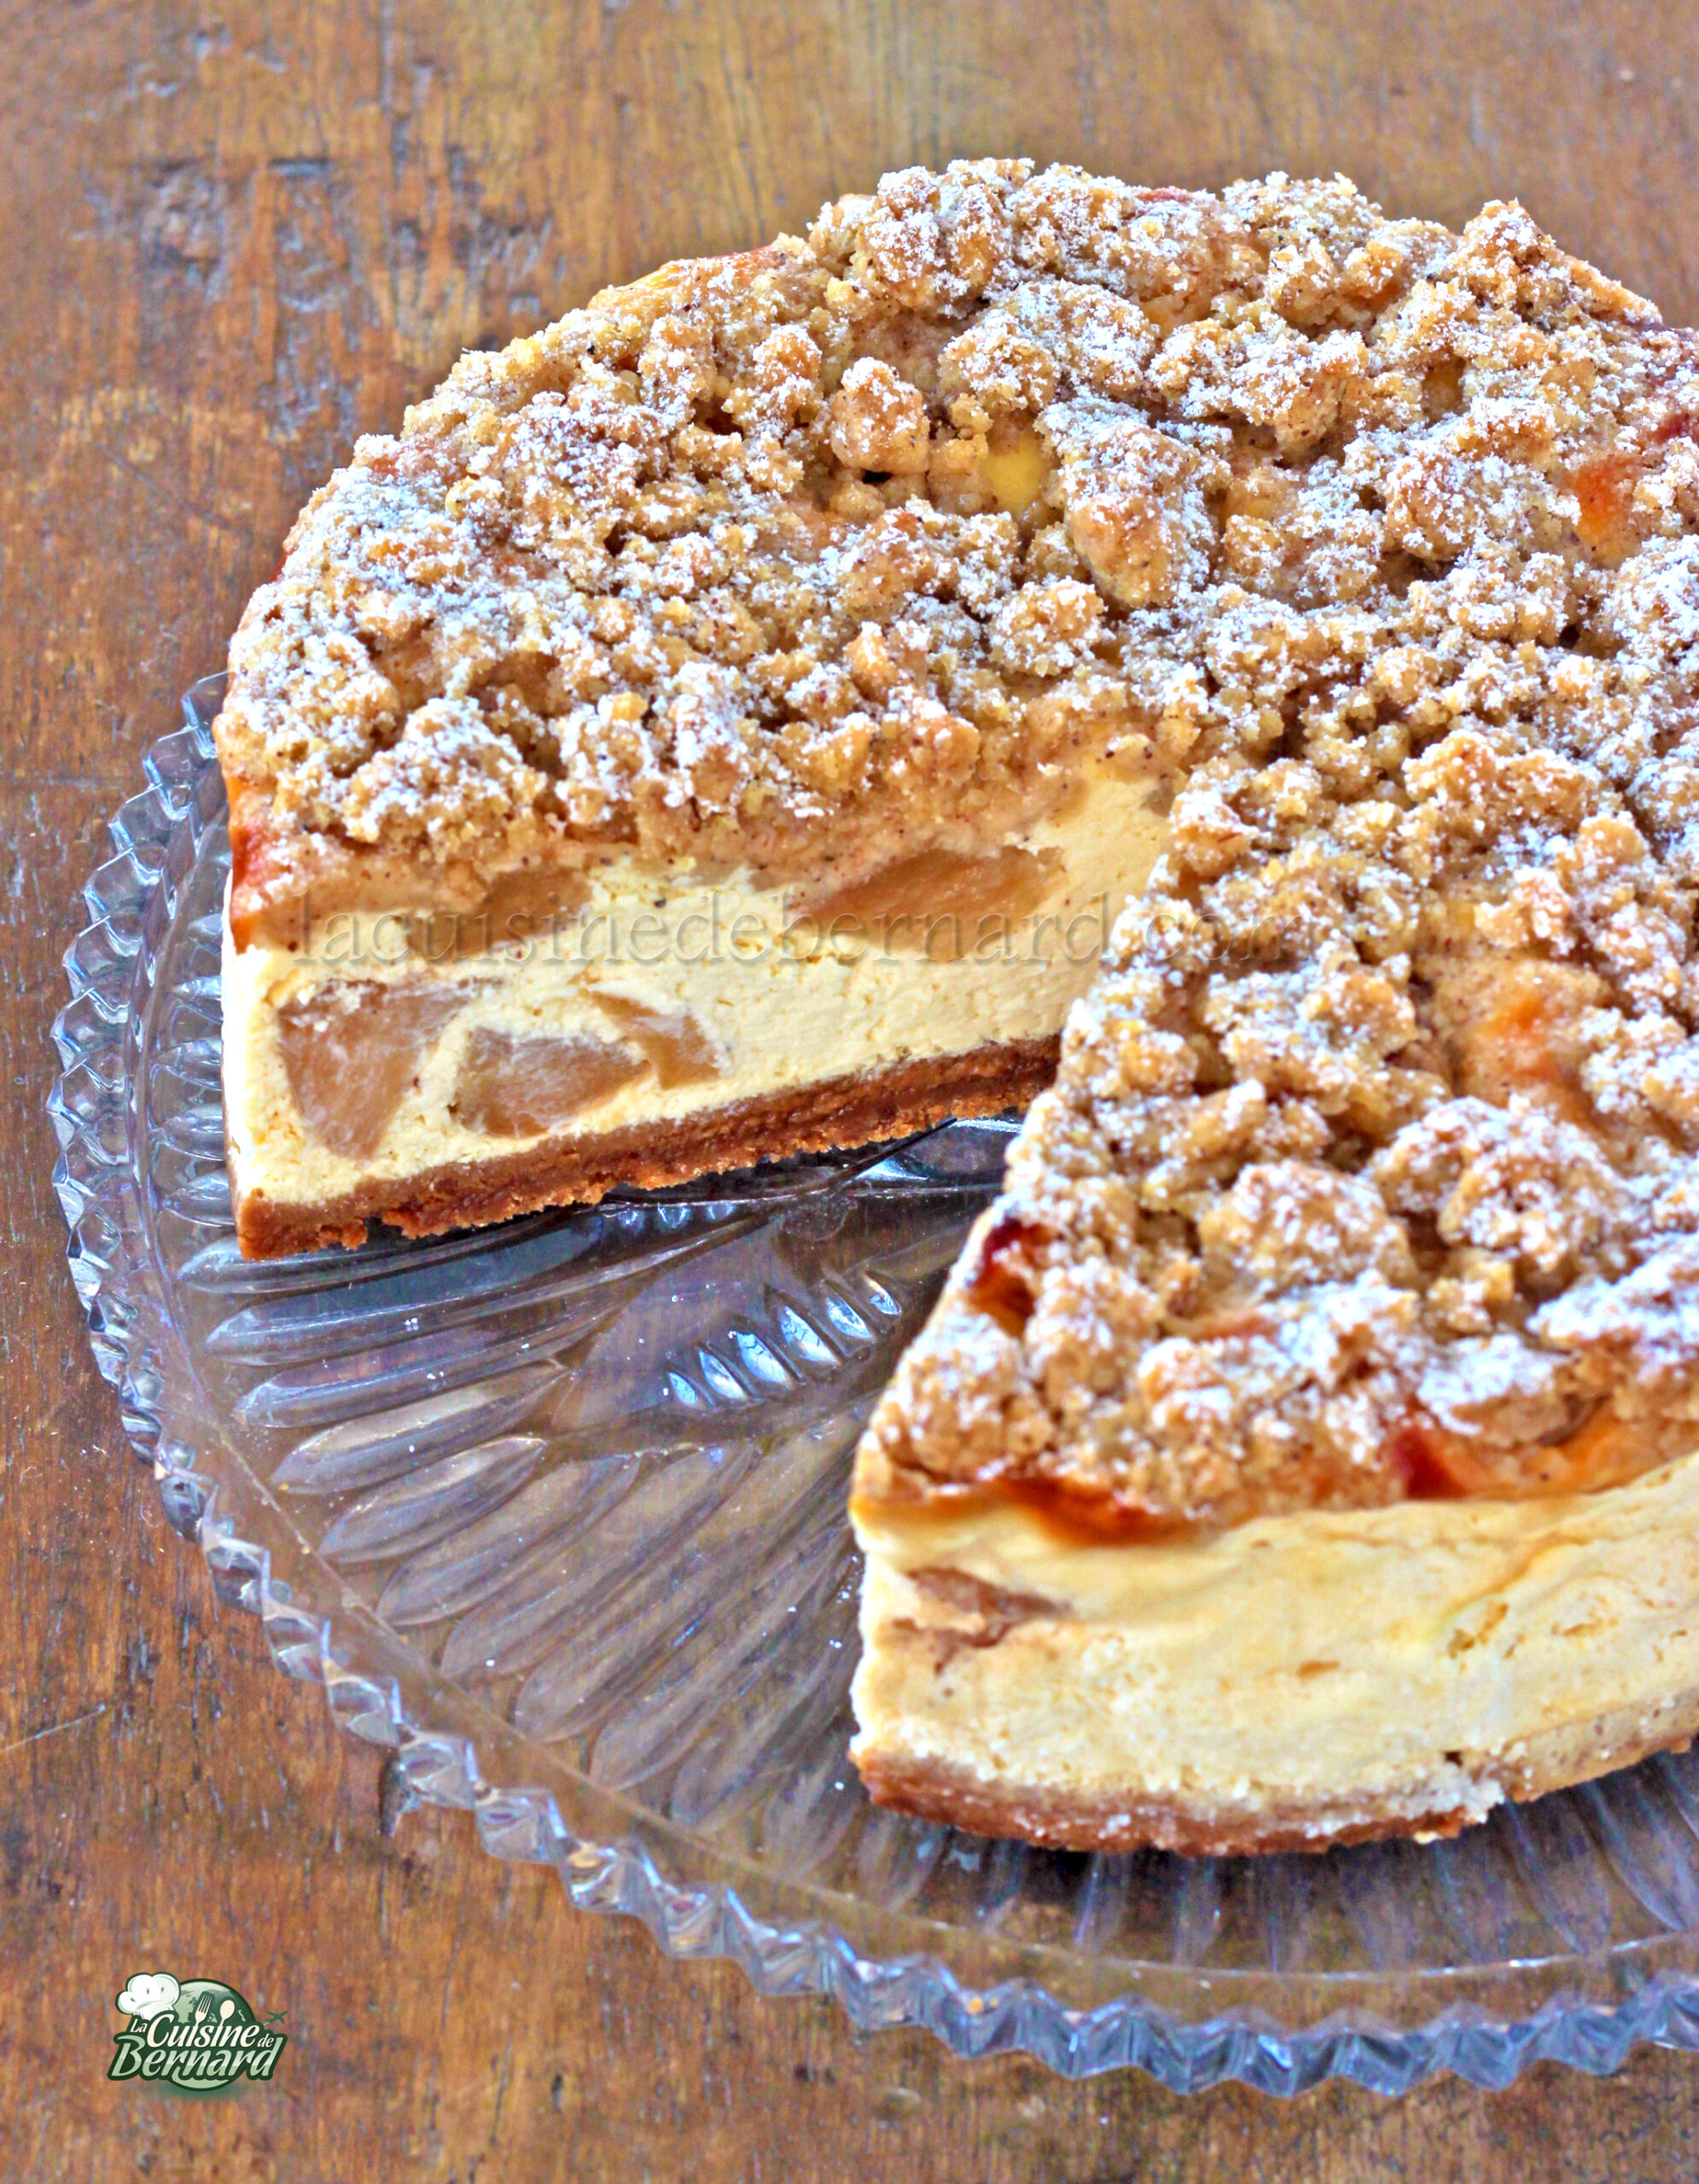

Cheesecake crumble pommes cannelle
Ingredients
Crème au cream cheese :
- 600 g cream cheese
- 100 g crème liquide entière
- 1 c. à café extrait de vanille liquide
- 3 œufs
- 60 g sucre
Crumble :
- 40 g beurre demi-sel
- 75 g farine
- 70 g sucre roux
- 1 c. à café cannelle en poudre
Pommes à la cannelle :
- 3-4 pommes
- 20 g beurre demi-sel
- 1 c. à soupe sucre
- 1 c. à café cannelle en poudre
Instructions
- Commencez par préparer les pommes. J’en ai préparées beaucoup plus pour les manger telles quelles, sans toutes les mettre dans le cheesecake. Épluchez les et coupez-les en quartiers.
- Placez-les dans une poêle avec le beurre, le sucre et la cannelle.
- Faites-les cuire 30 minutes sur feu doux, avec un couvercle, en secouant de temps en temps la poêle. Elles doivent devenir toutes tendres.
- Préparez la base du cheesecake. Mettez les spéculos au mixeur pour les réduire en poudre.
- Dans un petit récipient, versez le beurre fondu, le sucre et la poudre de spéculos.
- Mélangez bien puis versez dans un moule à fond amovible de 23cm, chemisé de papier sulfurisé.
- Mettez à cuire 15 minutes à 170°C.
- Préparez la crème à cheesecake.Dans un récipient, mélangez le cream cheese préalablement sorti du réfrigérateur depuis au moins 2 heures, et tous les ingrédients : crème liquide, œufs, sucre et vanille liquide. Mélangez bien au fouet.
- Versez la moitié sur la base de spéculos.
- Parsemez de pommes cuites et recoupées en morceaux.
- Versez le reste de crème puis reparsemez de pommes.
- Pour le crumble :Mélangez le beurre la farine, le sucre roux et la cannelle en poudre à la main.
- Compactez la pâte entre vos mains, puis cassez-la en morceaux pour parsemer sur le dessus du gâteau.
- Faites cuire 1h15 à 1h30 à 170°C sur chaleur statique (pas chaleur ventilée).
- Laissez refroidir totalement puis mettez au frais au moins 3 heures. Ajoutez un peu de sucre glace pour la décoration !
Nutrition

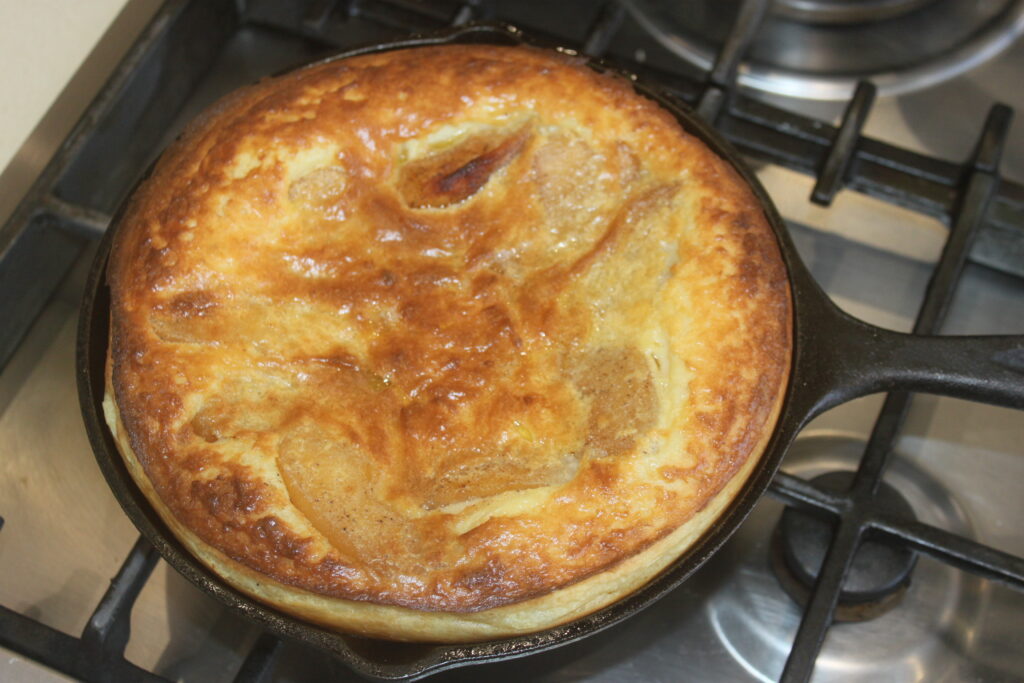
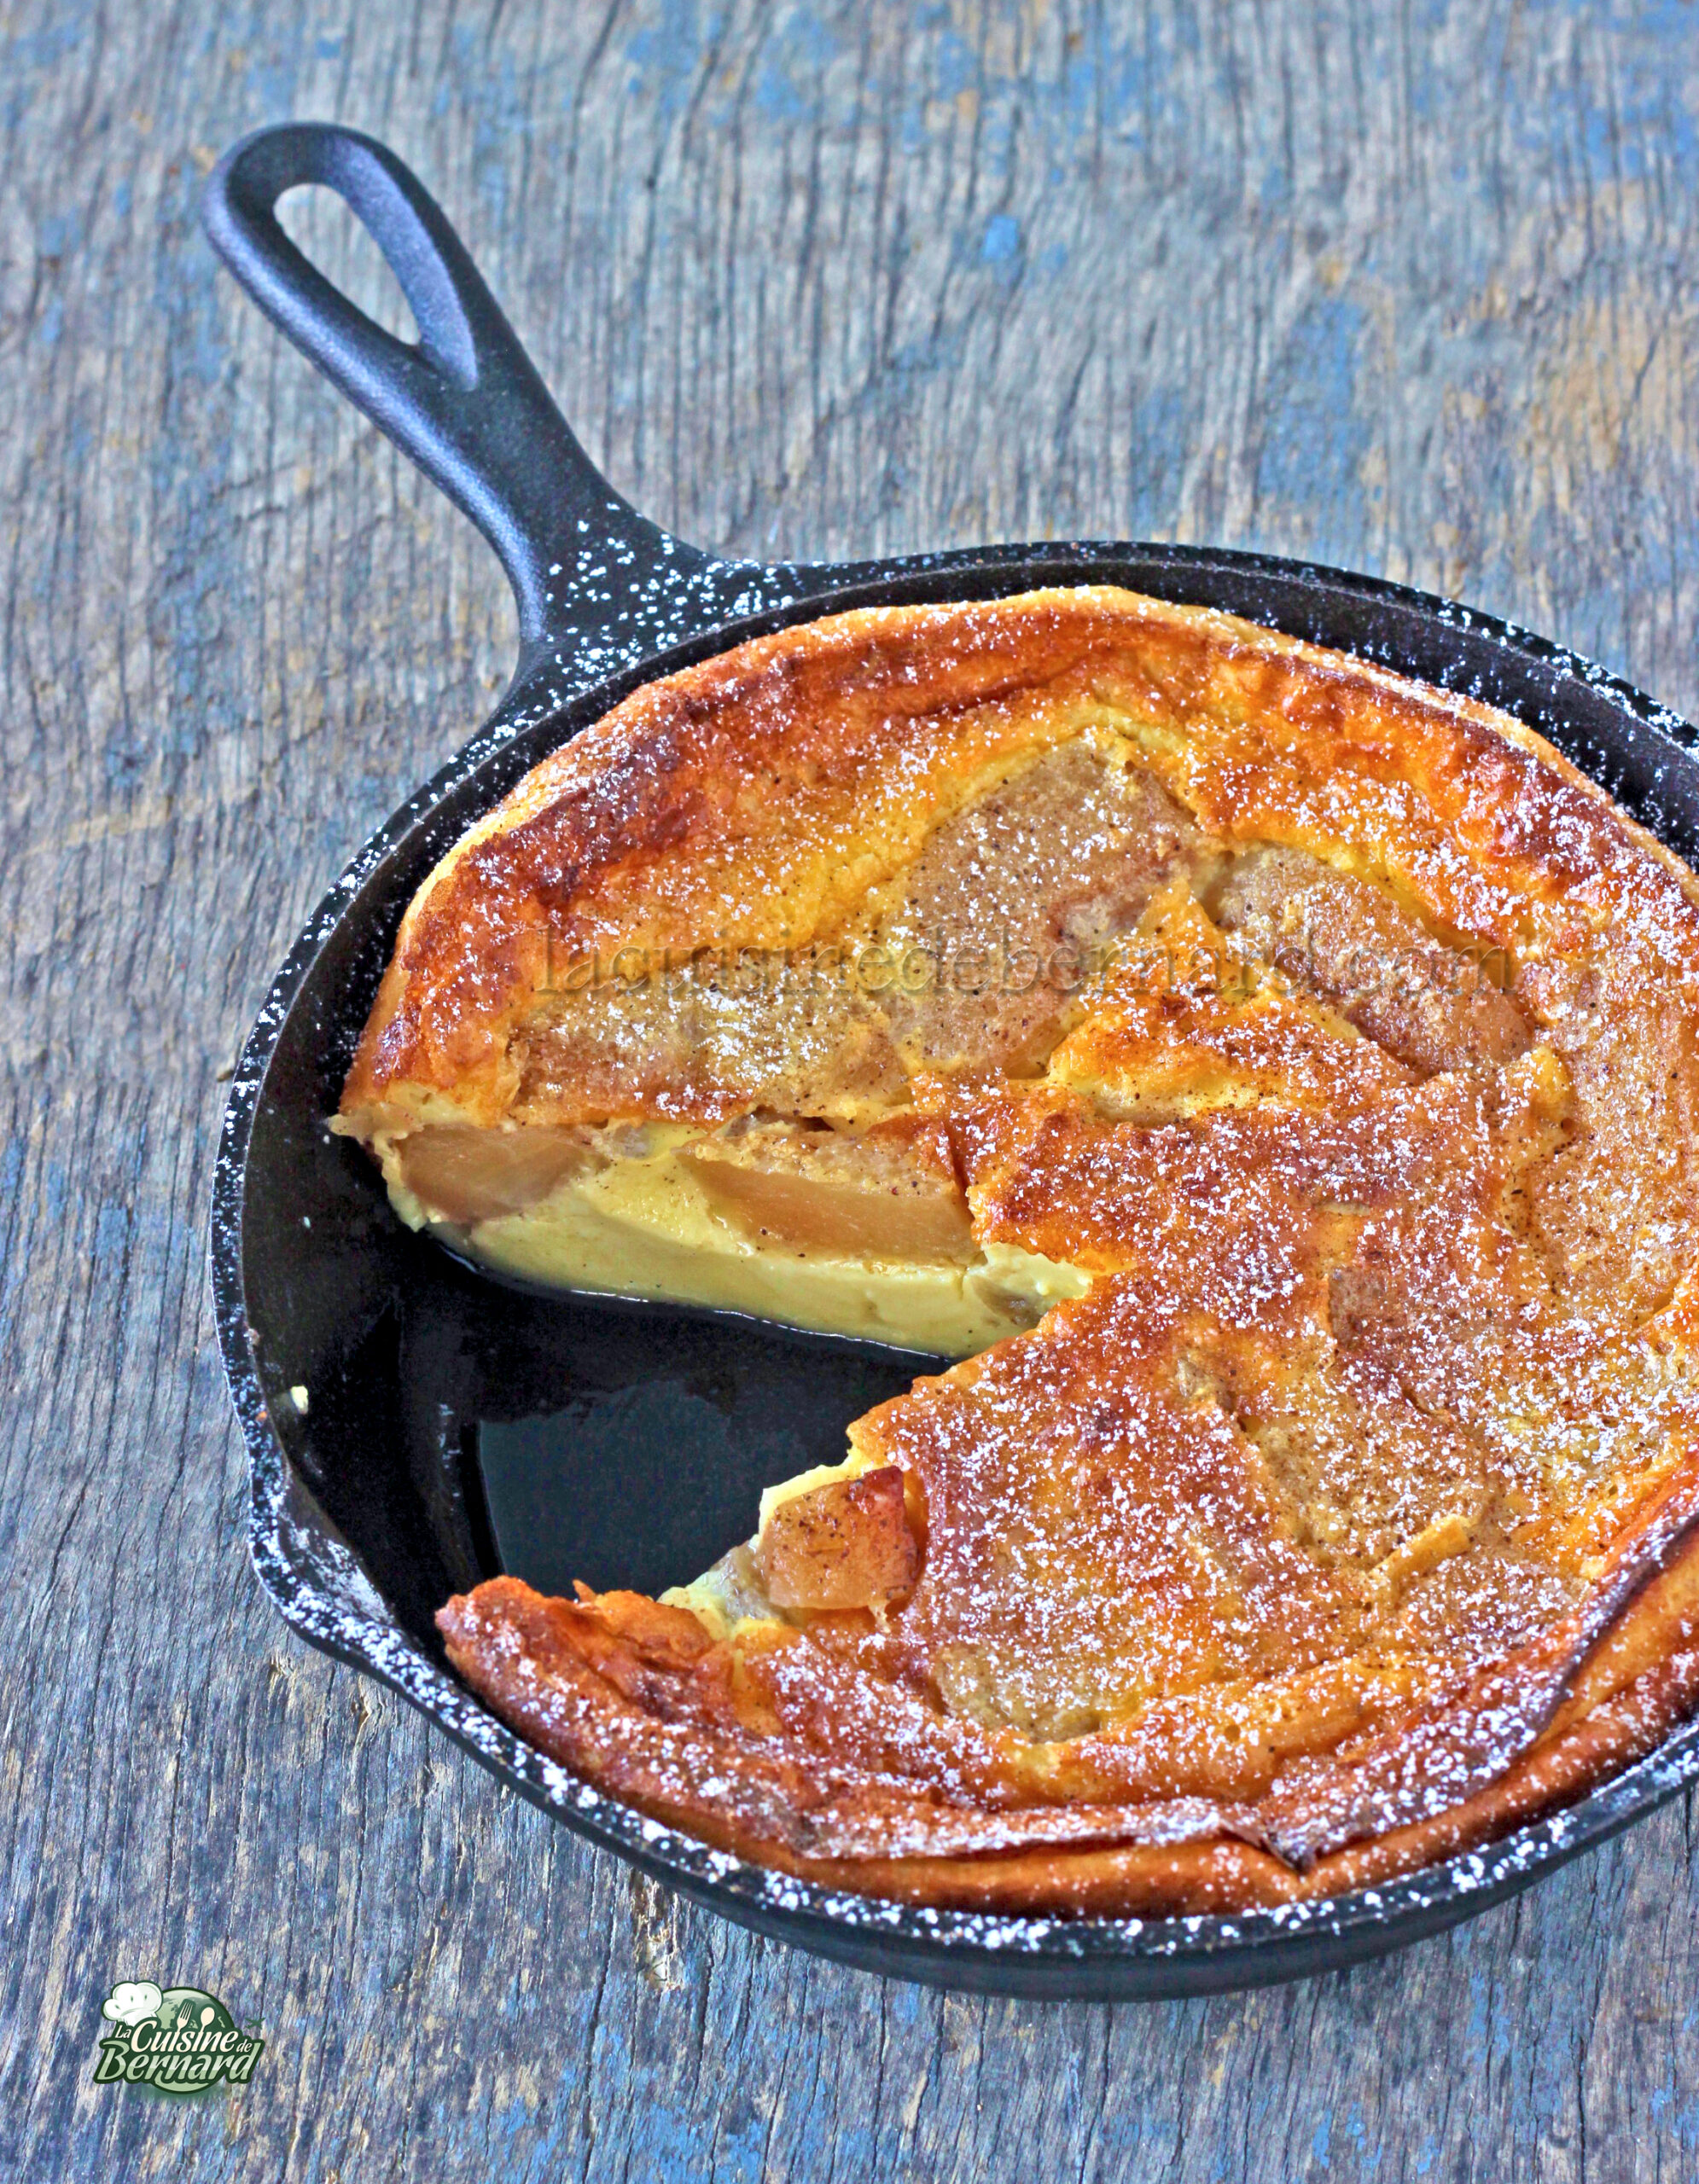
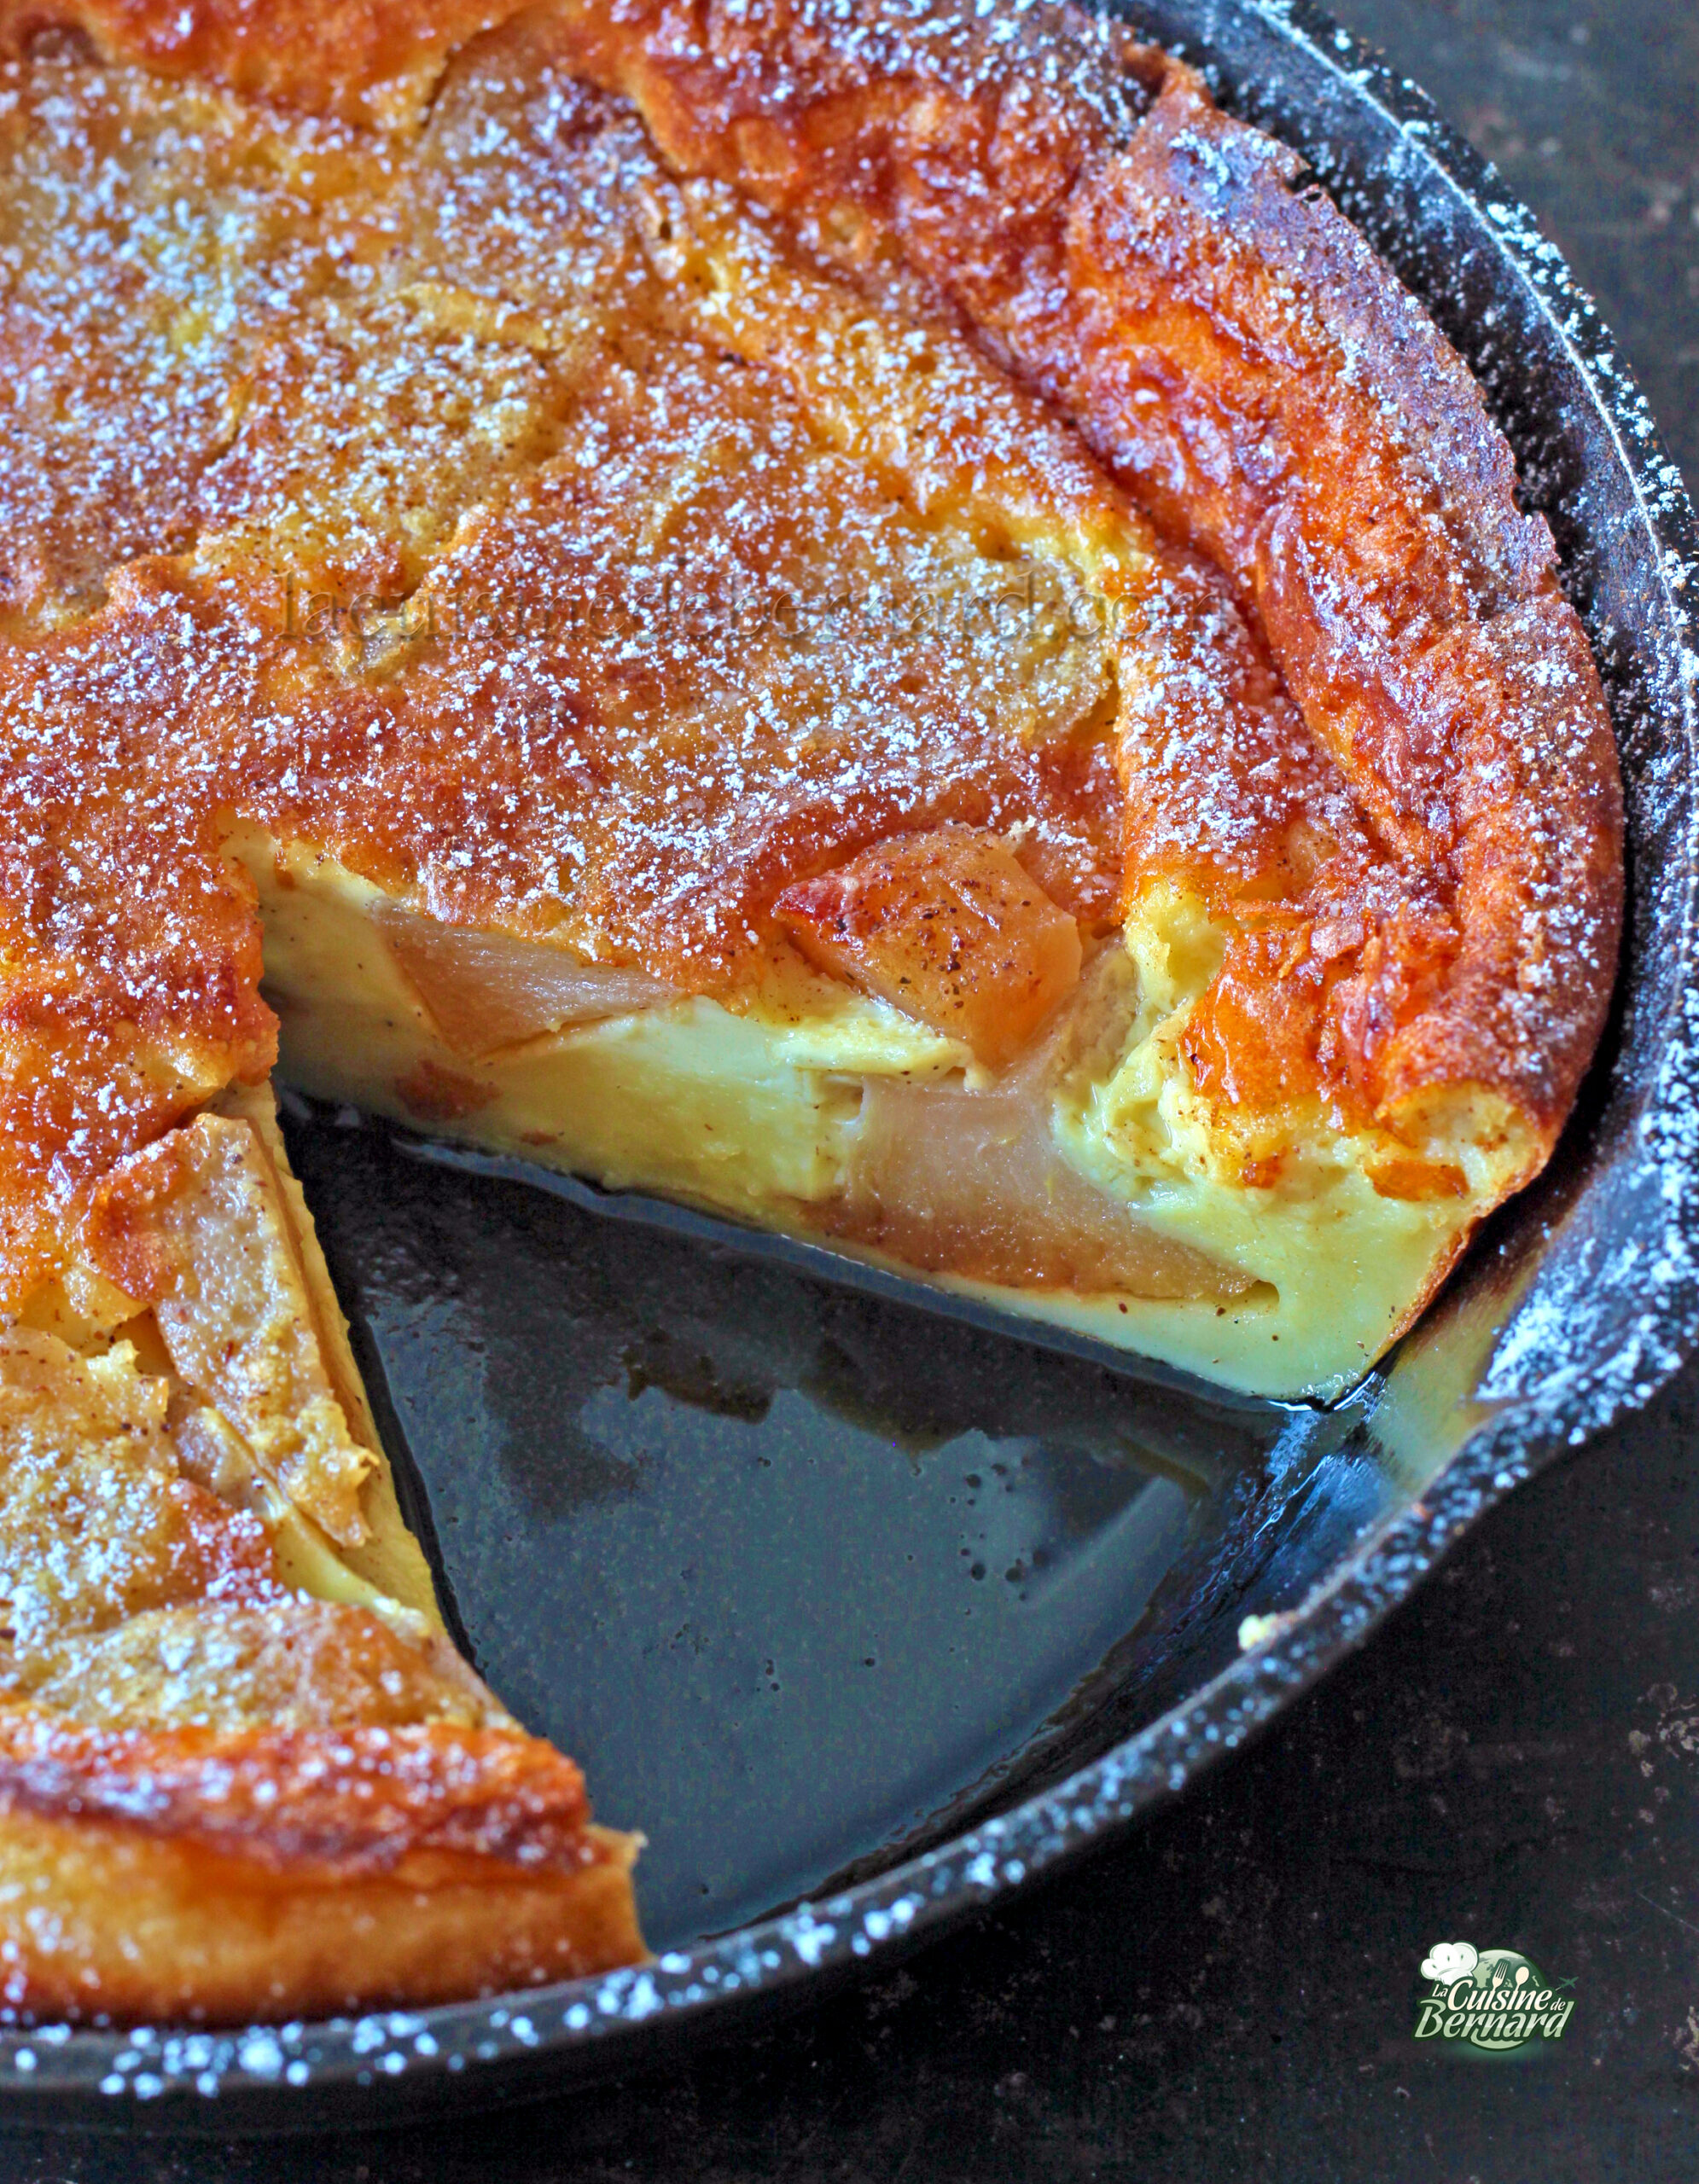
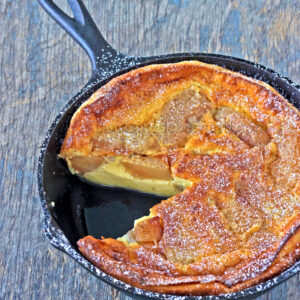
Not quite a far, nor a dutchbaby, still less a pancake, pannukakku is the Finnish version with its own identity of this type of dessert. The idea is to cook the dough in butter in a frying pan, then put it in the oven until it’s a lovely golden color! Here’s my version with cinnamon apples, to get in the autumn mood.
For a 20cm frying pan :
- 50g semi-salted butter
- 2 eggs
- 75g of flour
- 40g of sugar
- 1 teaspoon liquid vanilla extract
- 380g of semi-skimmed milk
- 3 baked apples with cinnamon
For apples:
- 3 apples (I used pink lady apples, which bake well)
- 20g semi-salted butter
- 1 tablespoon of sugar
- 1 teaspoon cinnamon powder
Pommes à la cannelle :
Start by preparing the apples. I prepared a lot more so that I could eat them as they were, without putting them all in the pannukakku. Peel them and cut them into quarters.
Place in a frying pan with the butter, sugar and cinnamon.
Cook for 30 minutes over low heat, with a lid, shaking the pan from time to time. They must be getting all soft.
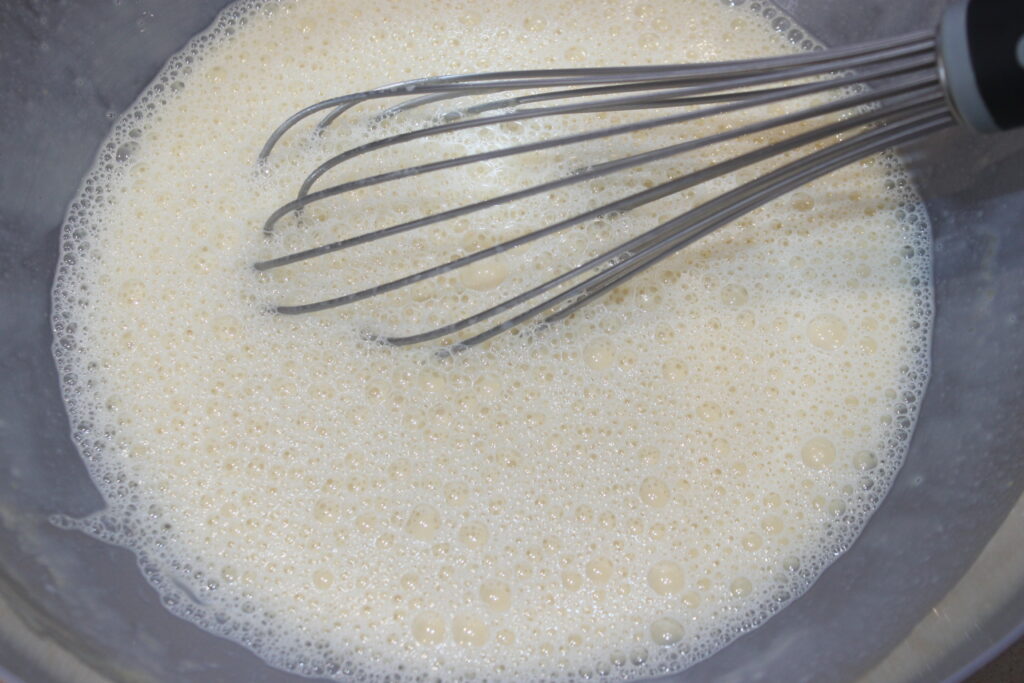
Préparez la pâte à pannukakku.
Place the eggs, sugar, flour and liquid vanilla in a bowl and whisk vigorously.
Pour in the milk while whisking.
Cuisson :
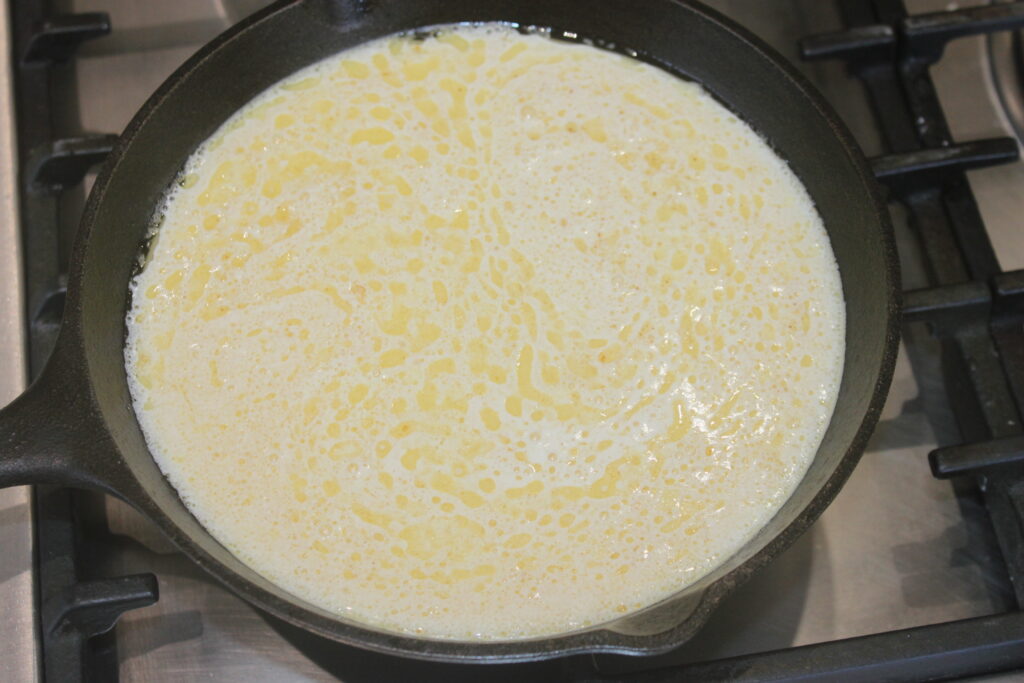
Melt the semi-salted butter in an ovenproof frying pan. For this I used the Lodge brand (this is NOT a sponsored article, just my opinion) which is easily found on the internet.

When it starts to turn nutty, pour in the batter.
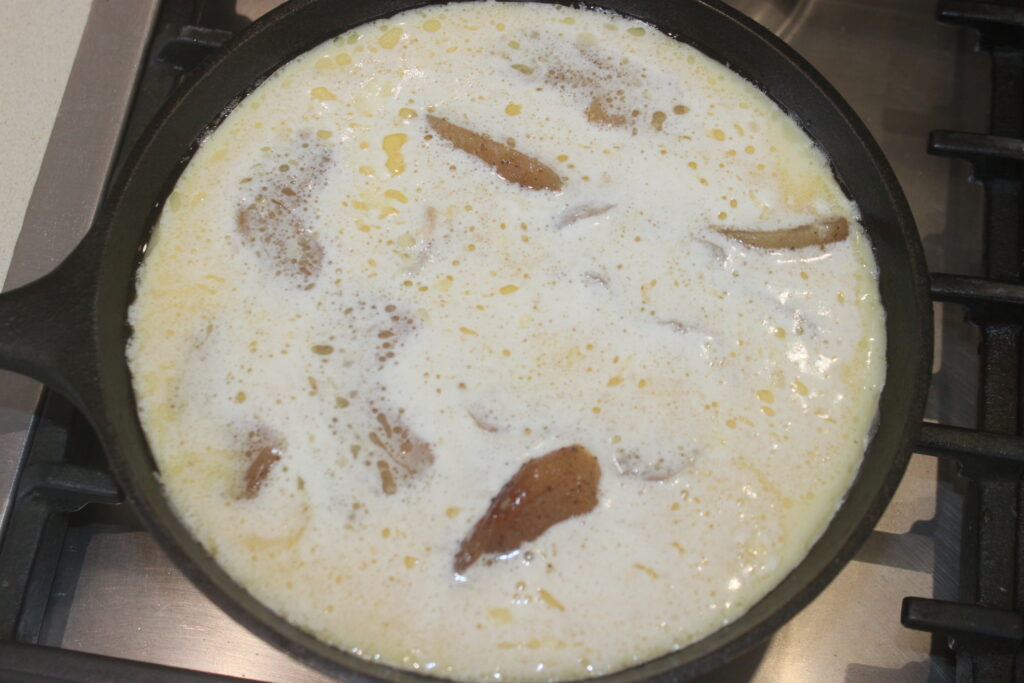
Sprinkle with apple pieces. If the wedges are too large for your taste, cut them in half.
Place in the oven at 205°C for 25 to 30 minutes on convection heat.
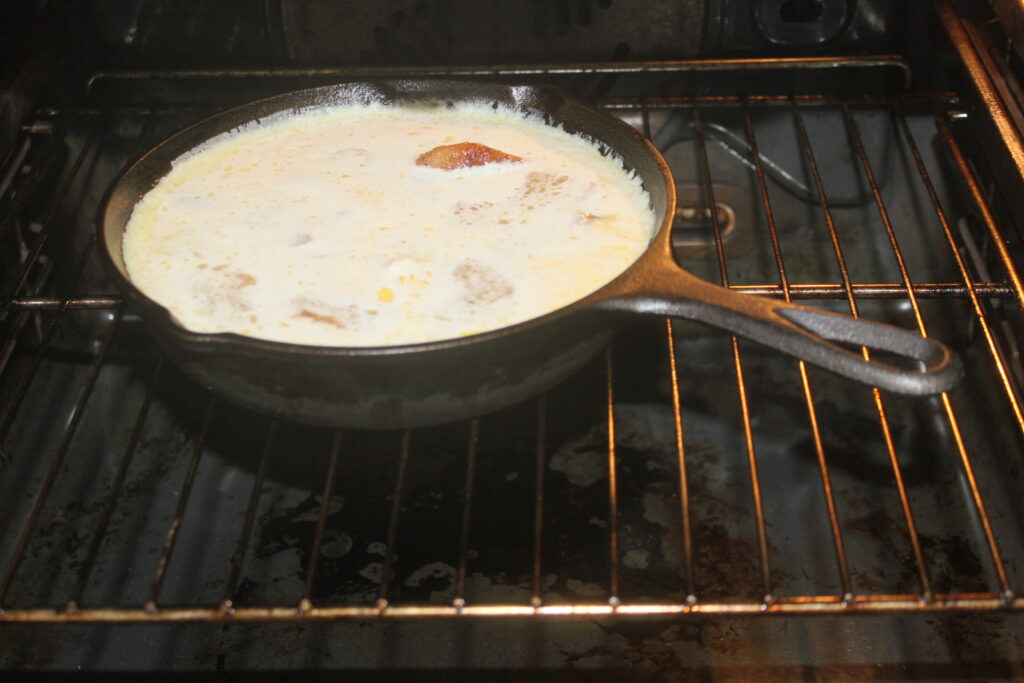
The pannukakku must be golden brown!
Serve hot, warm or chilled with a dusting of powdered sugar!
Pannukakku pommes cannelle
Ingredients
Pour une poêle de 20cm
- 50 g beurre demi-sel
- 2 œufs
- 75 g farine
- 40 g sucre
- 1 c. à café extrait de vanille liquide
- 380 g lait demi-écrémé
Pour les pommes :
- 3 pommes
- 20 g beurre demi-sel
- 1 c. à soupe sucre
- 1 c. à café cannelle en poudre
Instructions
- Commencez par préparer les pommes. J’en ai préparées beaucoup plus pour les manger telles quelles, sans toutes les mettre dans le pannukakku. Épluchez les et coupez-les en quartiers.
- Placez-les dans une poêle avec le beurre, le sucre et la cannelle.
- Faites-les cuire 30 minutes sur feu doux, avec un couvercle, en secouant de temps en temps la poêle. Elles doivent devenir toutes tendres.
- Préparez la pâte à pannukakku.Mettez les œufs, le sucre, la farine et la vanille liquide dans un récipient et mélangez au fouet de façon énergique. Versez ensuite le lait tout en fouettant.
- Faites fondre le beurre demi-sel dans une poêle allant au four. Pour cela j’ai pris la marque Lodge (ce n’est PAS un article sponsorisé, mais juste mon avis) que l’on trouve facilement sur internet.
- Quand il commence à devenir noisette, versez la pâte.
- Parsemez avec les morceaux de pommes. Si les quartiers sont trop gros à votre goût, coupes-les en deux.
- Mettez au four à 205°C pendant 25 à 30 minutes sur chaleur tournante. Le pannukakku doit être bien doré !
- Servez chaud, tiède ou frais avec un voile de sucre glace !
Nutrition

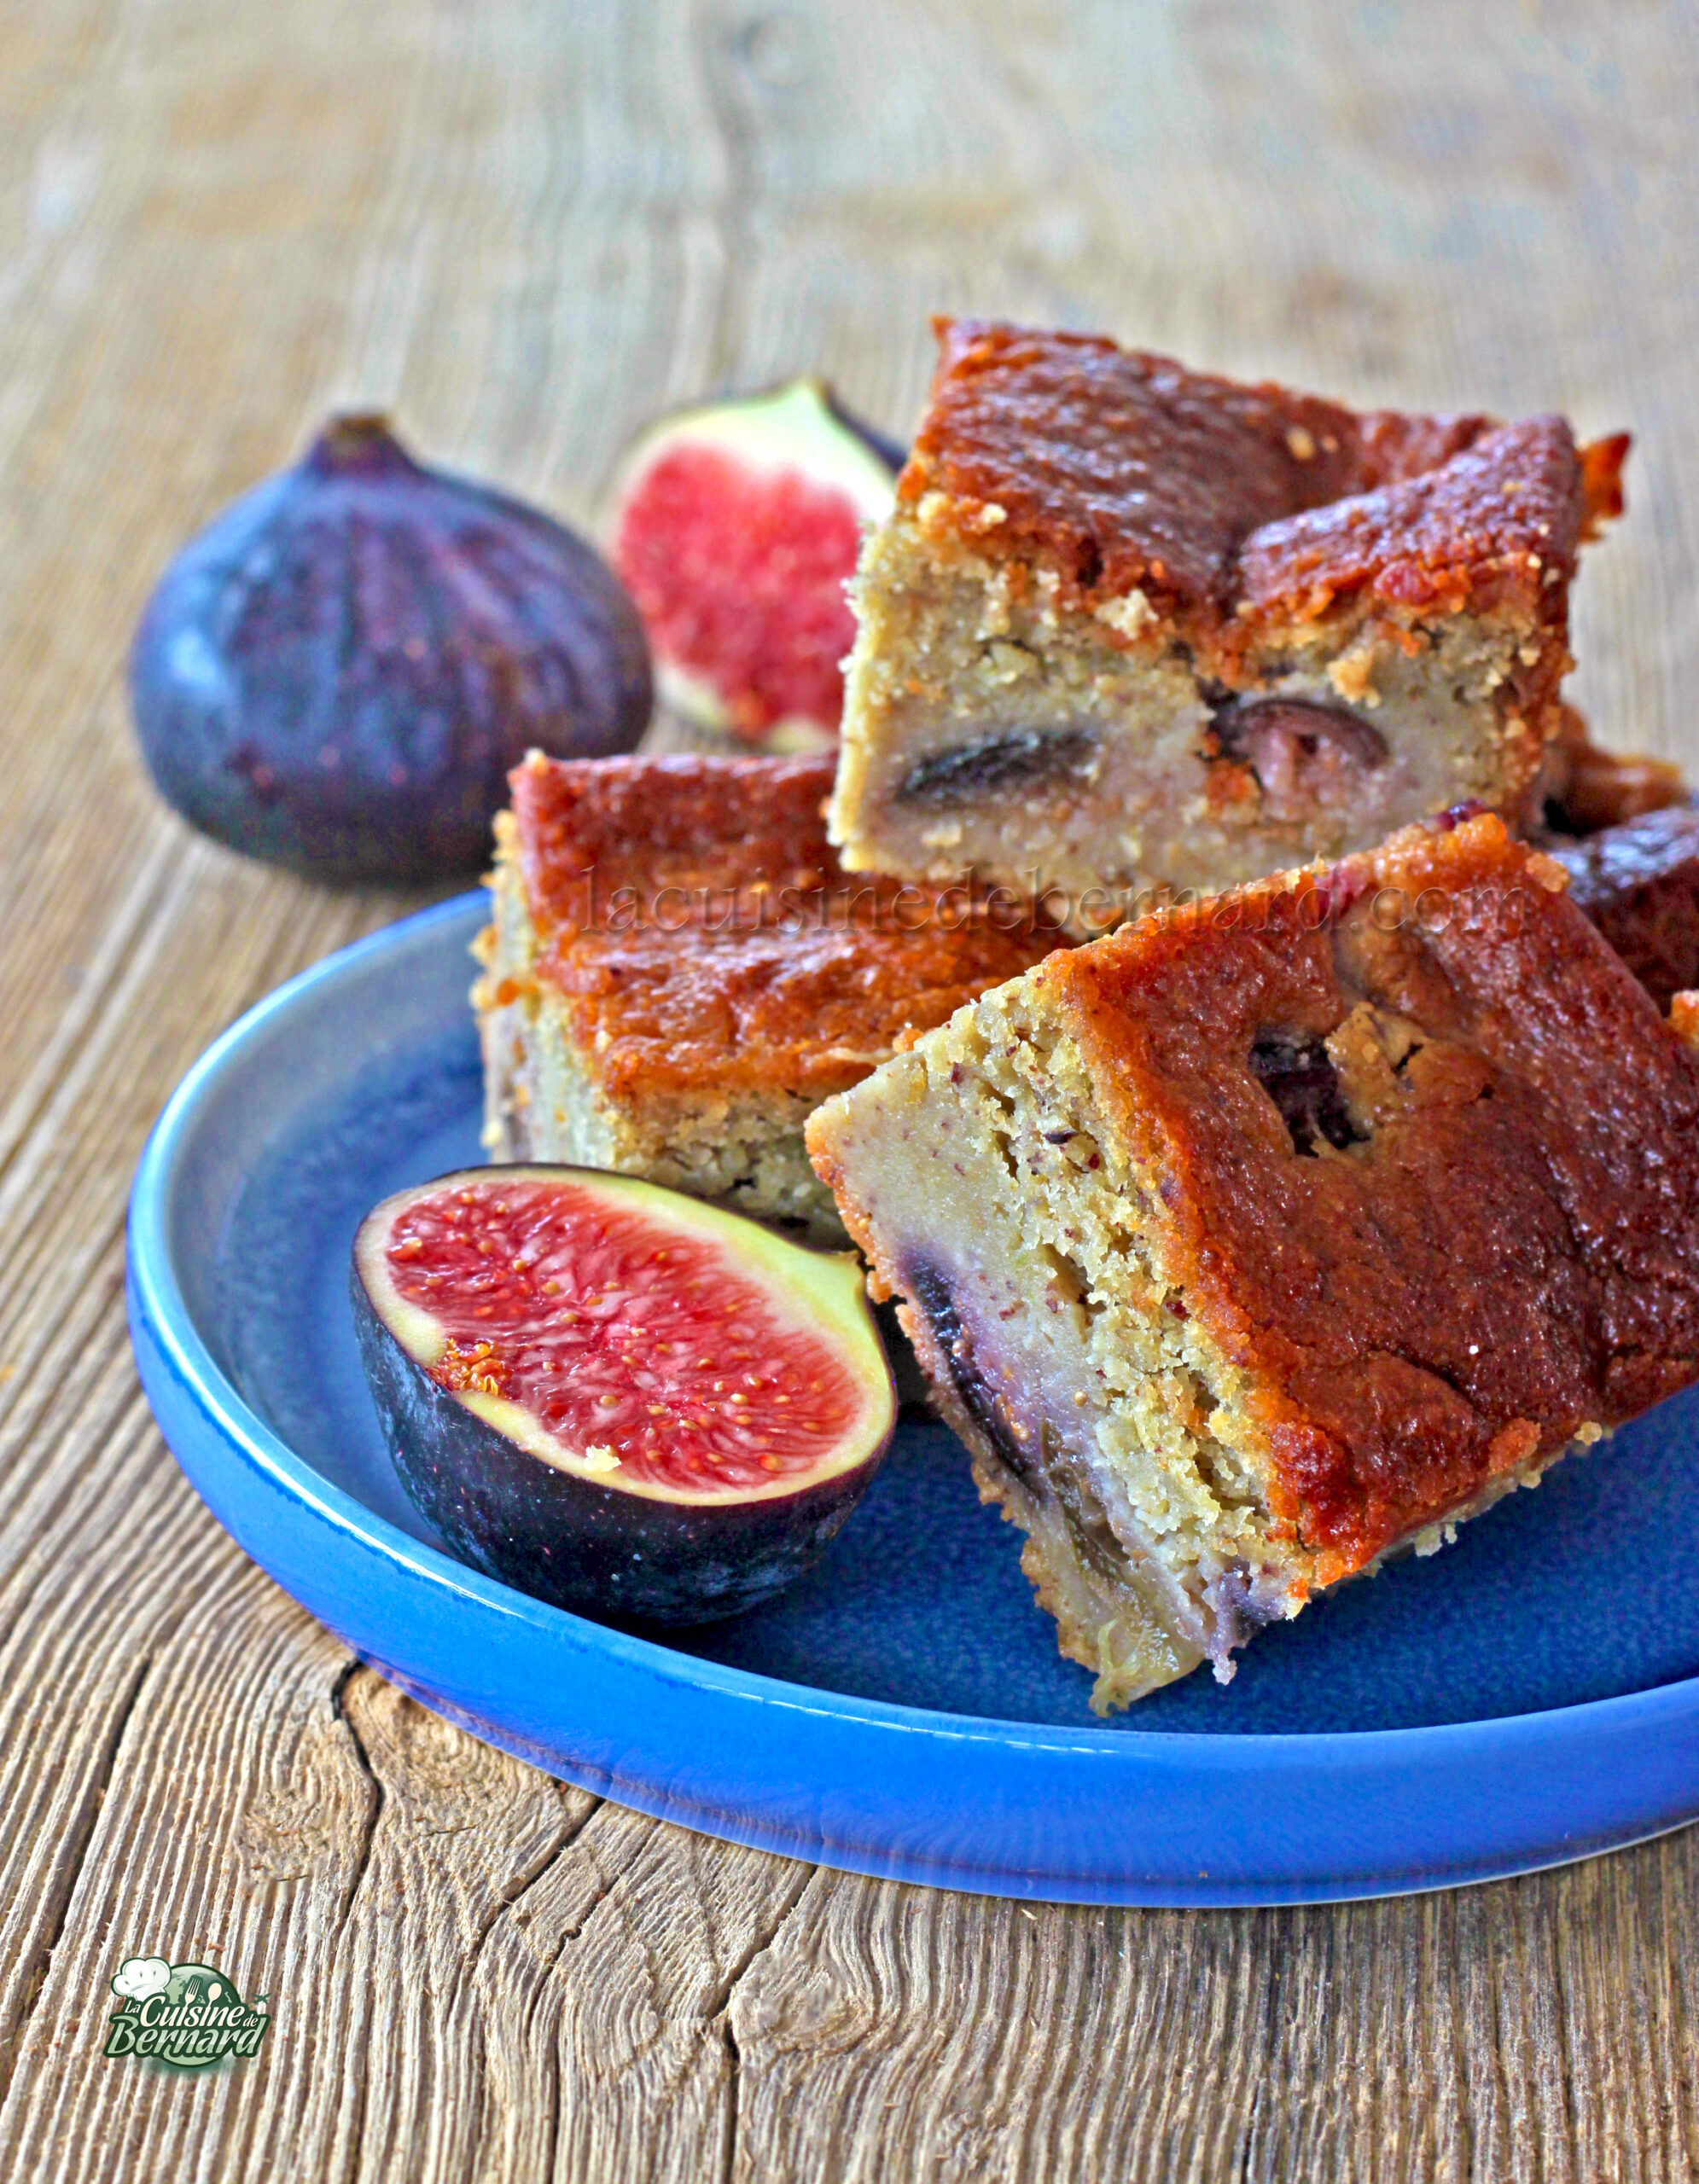
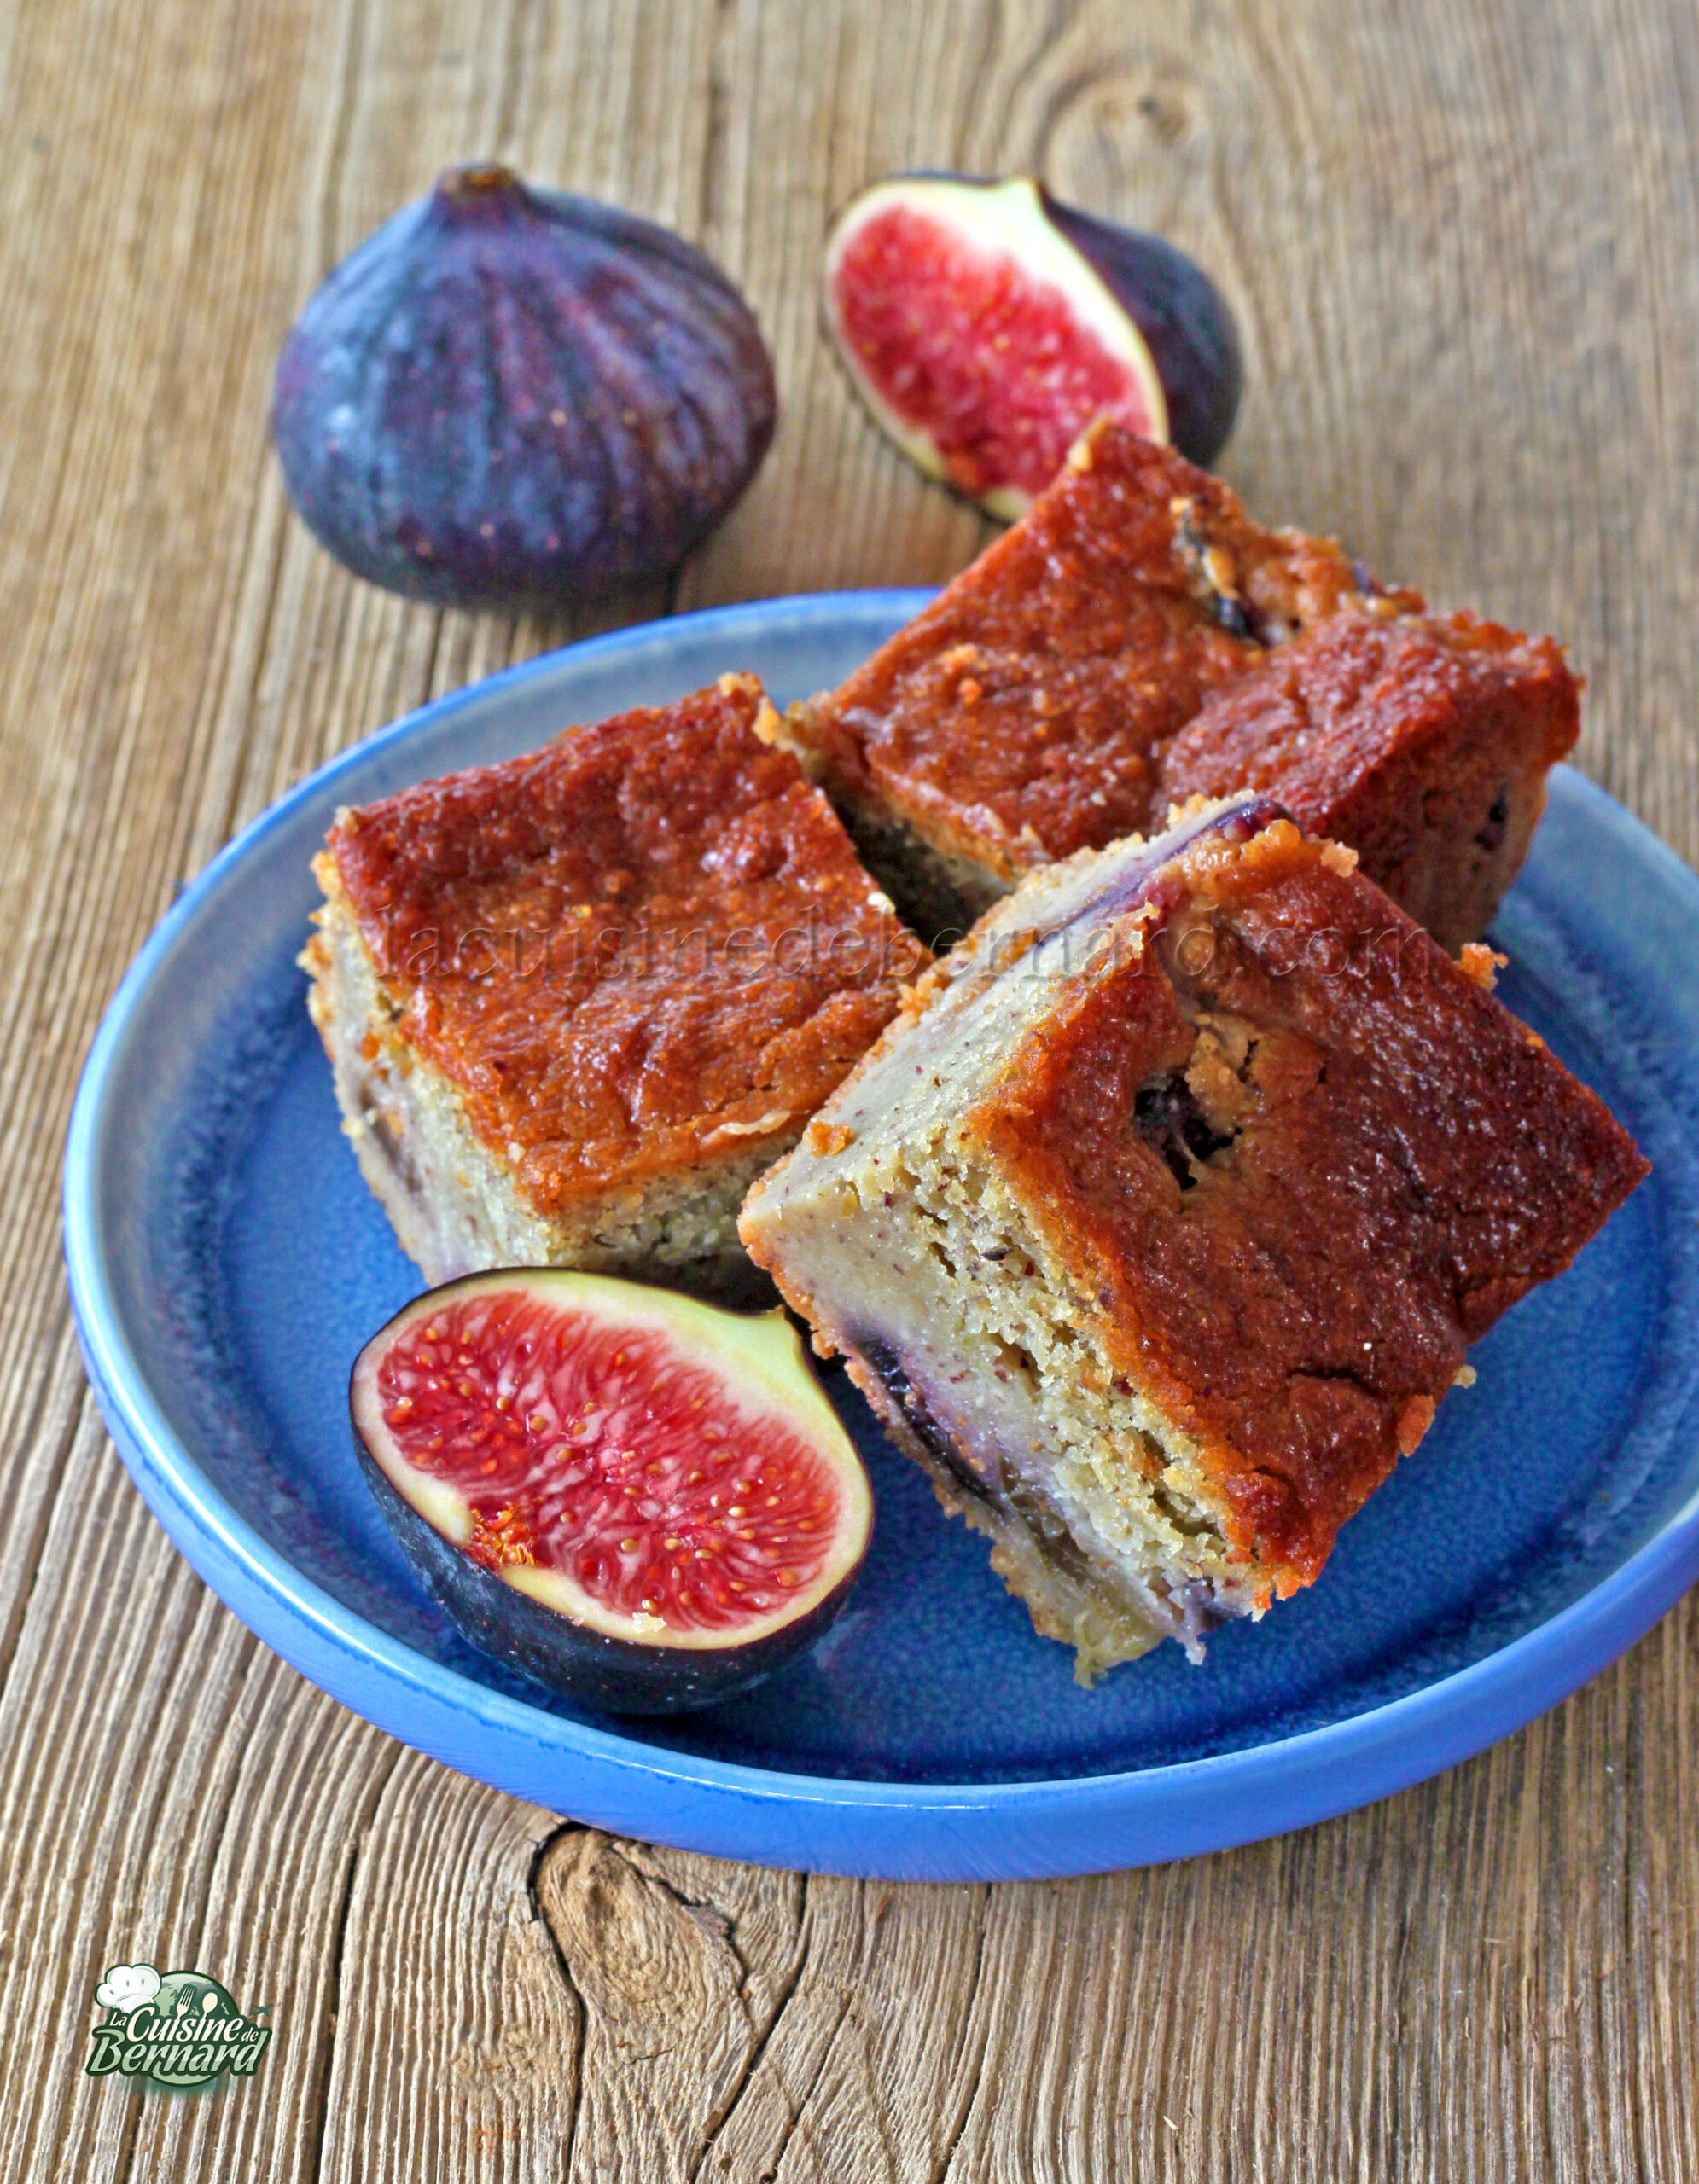
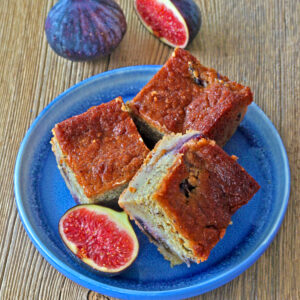
A good cake with fresh figs and hazelnut powder, very melt-in-your-mouth, that’s the recipe I suggest. I use mixed figs in the batter, but also chopped figs for even more flavor and softness. A delicious cake, as good warm as out of the fridge.
Recipe for a 22cm square mould (or a 24cm diameter circular mould):
- 200g fresh figs
- 100g milk
- 100g of soft butter
- 30g neutral oil
- 150g brown sugar
- 110g egg (2 large eggs)
- 175g of flour
- 100g of powdered hazelnuts
- 5g baking soda
- 3g sodium bicarbonate
- 200g fresh figs, cut into pieces
Préparation de la pâte :
Start by washing the 200g of fresh figs at the beginning of the ingredients list.
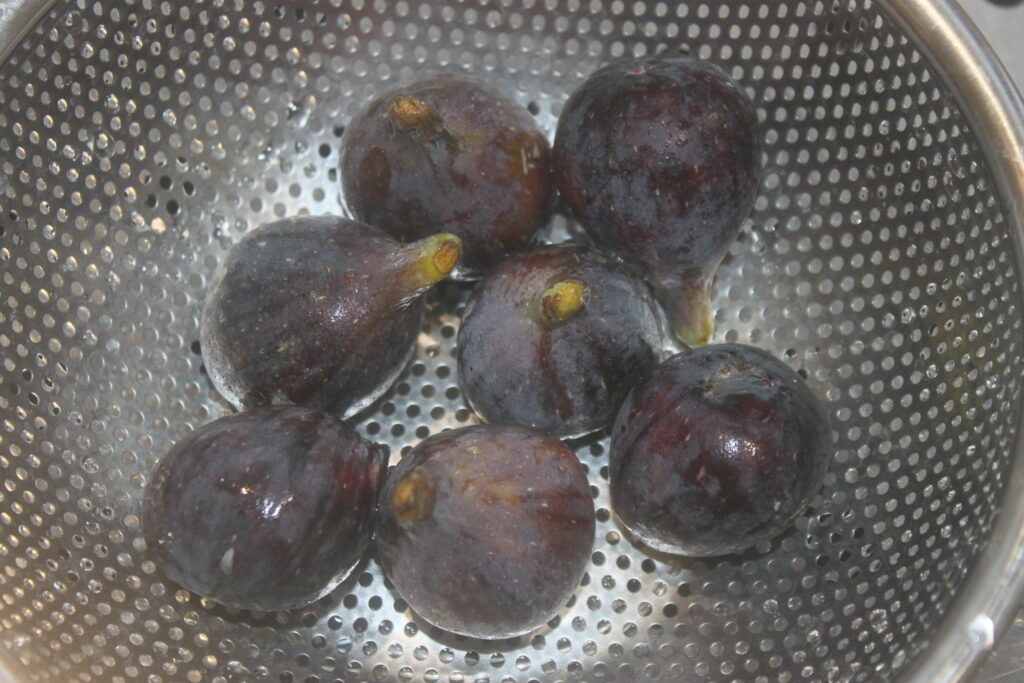
Remove the stalks and place in a small blender with the 100g milk.
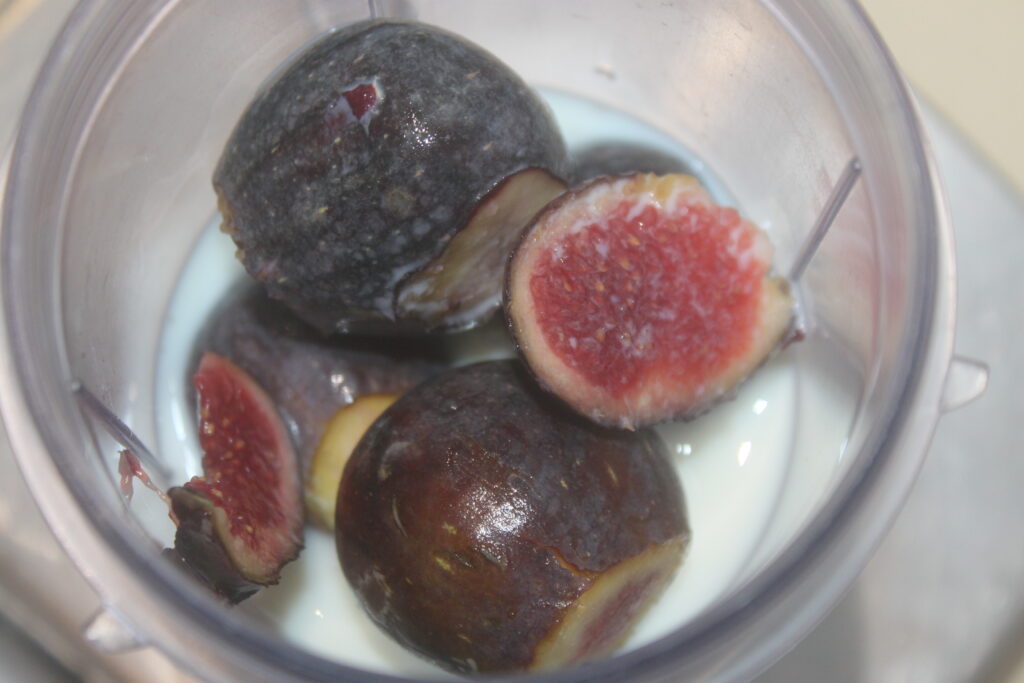
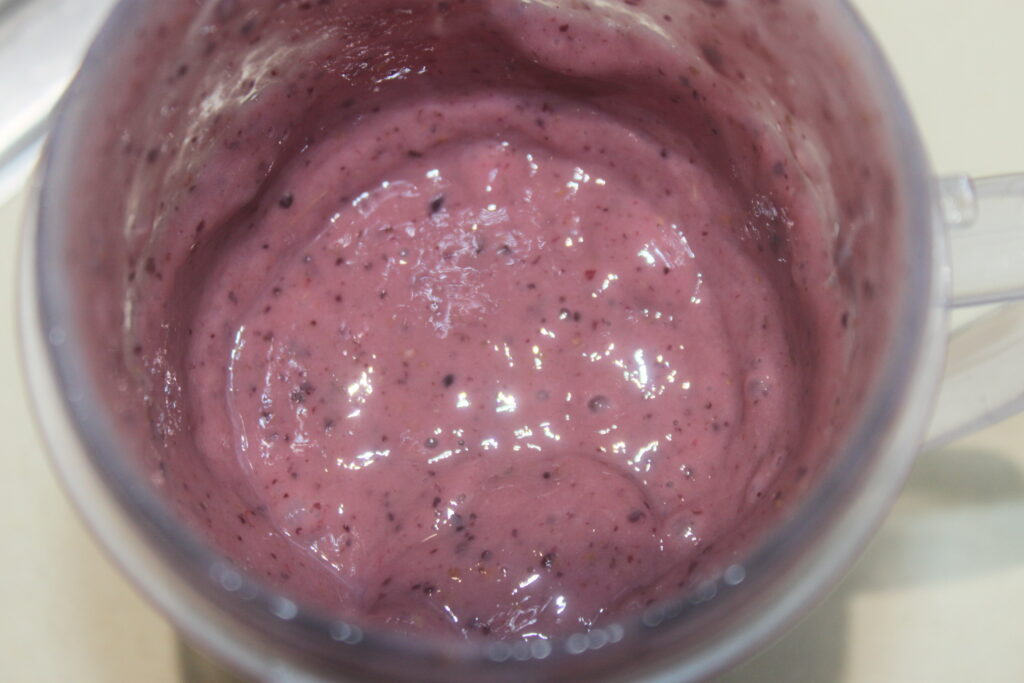
Blend well to obtain a sort of fig cream.
In the bowl of your food processor, or in a bowl, combine the butter, oil and brown sugar.

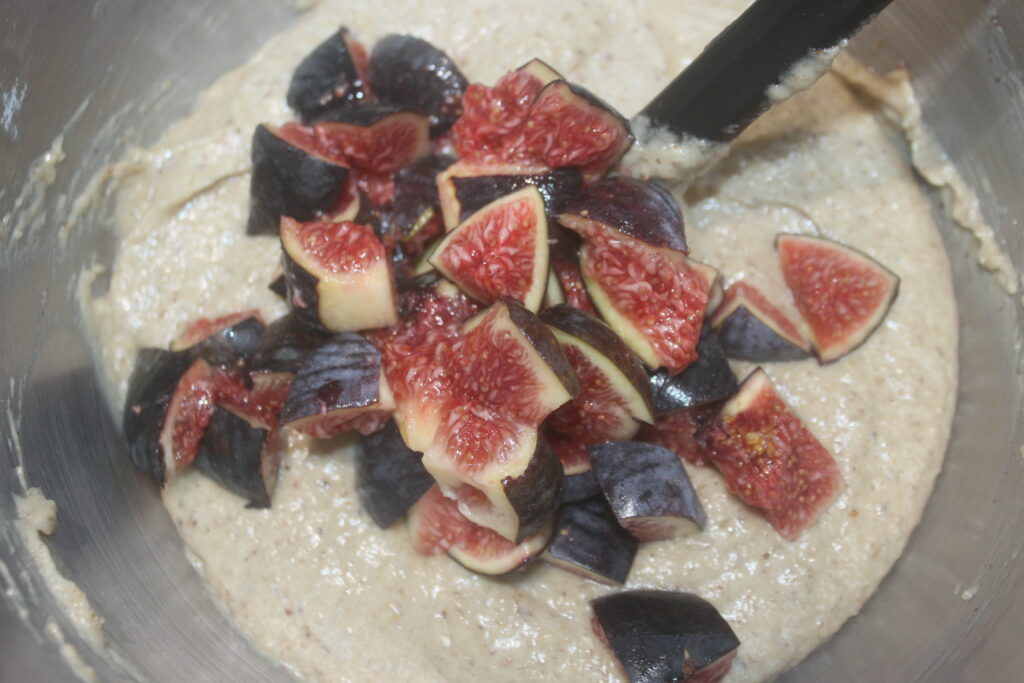
Add the eggs and fig cream.
Mix, then add the flour, hazelnut powder, baking powder and baking soda.
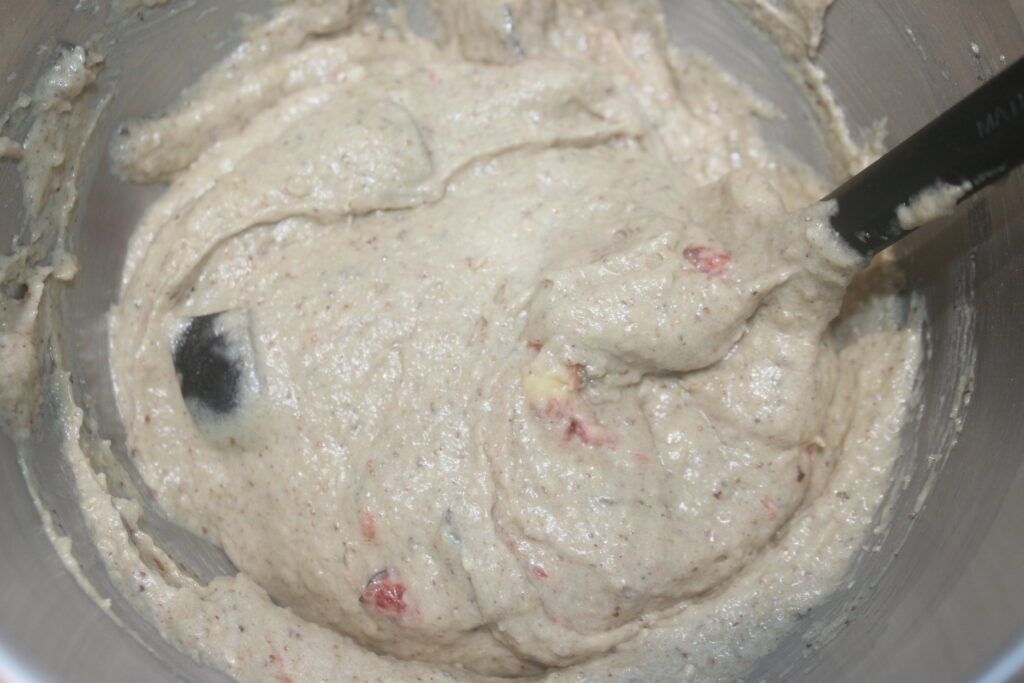
The dough should be smooth.
Finish with the 200g of fresh figs, cut into pieces.
Cuisson :
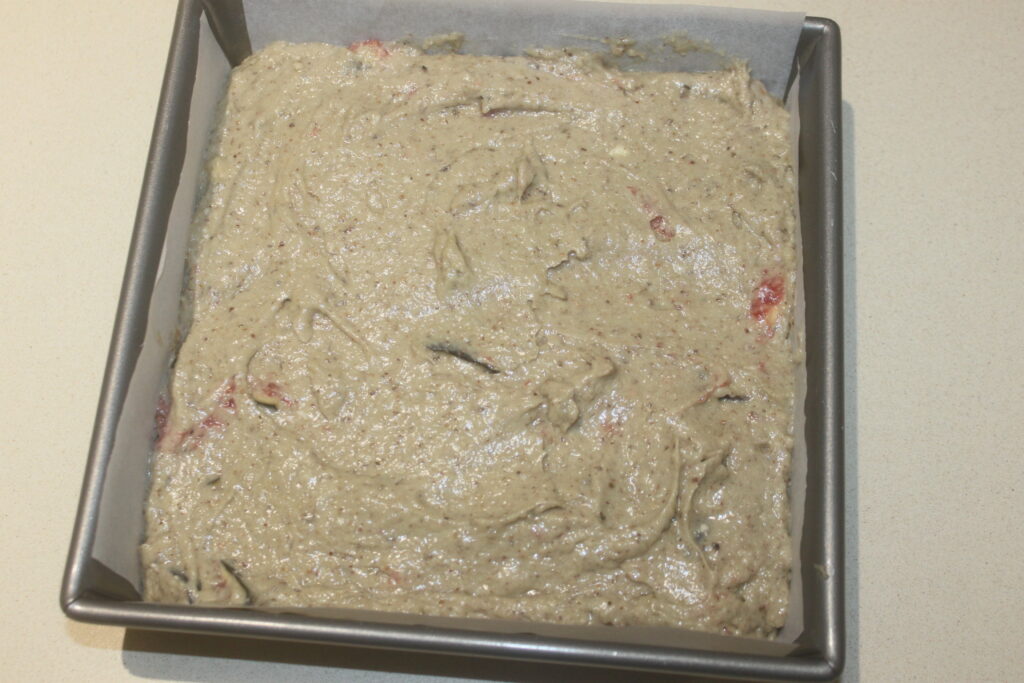
Pour into a 22cm square mold lined with parchment paper. You can also use a 24-25cm-diameter round tin.
Bake for 1h15 at 155°C over static heat (not fan-assisted or convection heat).
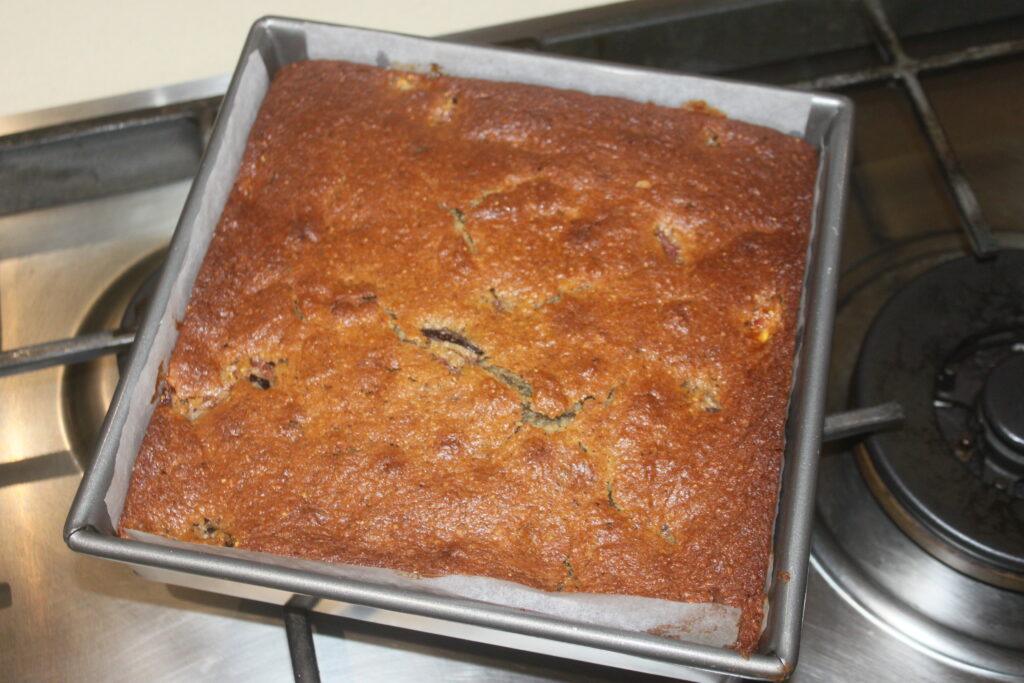
Let cool completely before cutting into slices.
Gâteau figues noisettes
Ingredients
- 200 g figues fraiches
- 100 g lait
- 100 g beurre
- 30 g huile neutre
- 150 g sucre roux
- 2 œufs 110g au total
- 175 g farine
- 100 g noisettes en poudre
- 5 g levure chimique
- 3 g bicarbonate de sodium
- 200 g figues fraiches
Instructions
- Commencez par laver les 200g de figues fraiches du début de la liste d’ingrédients.
- Équeutez-les puis mettez-les dans un petit mixeur avec les 100g de lait.
- Mixez bien pour avoir une sorte de crème de figue.
- Dans la cuve de votre robot, ou dans un récipient, mélangez le beurre, l’huile et le sucre roux.
- Ajoutez les œufs et la crème de figue.
- Mélangez, puis versez la farine, la noisette en poudre, le levure chimique et le bicarbonate de sodium. La pâte doit être bien homogène.
- Terminez avec les 200g de figues fraiches coupées en morceaux.
- Versez dans un moule carré de 22cm de côté, chemisé de papier sulfurisé. Vous pouvez aussi utiliser un moule rond de 24-25cm de diamètre.
- Faites cuire 1h15 à 155°C sur chaleur statique (et non chaleur tournante ou ventilée).
- Laissez tiédir complètement avant de couper en parts.
Nutrition
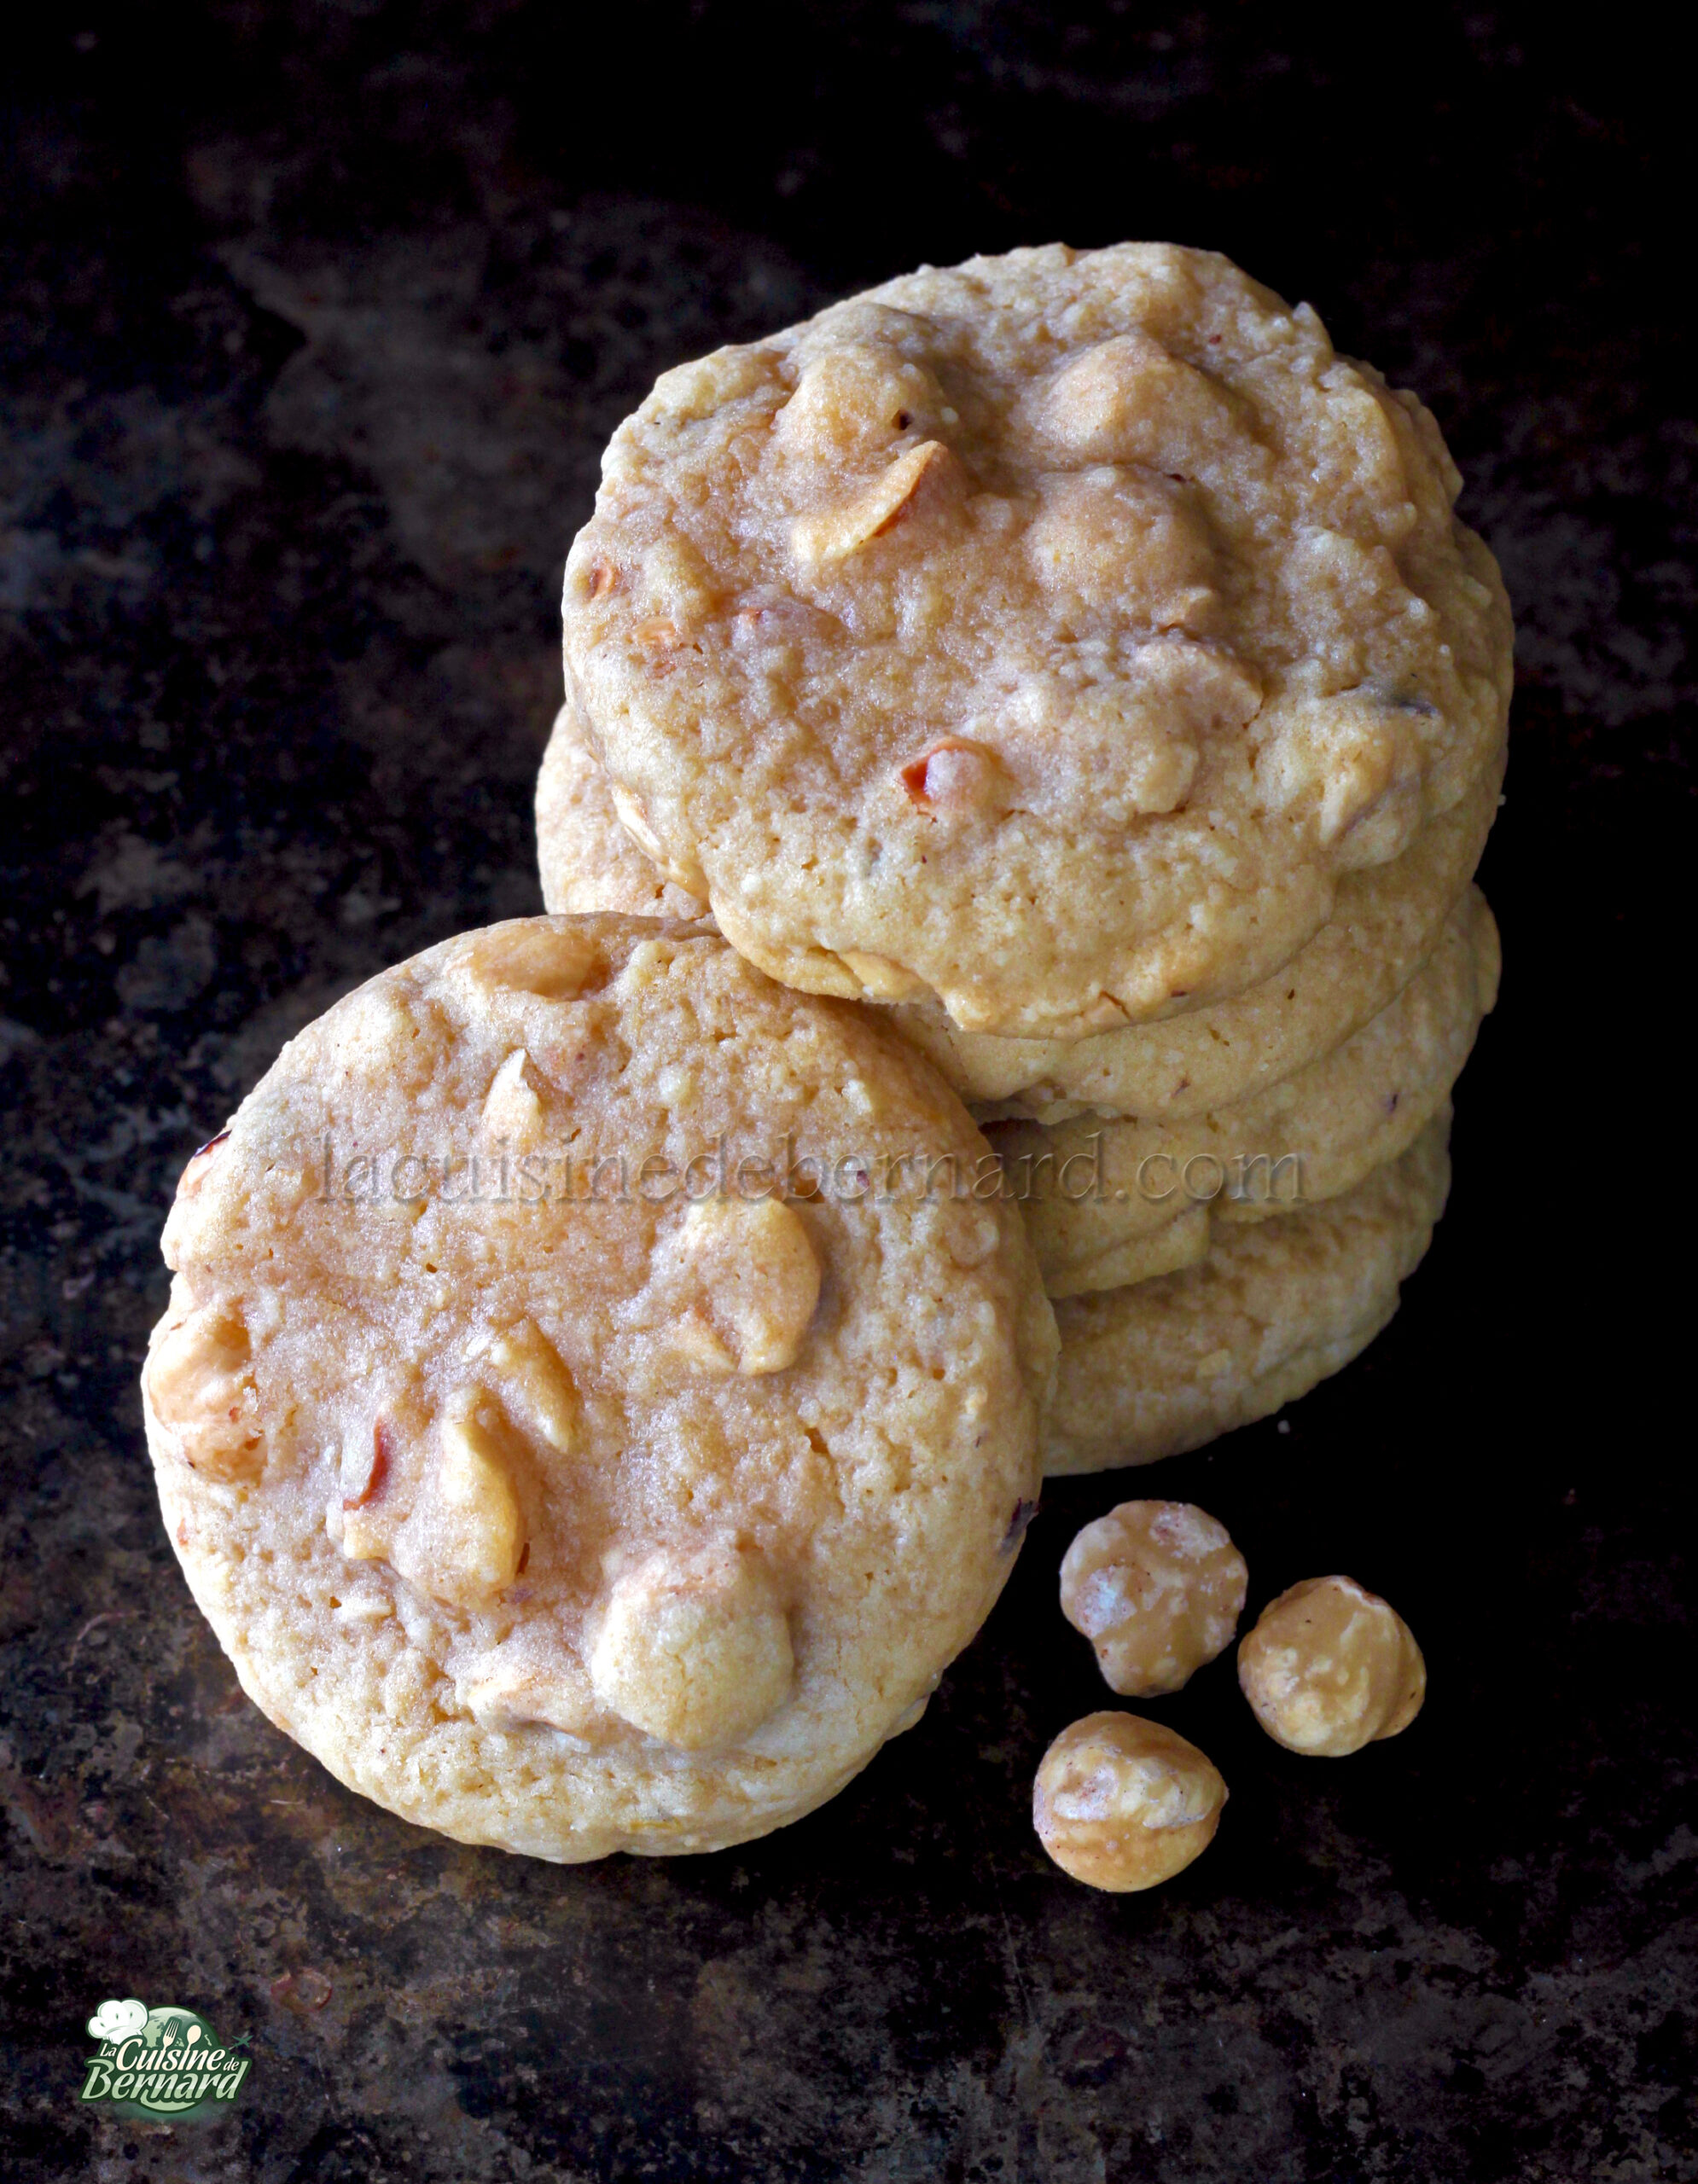
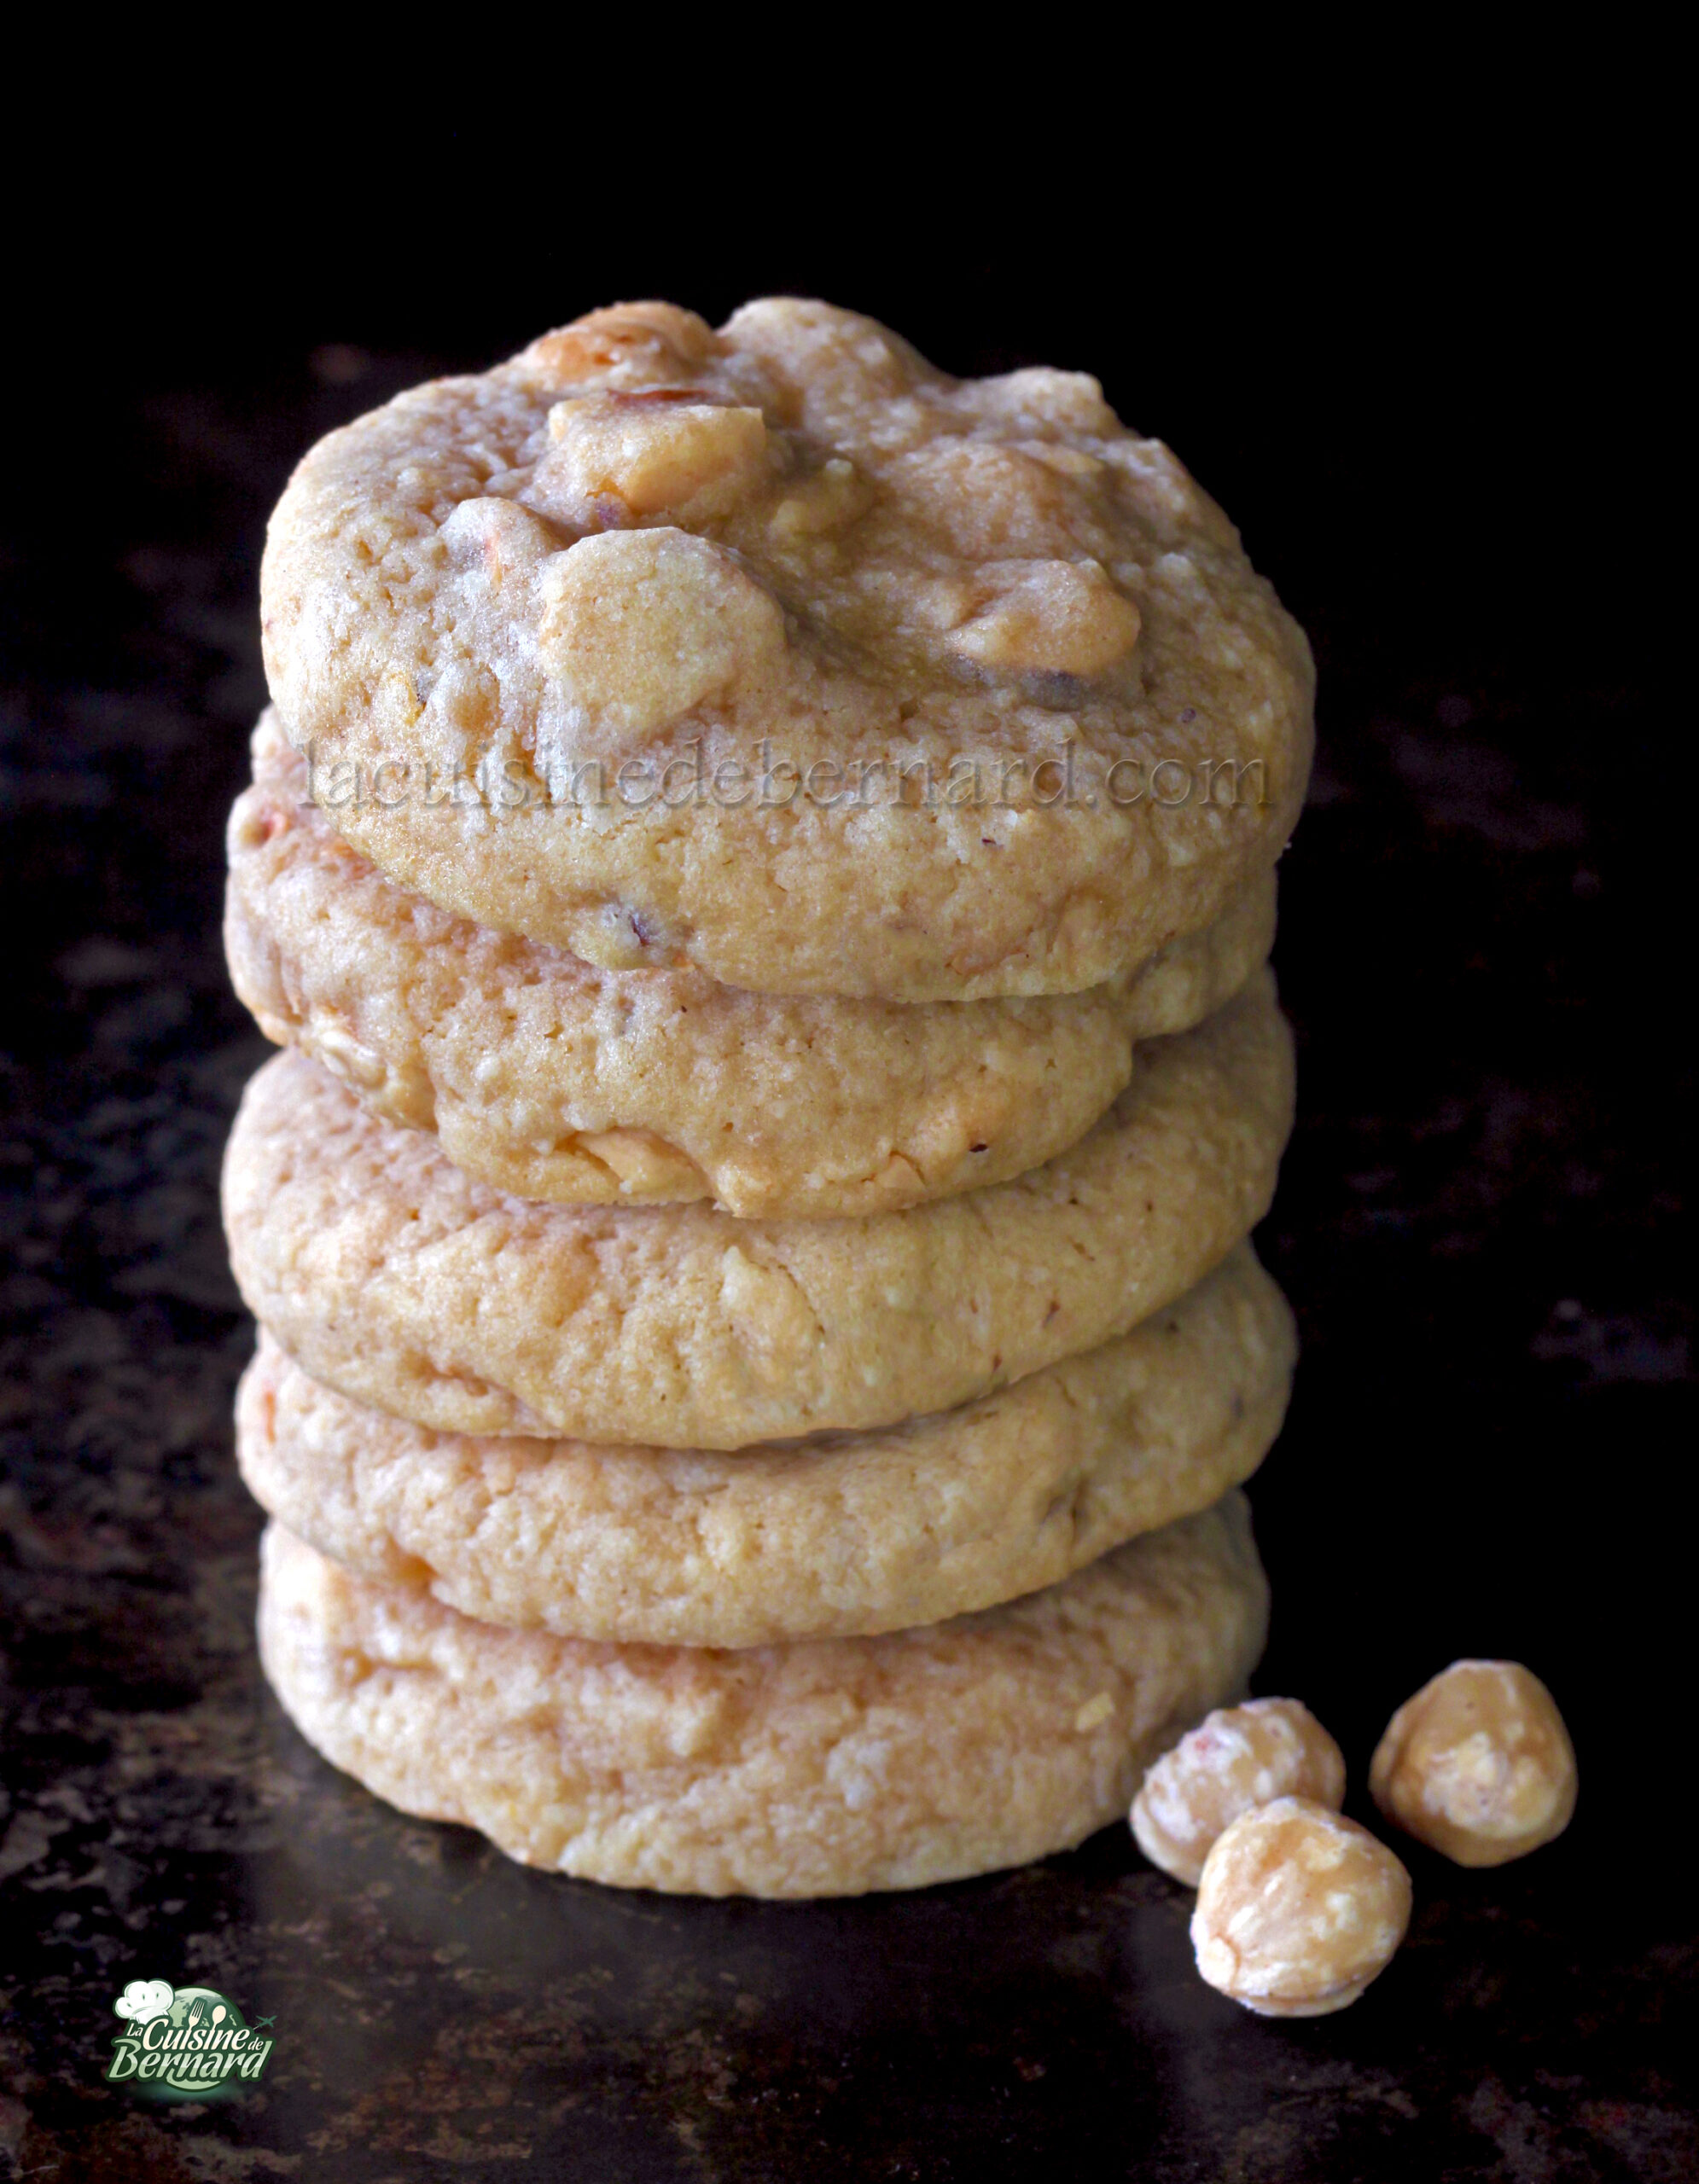
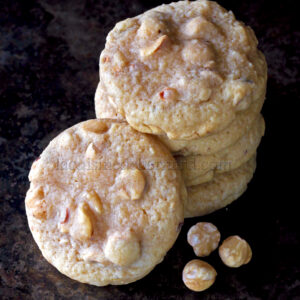
Cookies with an unexpected taste and texture! I put in a butter that I make hazelnut, i.e. well colored, with very developed perfumes.
But also hazelnut powder and crushed, toasted hazelnuts. At first they look like classic white chocolate chip cookies, but as soon as you bite into them, a whole new taste experience awaits!
Ingredients for 14 cookies:
- 125g of semi-salted butter
- 150g brown sugar
- 100g of hazelnut powder
- 60g of egg
- 35g semi-skimmed milk
- 1 teaspoon liquid vanilla extract
- 180g of flour
- 100g chopped roasted hazelnuts
Preparation:
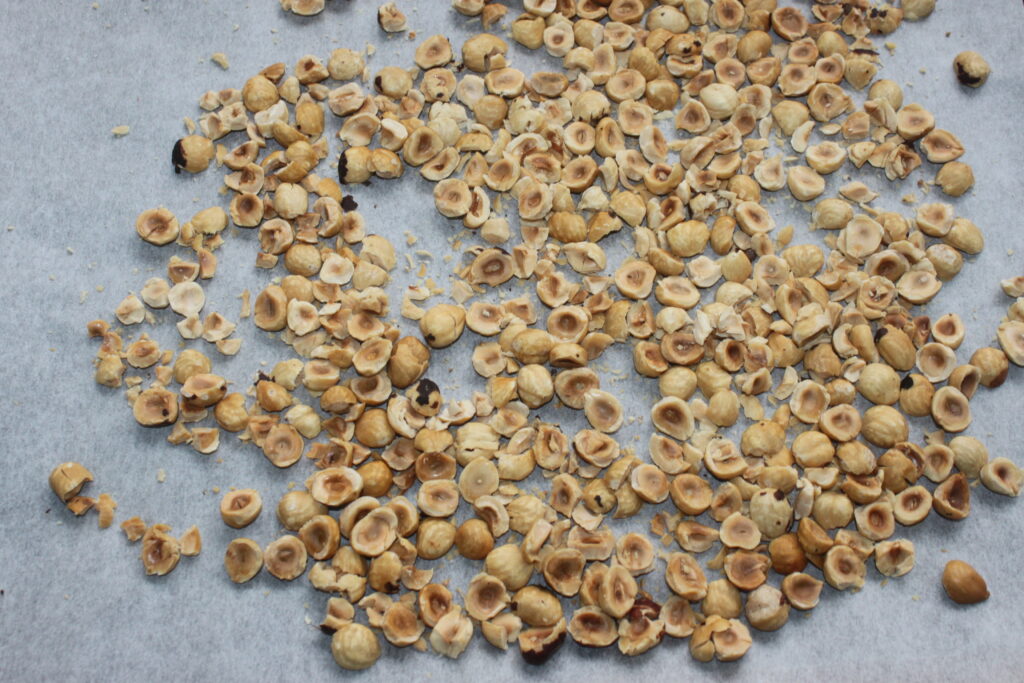
For whole hazelnuts, I’ve used skinless hazelnuts here. I toast them in the oven at 170°C for 16 to 18 minutes.

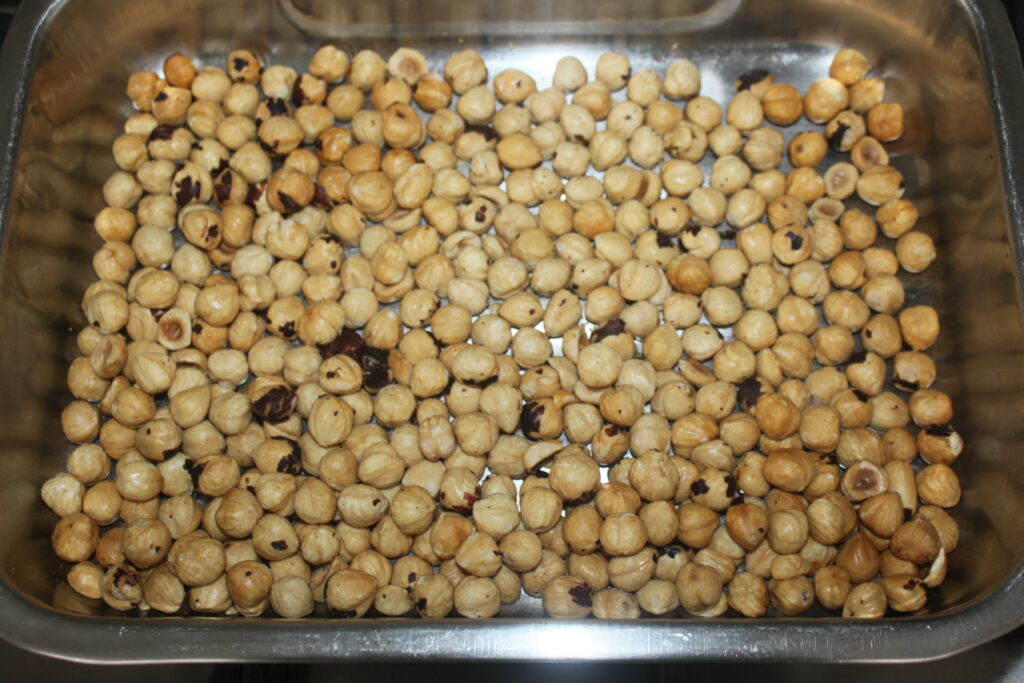
To break them, I gently crush them with a rolling pin. I grilled a lot more than 100g, as I often use them in salads!
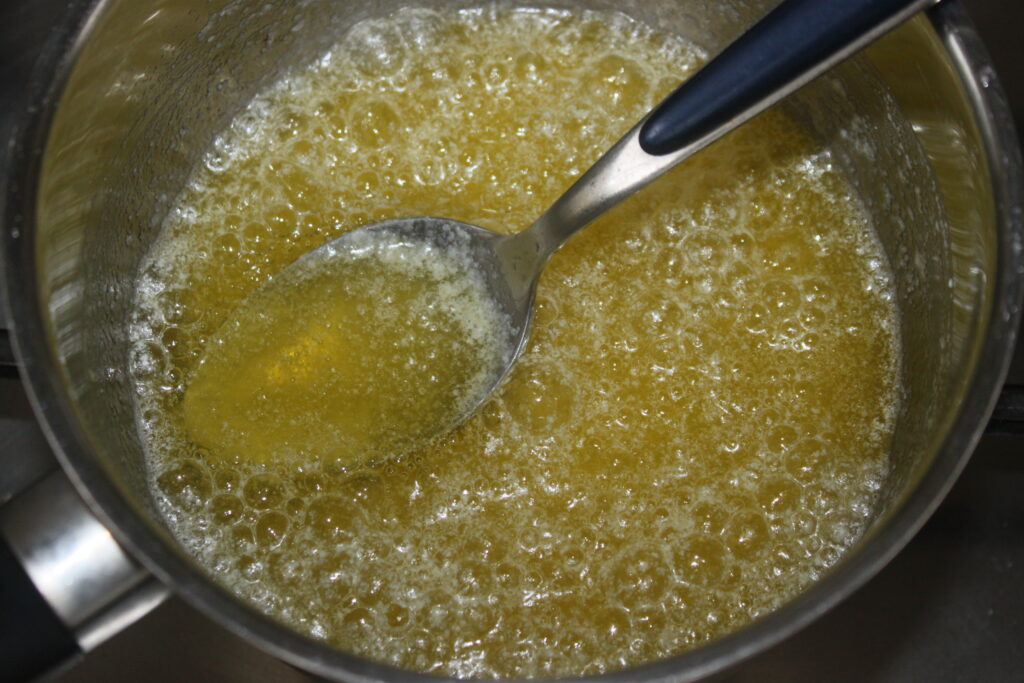
For the cookies, place the semi-salted butter in a saucepan.

Cook gently until it takes on a lovely nutty color, without burning the bottom of the pan.

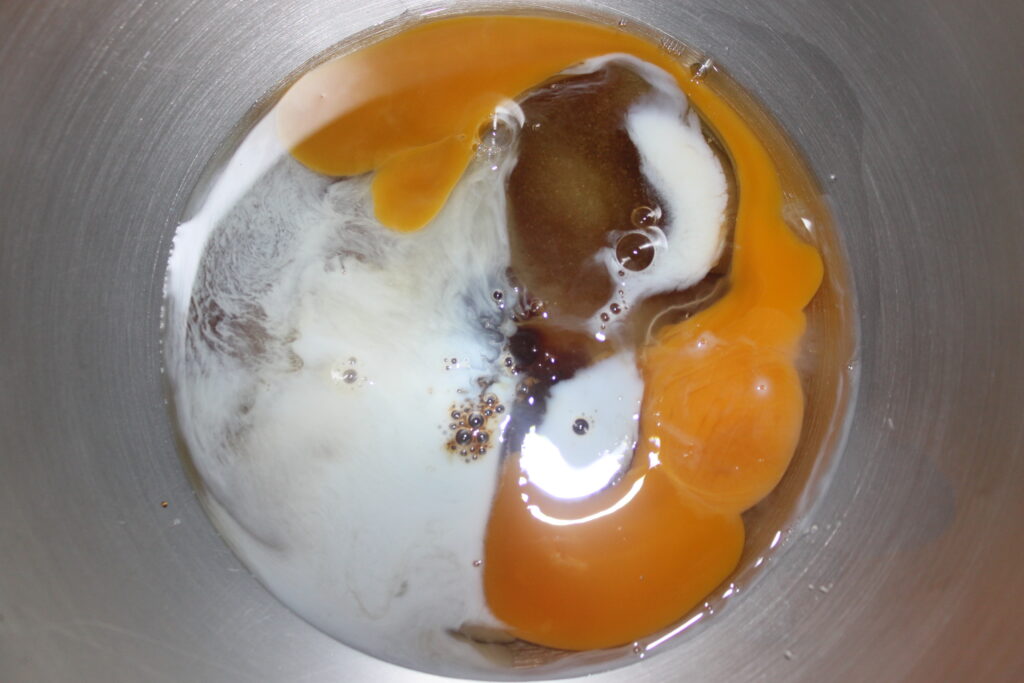
Set aside to cool. Place the brown sugar, vanilla, semi-skimmed milk and 60g egg in a bowl.
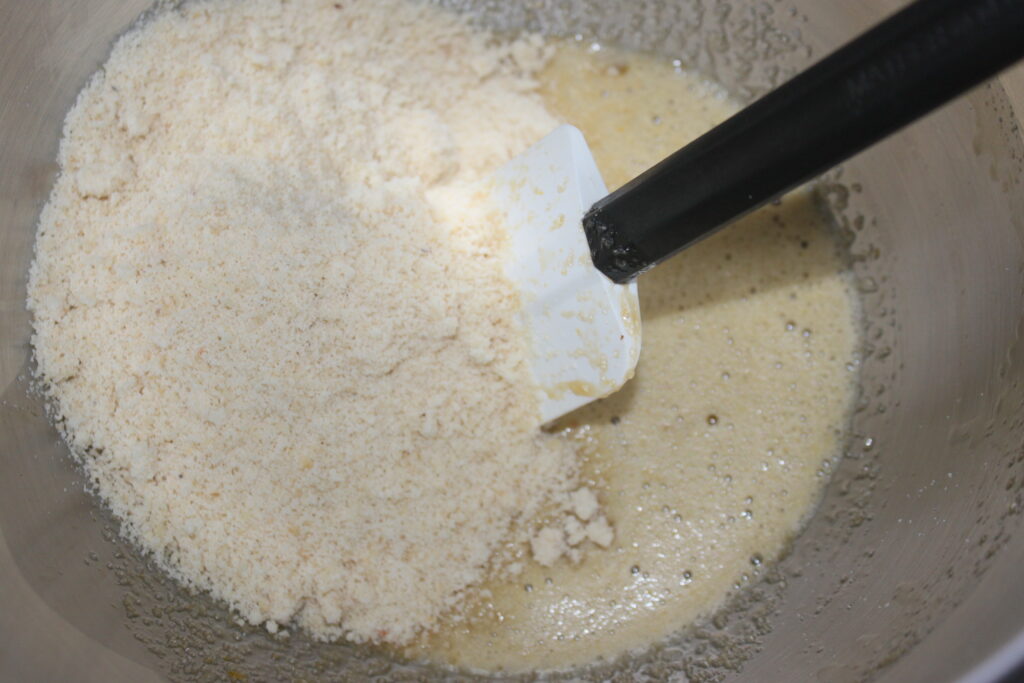
Mix well, then pour in the hazelnut powder.
When the butter is no longer too hot, pour in 90g, which should be the weight at this point. You started with 125g, but some of it cooked off and evaporated.
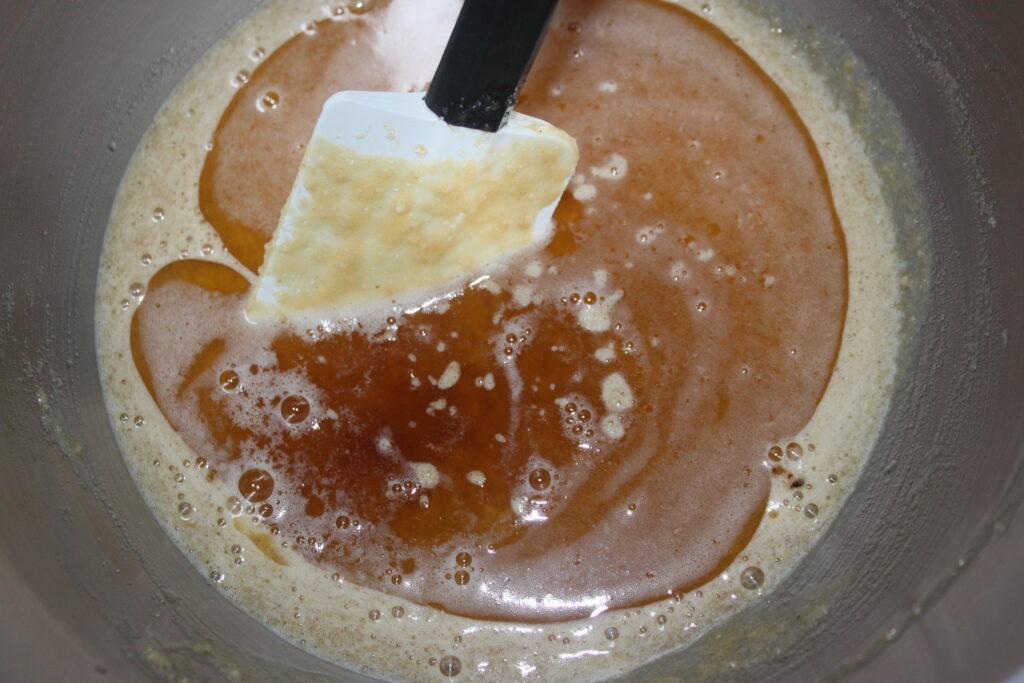
Mix and pour in the flour.
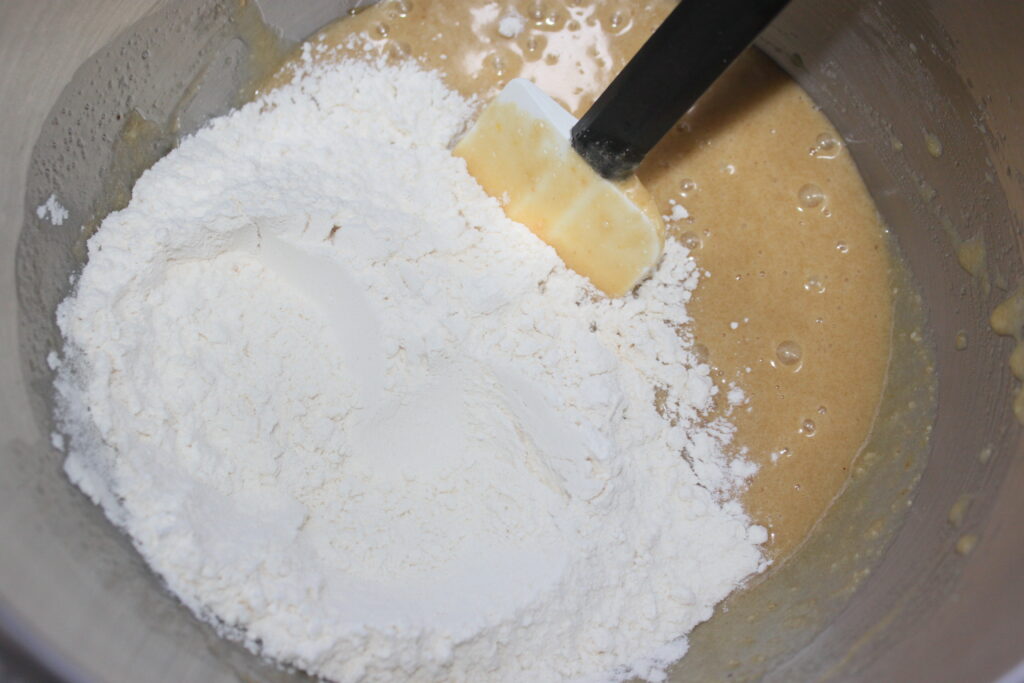
Mix, then add the 100g of crushed toasted hazelnuts.
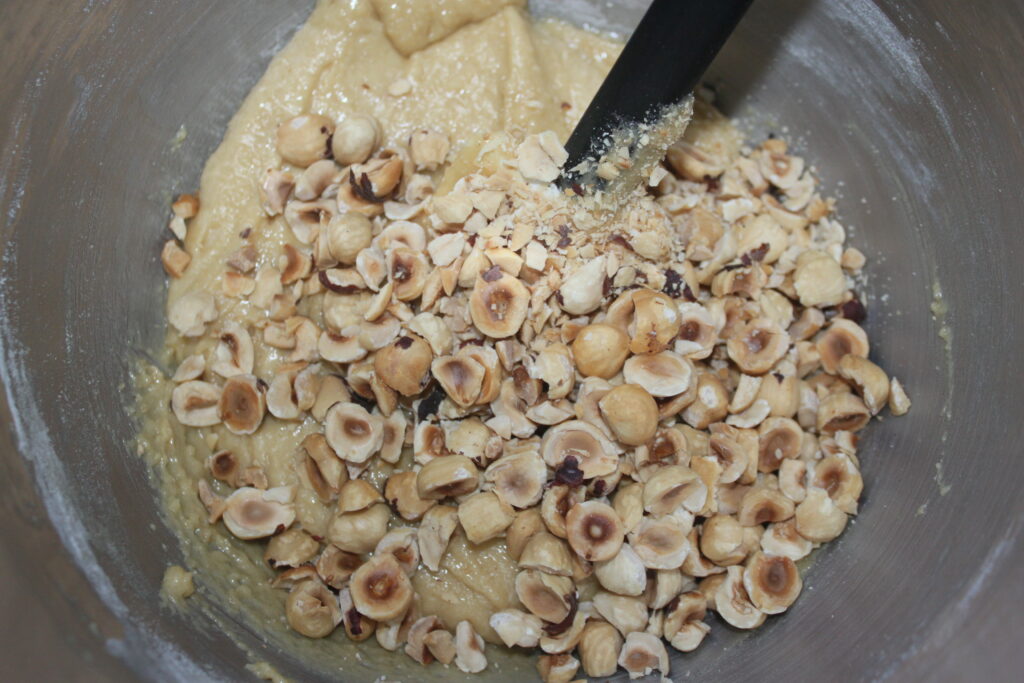
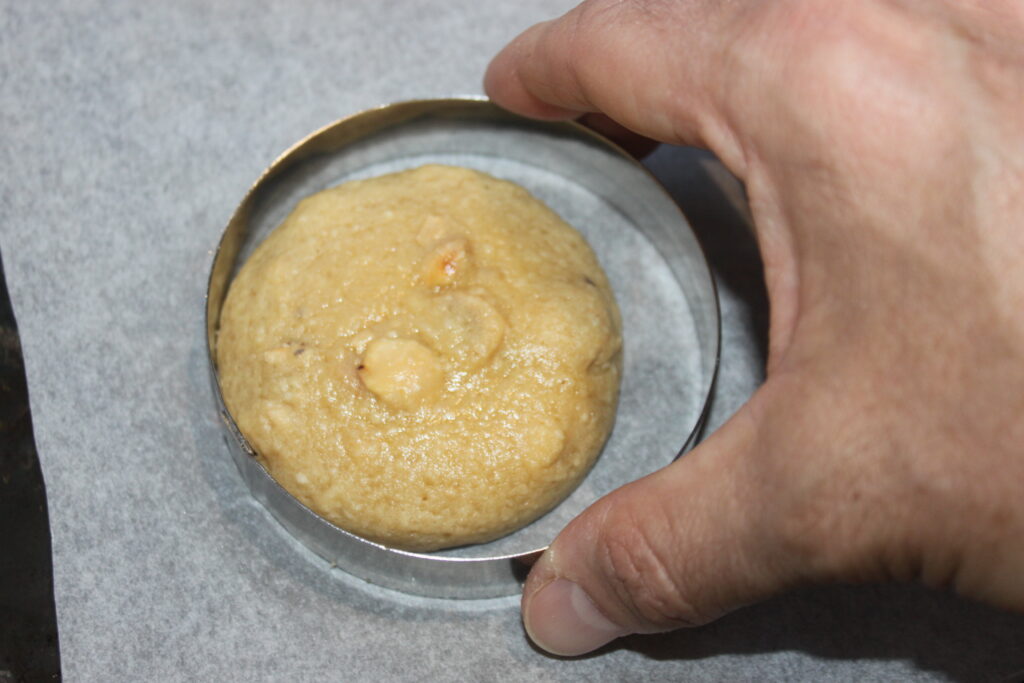
If the dough is too soft at this stage, chill it for a quarter of an hour. Then scoop out the balls, here with an ice-cream scoop, and place them on a baking sheet lined with parchment paper.

Flatten them slightly by hand.

Then bake for 10 to 12 minutes at 170°C over fan assisted heat.
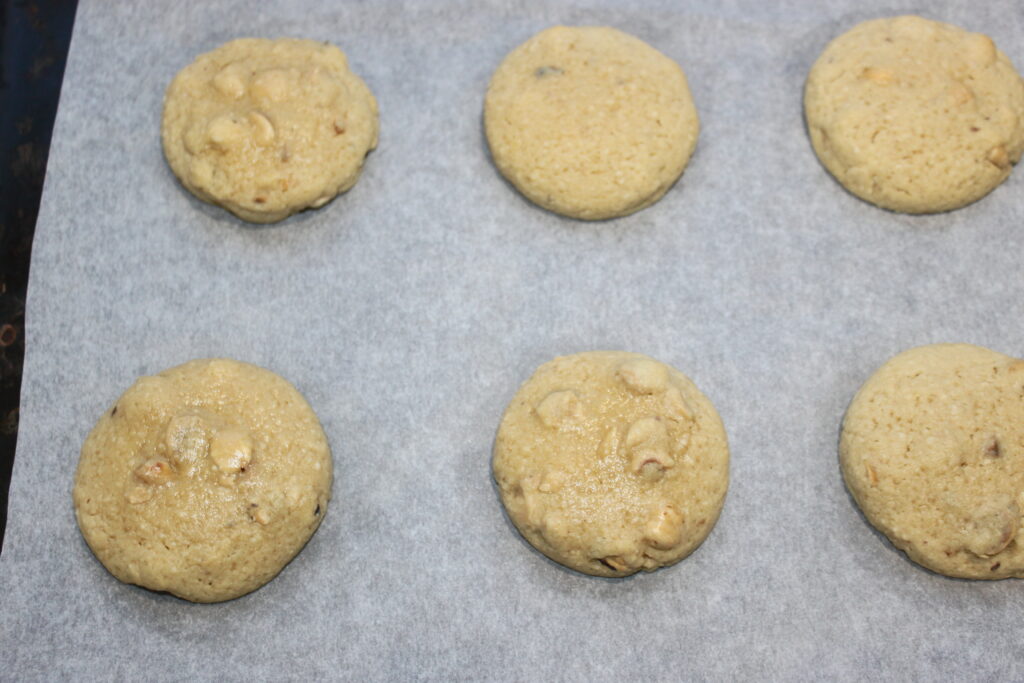
The center should appear slightly undercooked. To make them rounder, I twist a small circle (or upside-down glass) around each cookie.
They will keep perfectly well at room temperature in an airtight tin for 5 days.
Cookies noisettes et beurre noisette
Ingredients
Pour 14 cookies
- 125 g beurre demi-sel
- 150 g sucre roux
- 100 g poudre de noisette
- 60 g œuf
- 35 g lait demi-écrémé
- 1 c. à café extrait de vanille liquide
- 180 g farine
- 100 g noisettes grillées concassées
Instructions
- Pour les noisettes entières, j’ai pris ici des noisettes sans peau. Je les fais griller au four à 170°C pendant 16 à 18 minutes.
- Pour les casser, je les écrase doucement au rouleau à pâtisserie. J’en ai fait griller bien plus que 100g, car j’en mets souvent dans la salade !
- Pour les cookies, mettez le beurre demi-sel dans une casserole.
- Faites-le cuire doucement jusqu’à ce qu’il prenne une belle couleur noisette, sans pour autant brûler le fond de la casserole.
- Laissez-le de côté pour qu’il tiédisse. Dans un récipient, mettez le sucre roux, la vanille, le lait demi-écrémé et les 60g d’œuf.
- Mélangez bien puis versez la poudre de noisette.
- Quand le beurre n’est plus trop chaud, versez-en 90g, ce qui devrait être le poids à ce moment là. En effet, au départ vous aviez 125g, mais une partie a cuit et s’est évaporée.
- Mélangez et versez la farine.
- Mélangez puis ajoutez enfin les 100g de noisettes grillées concassées.
- Si la pâte est trop molle à ce stade, mettez-la au frais un quart d’heure. Faites ensuite des boules, ici avec un cuillère à glace, et posez-les sur un plaque à pâtisserie garnie de papier sulfurisé.
- Aplatissez-les légèrement à la main.
- Faites ensuite cuire 10 à 12 minutes à 170°C sur chaleur tournante.
- Le centre doit paraitre légèrement sous-cuit. Pour les rendre plus ronds, je tourne un petit cercle (ou un verre renversé) autour de chaque cookie.
- Ils se conserveront parfaitement à température ambiante dans une boite hermétique pendant 5 jours.
Nutrition
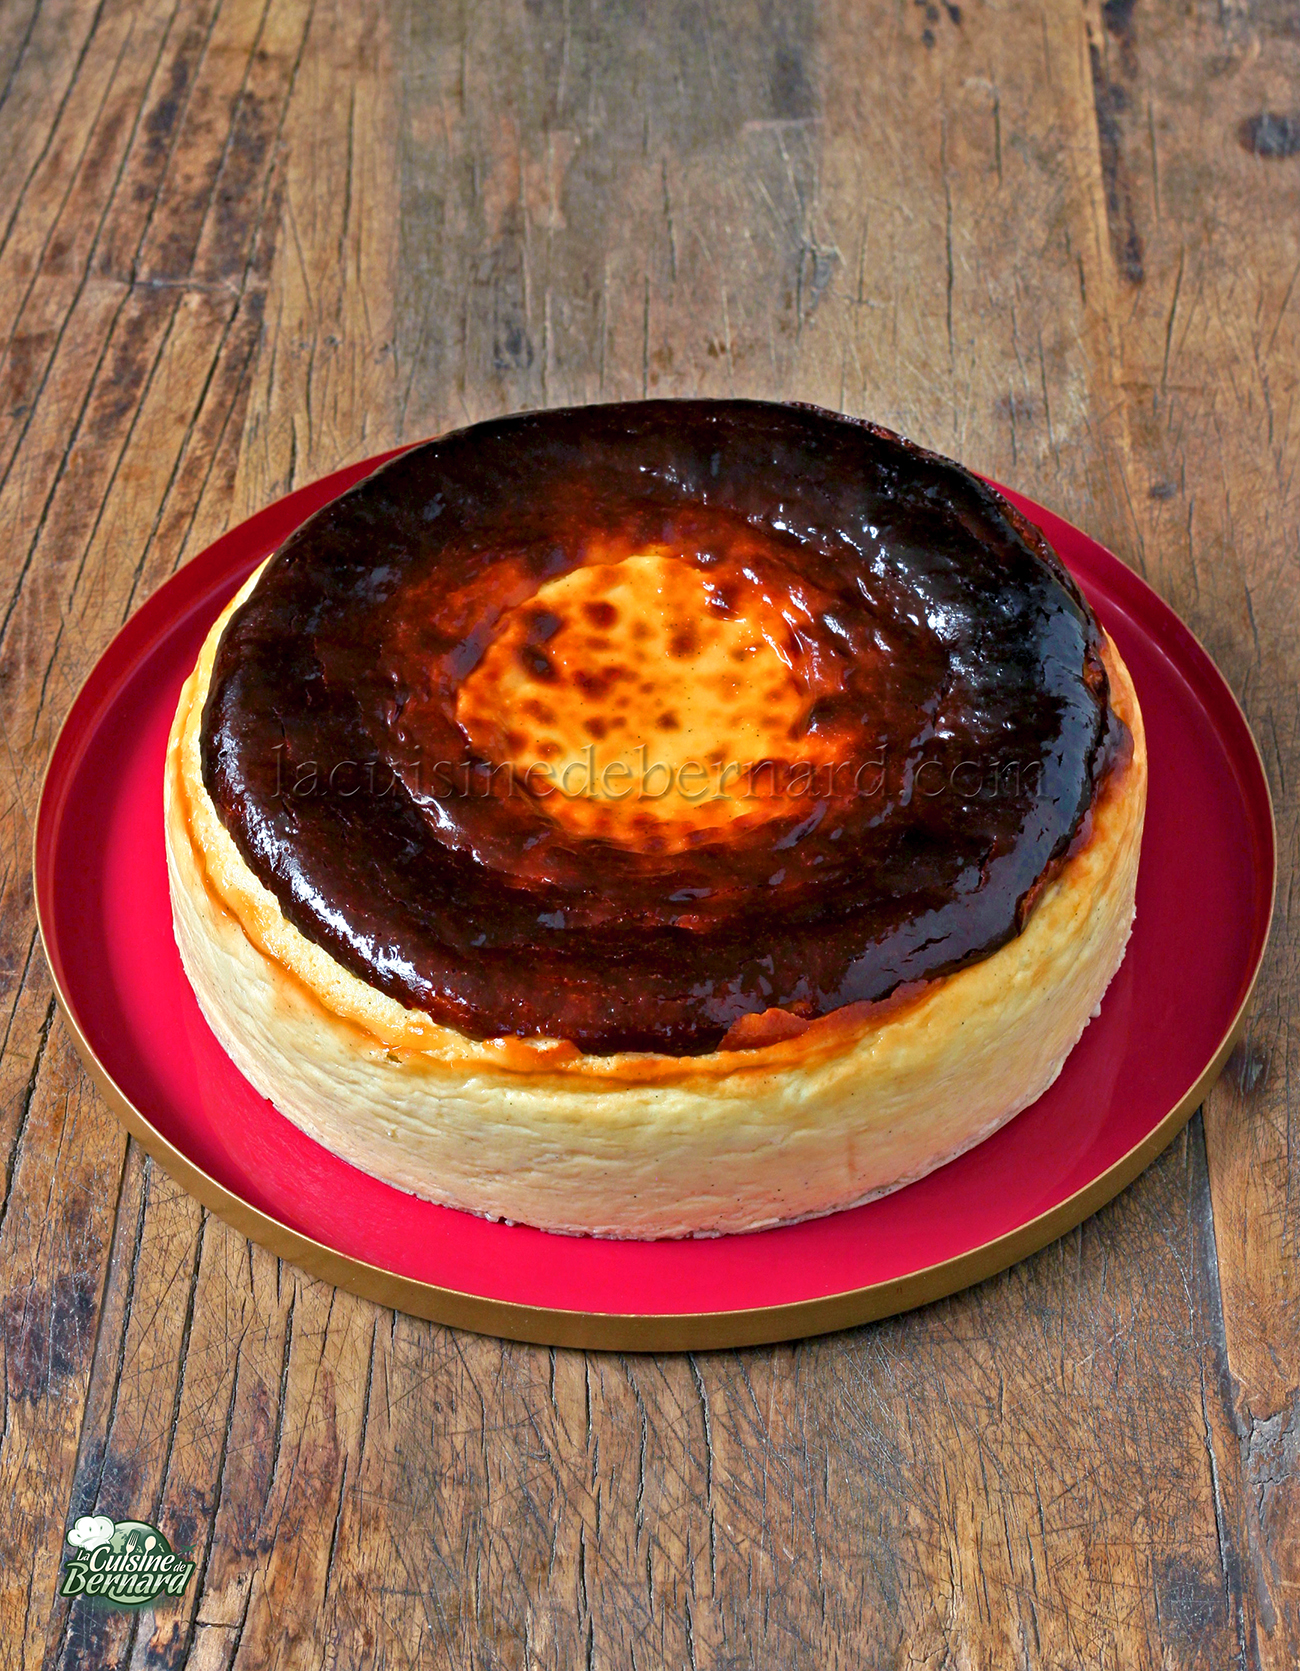
A cheesecake of Basque origin? Not really, but the story is mostly very recent (less than 30 years) and is clearly becoming a classic and well-known recipe on social networks and in pastry shops in the USA and some Asian countries. You can find the history of this cake on the Internet. Basically, it was born in a restaurant in San Sebastian in the 90s, before being (re)discovered in the 2010s and becoming known in the USA as the Basque Burnt Cheesecake. The history of cheesecake is one of evolution, starting with the Jewish culture of Eastern Europe, before becoming the standard cake in North America, then adapting again in Asia in a more runny or puffed version. So this version doesn’t come from the Basque country as a regional specialty, but was born from the desire of a talented restaurateur to make a new version. What makes it different from a classic cheesecake is its caramelized crust and soft center. In addition to cream cheese, I use classic unsweetened fromage blanc, but you can also use heavy cream or even mascarpone!
Recipe for a 18cm mould:
- 600g cream cheese
- 160g caster sugar (including 2 packets vanilla sugar)
- 2 vanilla pods
- 1 teaspoon liquid vanilla extract
- 4 large eggs (225g unshelled)
- 15g cornstarch (maïzena)
- 300g fromage frais (3.3% fat, the classic) or mascarpone, or full-fat heavy cream for an even richer version!
Place the cream cheese in a container and microwave for 45 seconds to soften slightly. Pour in the two sachets of vanilla sugar, then top up the total sugar weight to 160g (roughly 15g vanilla sugar and 145g sugar).

Remove the vanillin from two split vanilla beans.
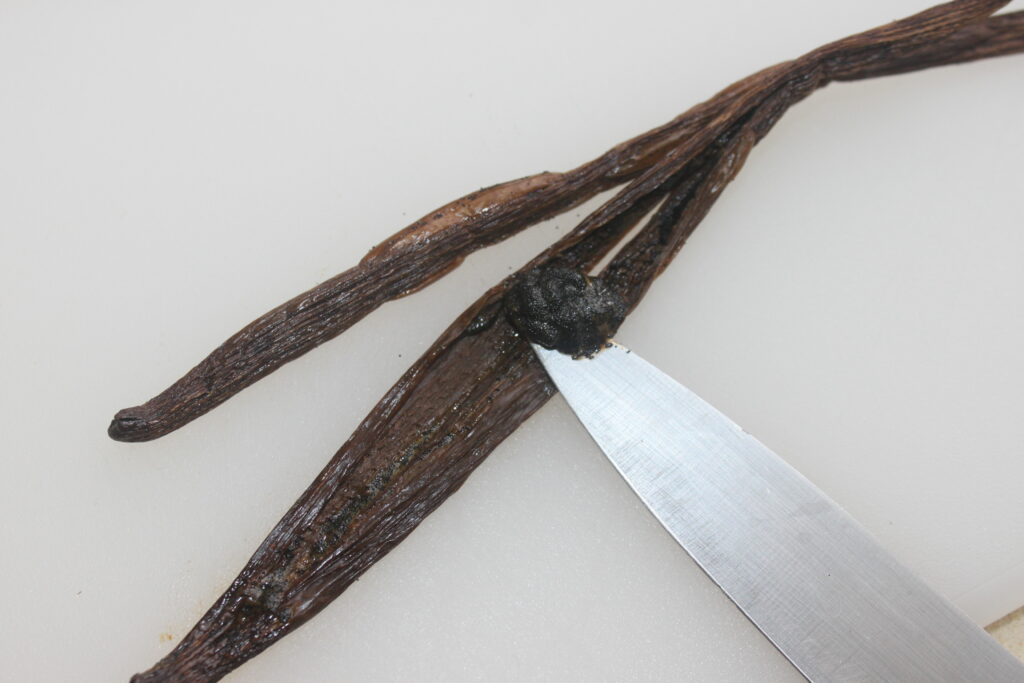
Stir into the sweet cream cheese.

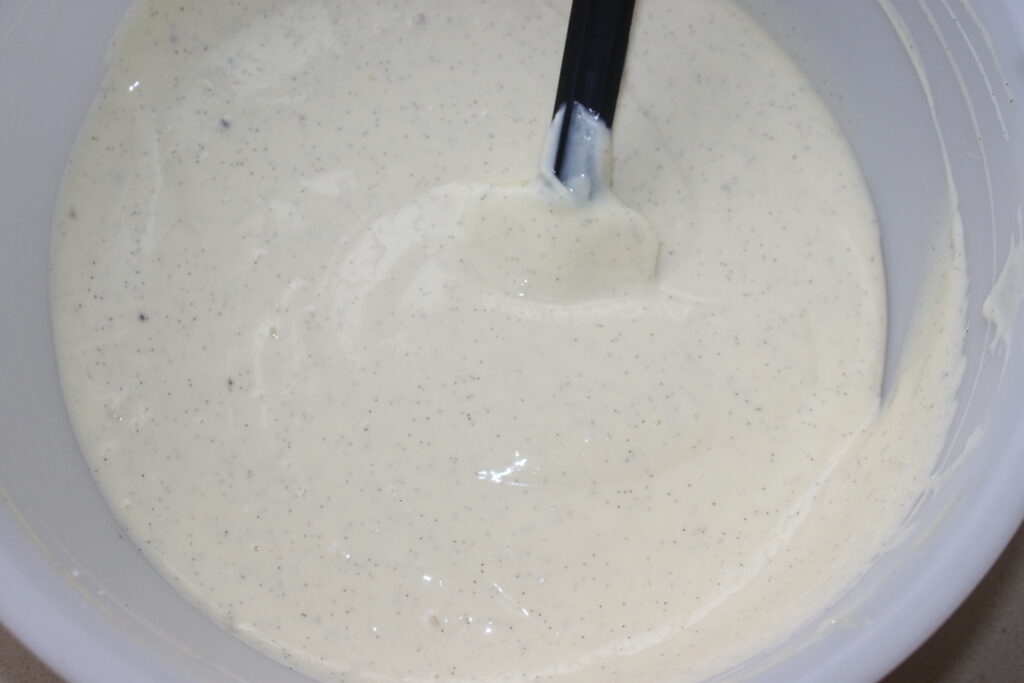
Add the eggs and liquid vanilla.

Finish with the cornflour and fromage blanc. Mix well, using a hand whisk if necessary.

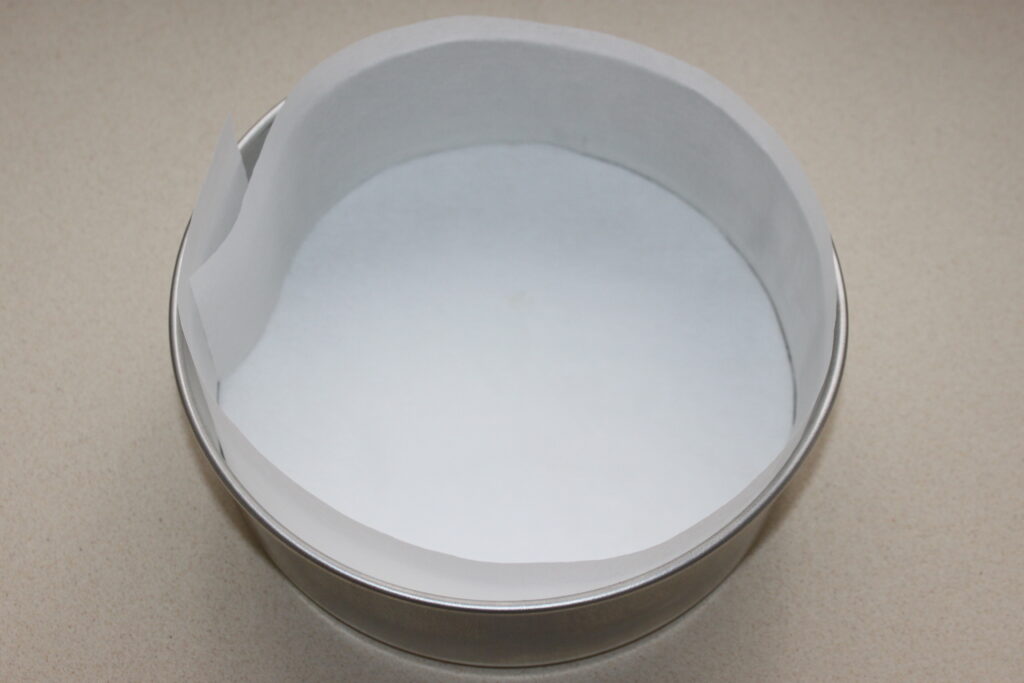
Line an 18cm removable-bottom mold with parchment paper.
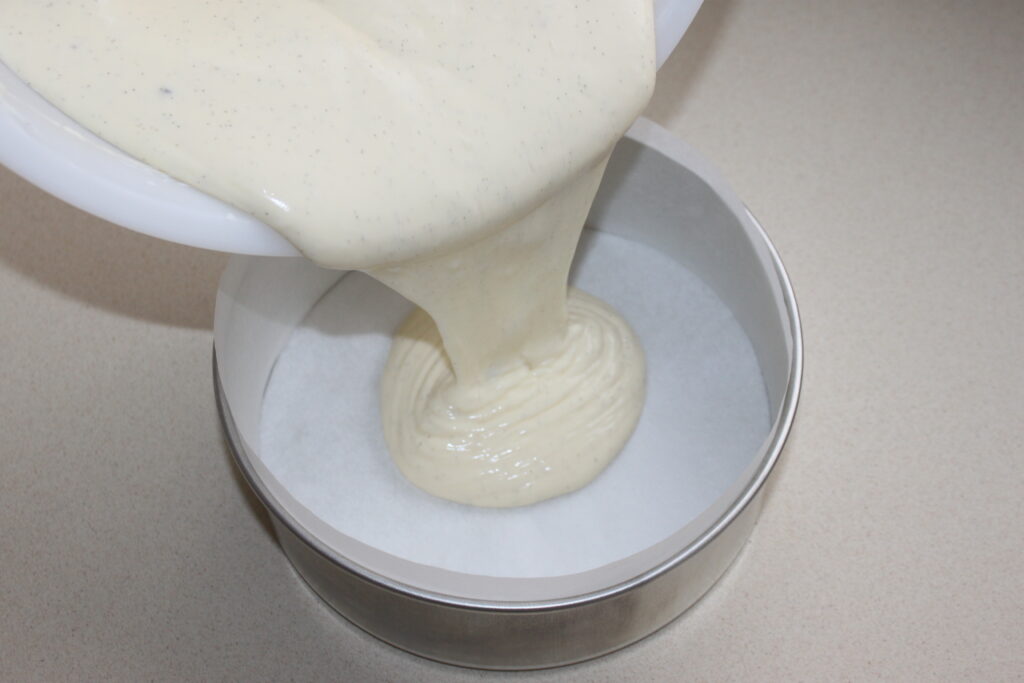
Pour into the mould.
Bake for 50 minutes in an oven preheated to 230°C over static heat (not fan assisted). The cake will puff up (then fall back down) and get a nice, colorful crust. When cooking is complete, leave in the oven, door ajar, for 15 minutes.

Then let stand at room temperature.

Then chill overnight before slicing and serving.
A melt-in-the-mouth delight!
Cheesecake Basque, mais pas basque !
Ingredients
Pour un moule de 18 cm à fond amovible
- 600 g cream cheese
- 160 g sucre
- 2 gousses de vanille
- 1 c. à café extrait de vanille liquide
- 225 g œuf
- 15 g fécule maïs
- 300 g fromage blanc
Instructions
- Placez le cream cheese dans un récipient et mettez-le 45 secondes au four à micro-ondes pour qu’il ramollisse un peu. Versez les deux sachets de sucre vanillé, puis complétez le poids du sucre total à 160g (en gros 15g de sucre vanillé et 145g de sucre).
- Prélevez la vanilline de deux gousses de vanille fendues en deux.
- Mélangez dans le cream cheese sucré.
- Ajoutez les œufs et la vanille liquide.
- Terminez avec la maïzena et le fromage blanc. Mélangez bien, au fouet manuel si nécessaire.
- Chemisez un moule de 18cm à fond amovible de papier sulfurisé. Versez le tout dans le moule.
- Faites cuire 50 minutes dans un four préalablement chauffé à 230°C sur chaleur statique (pas chaleur tournante). Le gâteau va gonfler (puis retomber) et obtenir une belle croûte bien colorée. Quand la cuisson est terminée, laissez dans le four éteint, porte entrouverte pendant 15 minutes.
- Laissez ensuite reposer à température ambiante.
- Mettez ensuite une nuit au frais avant de couper en tranches et de servir.
- Un délice fondant à cœur !
Nutrition
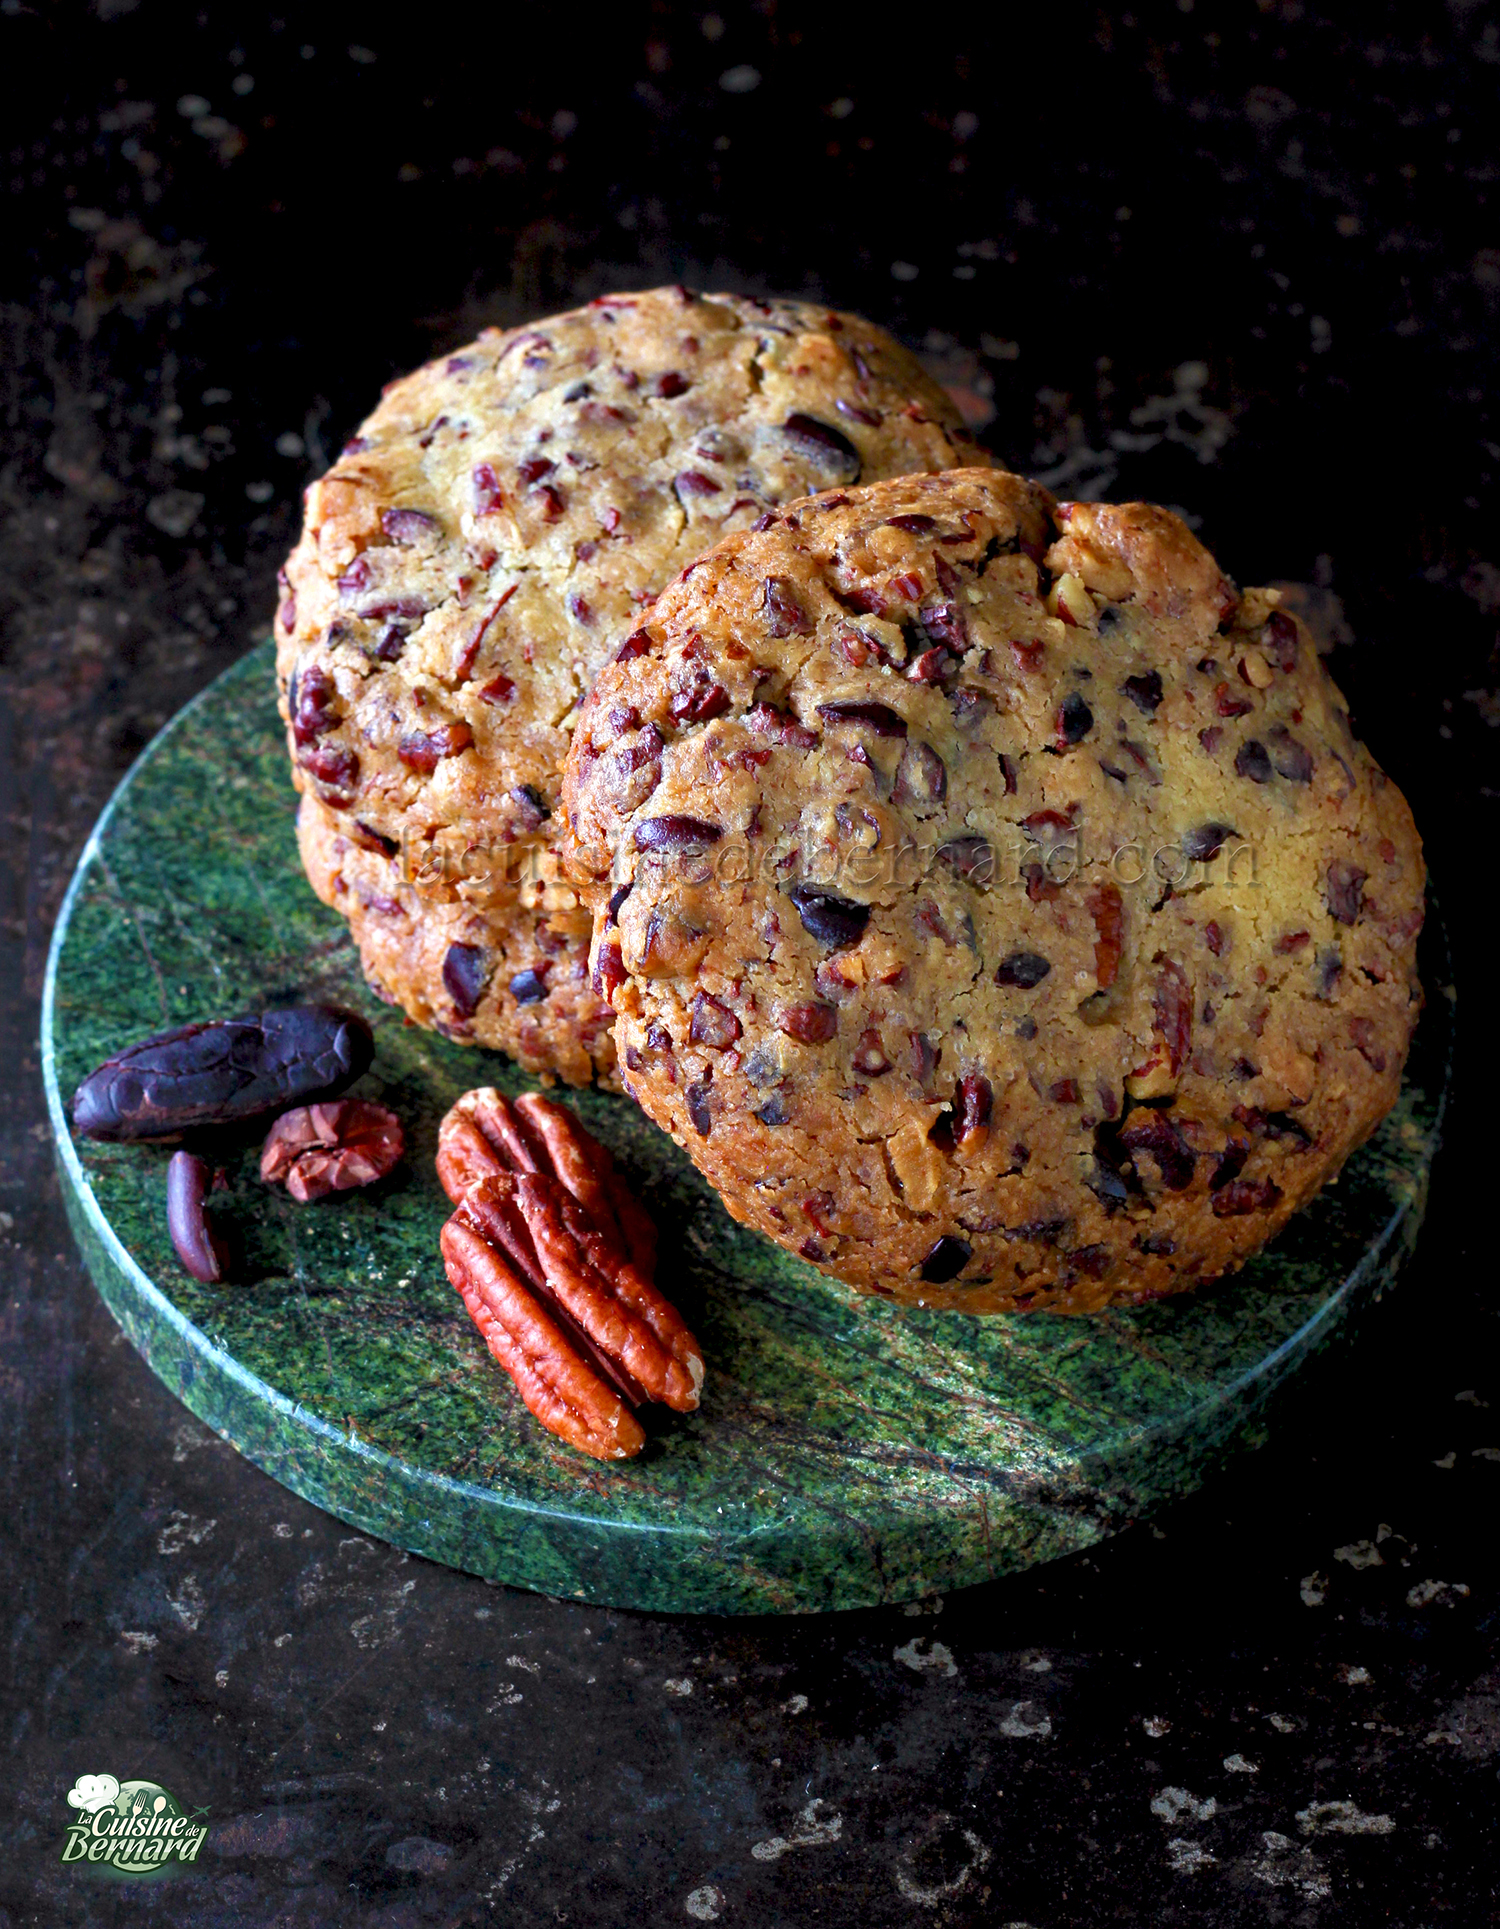
Crisp, crunchy shortbread! These are my cocoa-pecan shortbread. They are very low in sugar (enough for my taste), which may surprise some people. You’d expect a chocolate shortbread, but I actually used cocoa nibs. I love their texture, which will be perfect on these cakes, for a snack rich in flavour!
- 80g brown sugar
- 165g of semi-salted butter
- 185g flour
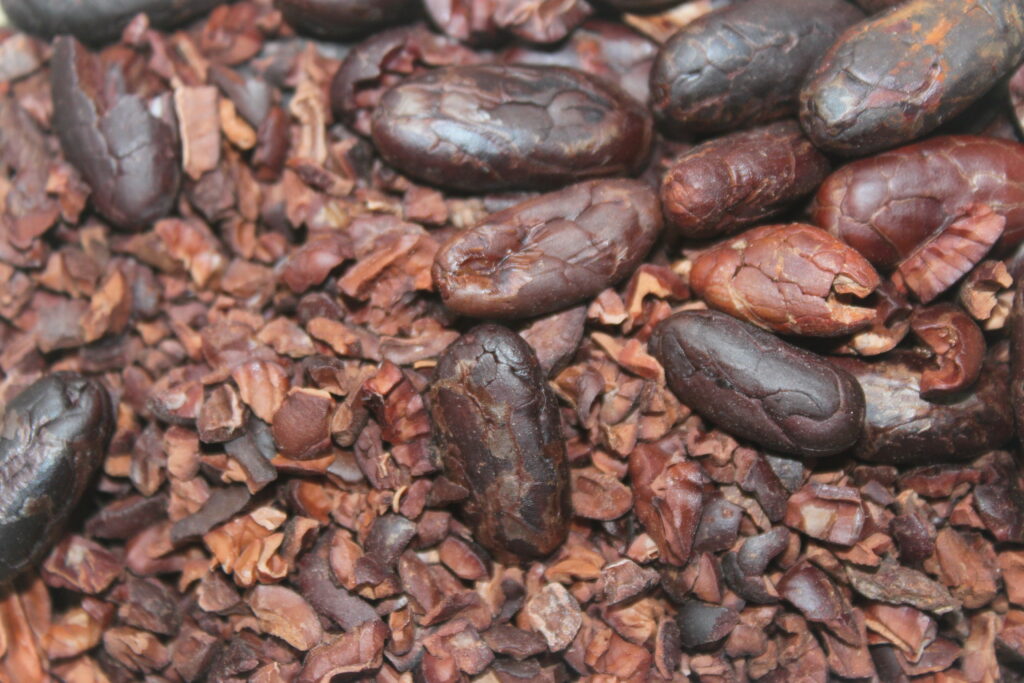
- 150g of cocoa nibs
- 150g pecans
For the grits, I roasted mine at 160°C for 15 minutes. Do this if you buy it raw.
Place the brown sugar and butter in a bowl and mix well until creamy.

Add the flour and mix again.
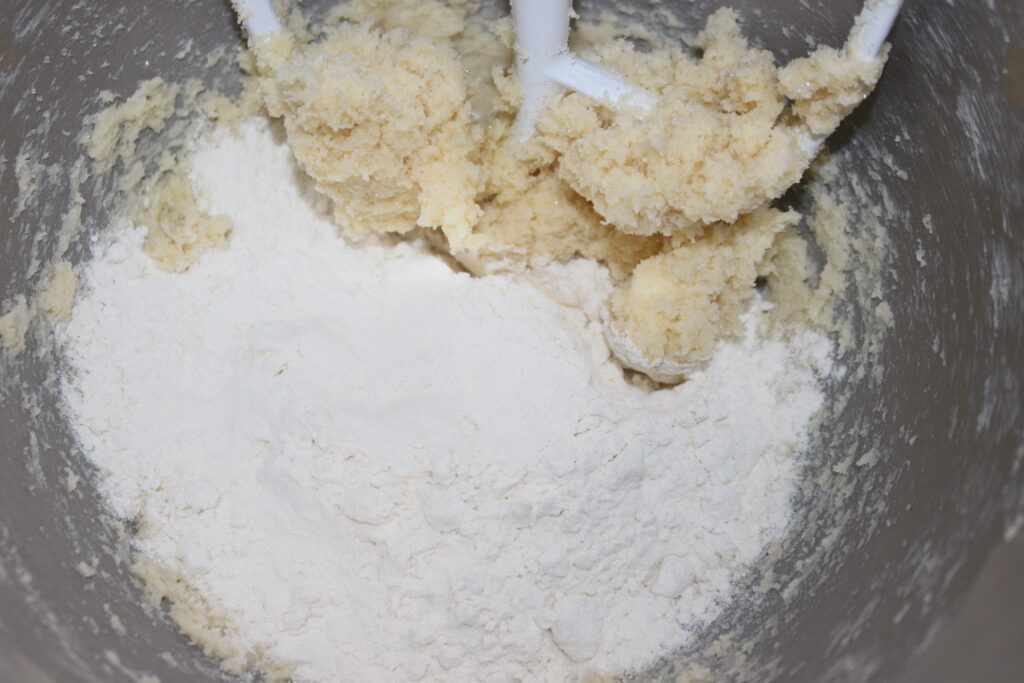
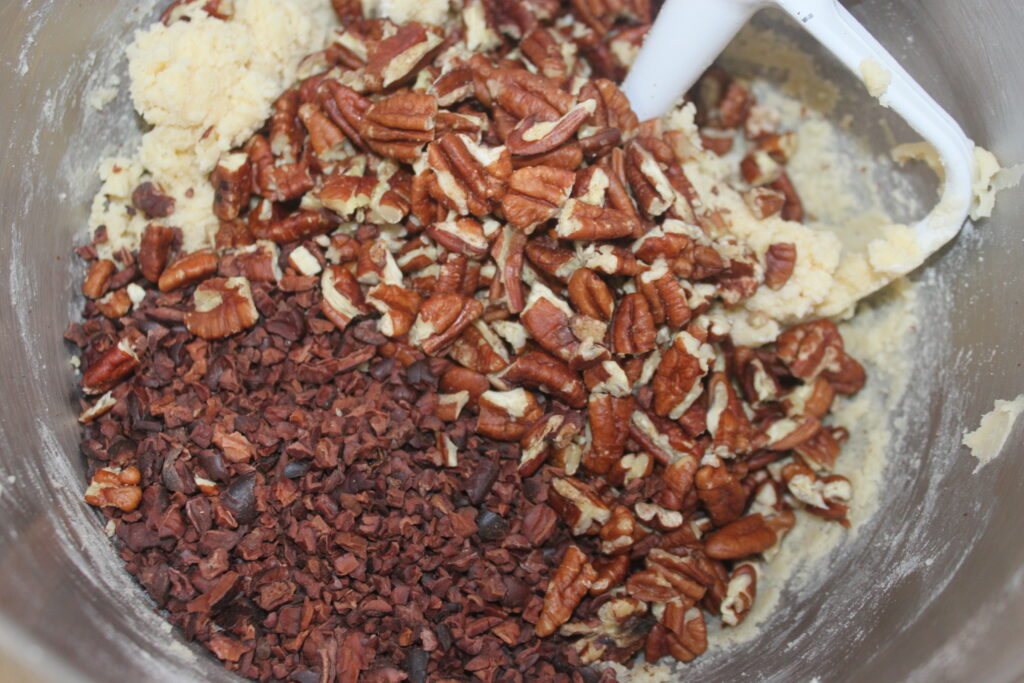
Mix until smooth. Pour in the chopped pecans and cocoa nibs.
Weigh out 60g dumplings to make 12 large shortbreads.
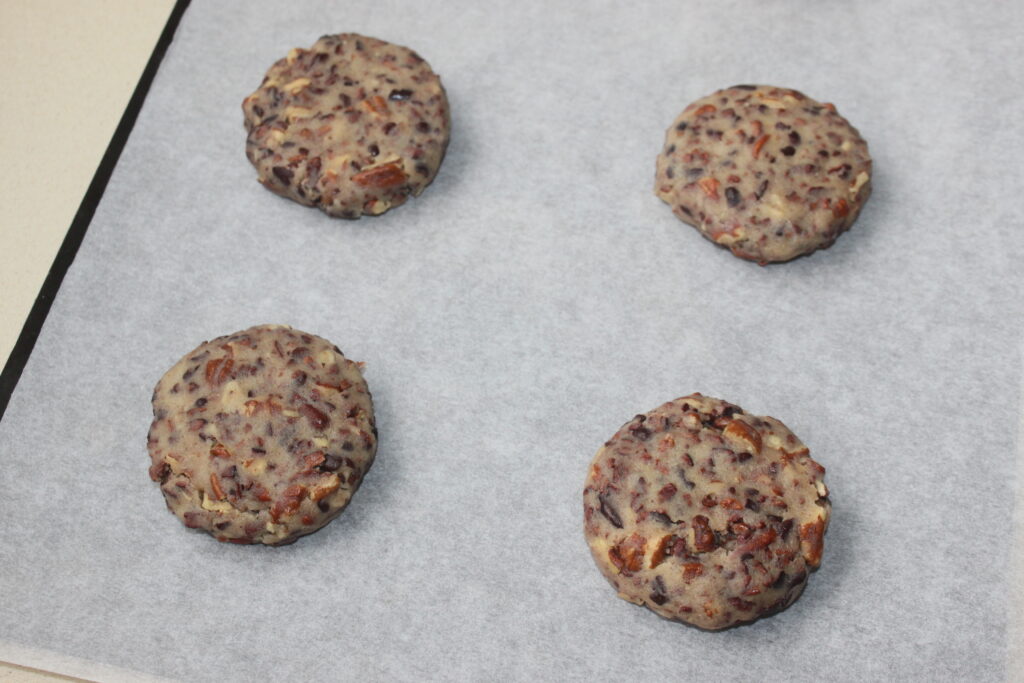
Bake for 30 minutes at 160°C over fan assisted heat. The shortbread should be well browned.
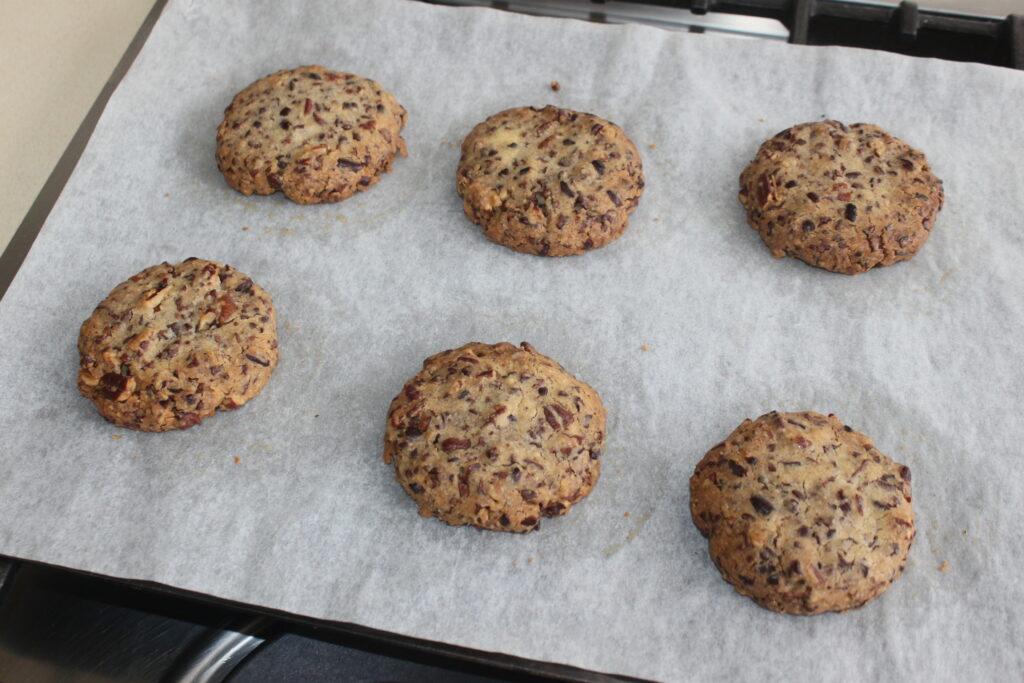
Leave to cool before storing in an airtight tin.
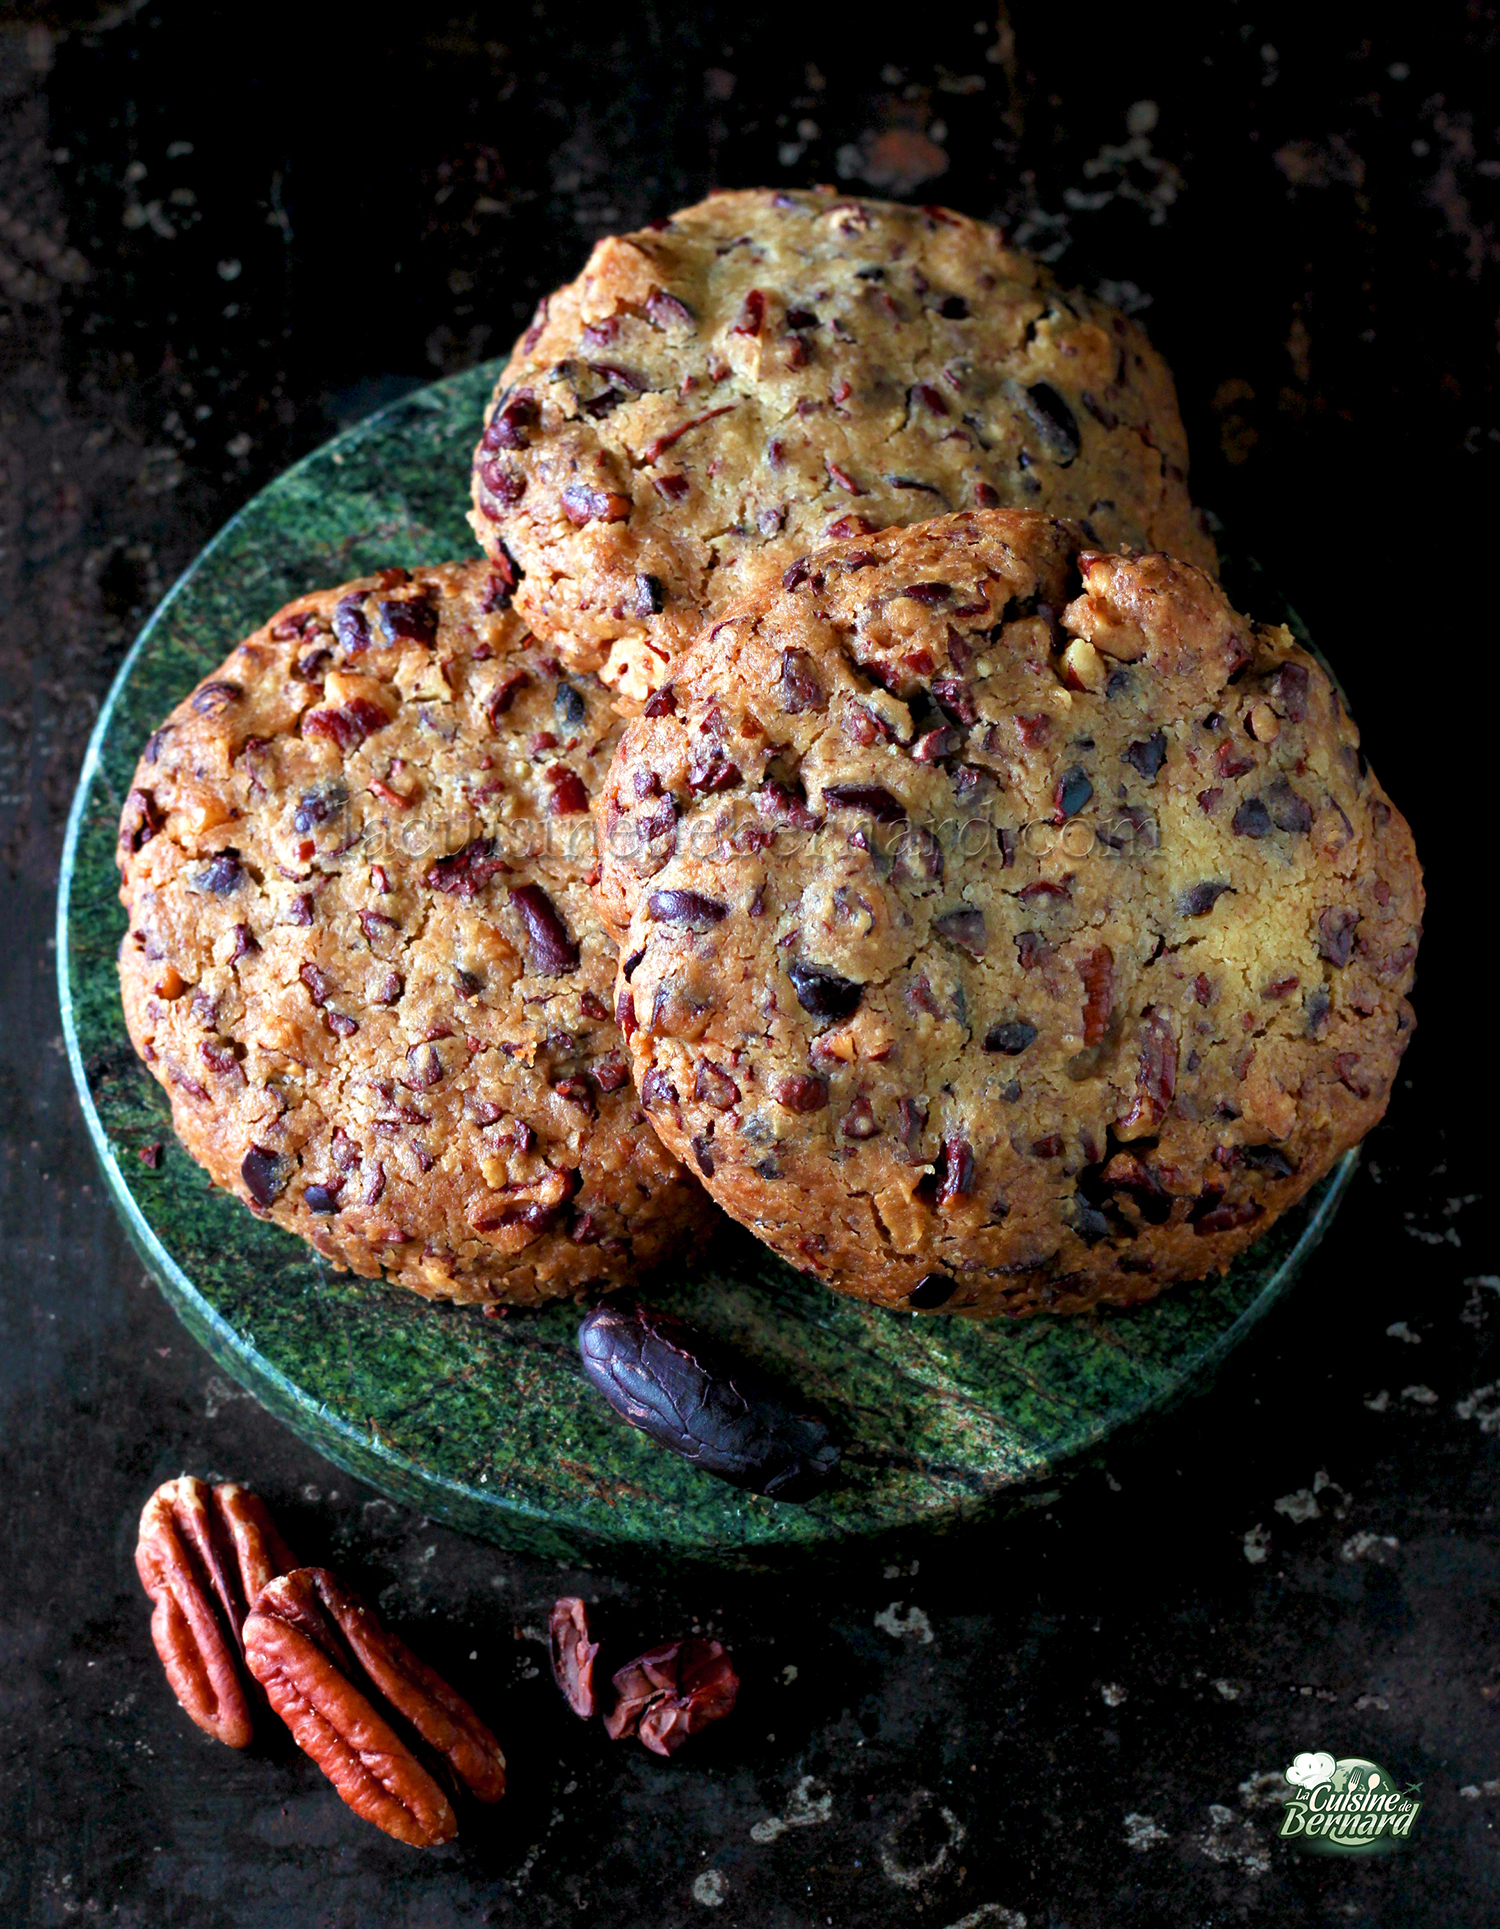

Sablés grué cacao et noix de pécan
Ingredients
- 80 g sucre roux
- 165 g beurre demi-sel
- 185 g farine T55
- 150 g grué de cacao torréfié
- 150 g noix de pécan
Instructions
- Pour le grué, j’ai torréfié le mien à 160°C pendant 15 minutes. Faites-le si vous l’achetez cru.
- Mettez le sucre roux et le beurre dans un récipient, mélangez bien jusqu’à avoir une consistance de crème.
- Ajoutez alors la farine et mélangez de nouveau.
- Mélangez jusqu’à ce que la pâte soit homogène. Versez les noix de pécan coupées en morceaux et le grué de cacao.
- Pesez des boulettes de 60g pour faire 12 gros sablés.
- Faites cuire 30 minutes à 160°C sur chaleur tournante. Les sablés doivent être bien dorés.
- Laissez refroidir avant de ranger dans une boite hermétique.
Nutrition
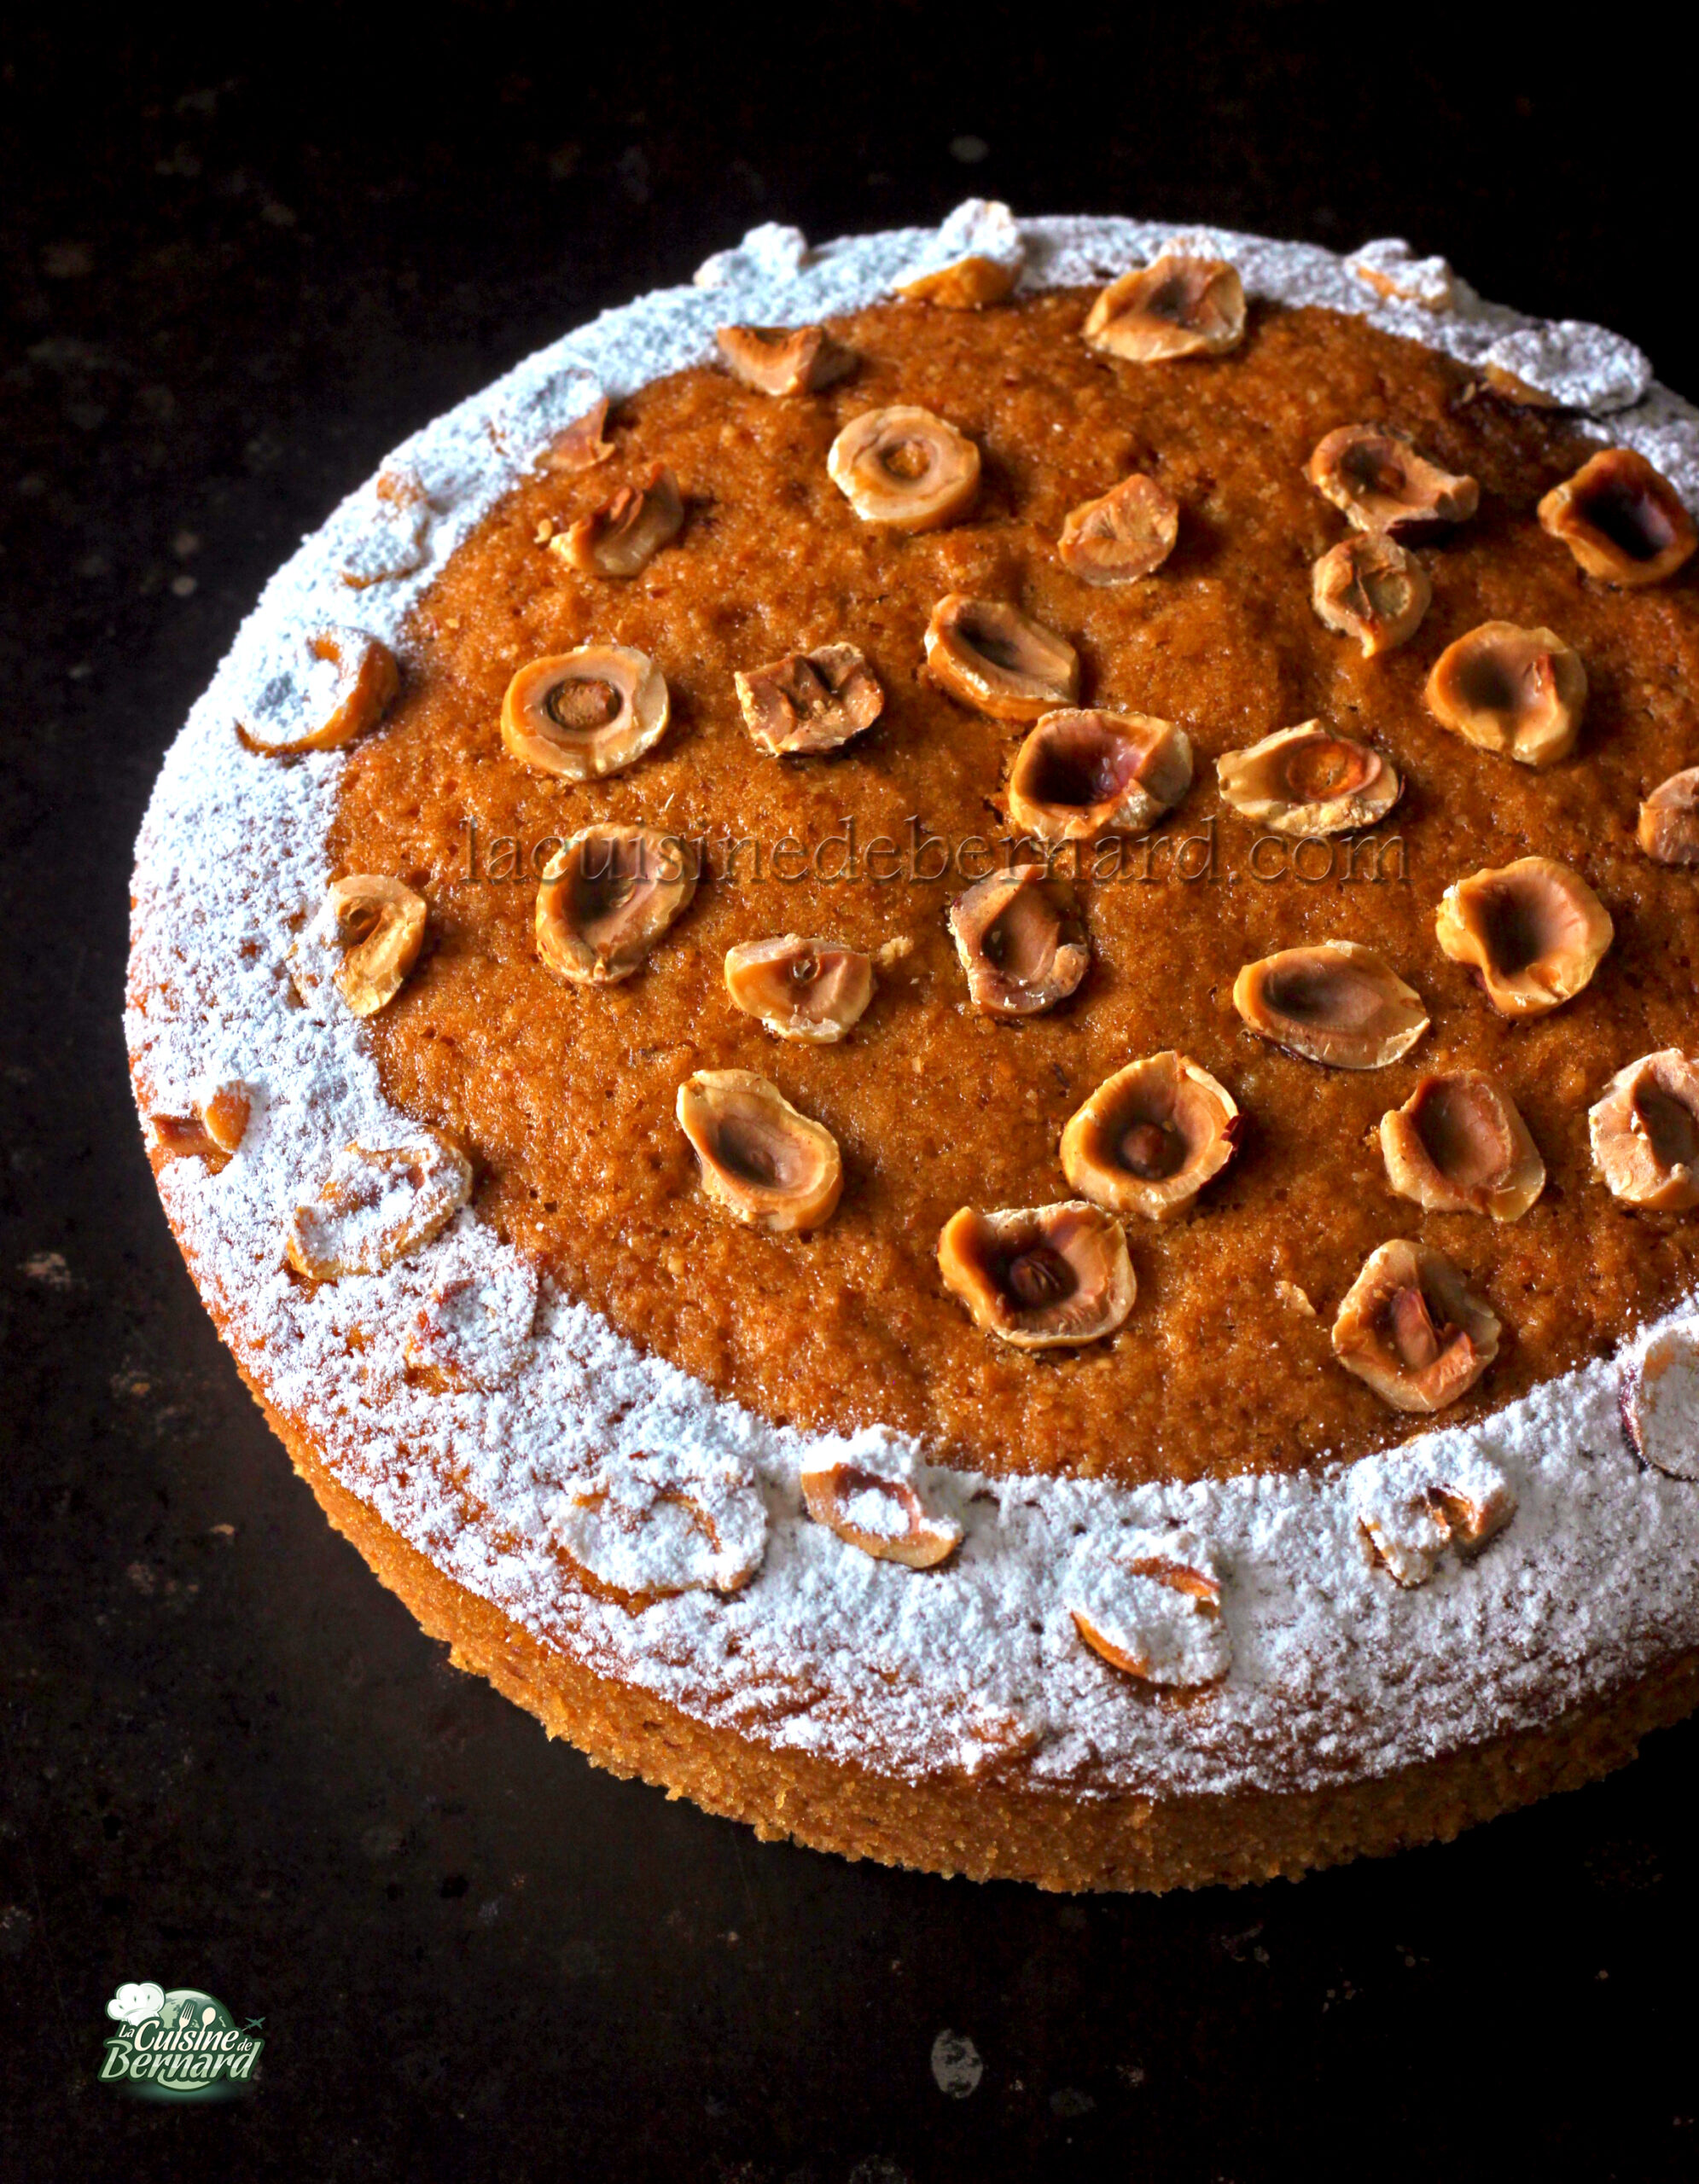
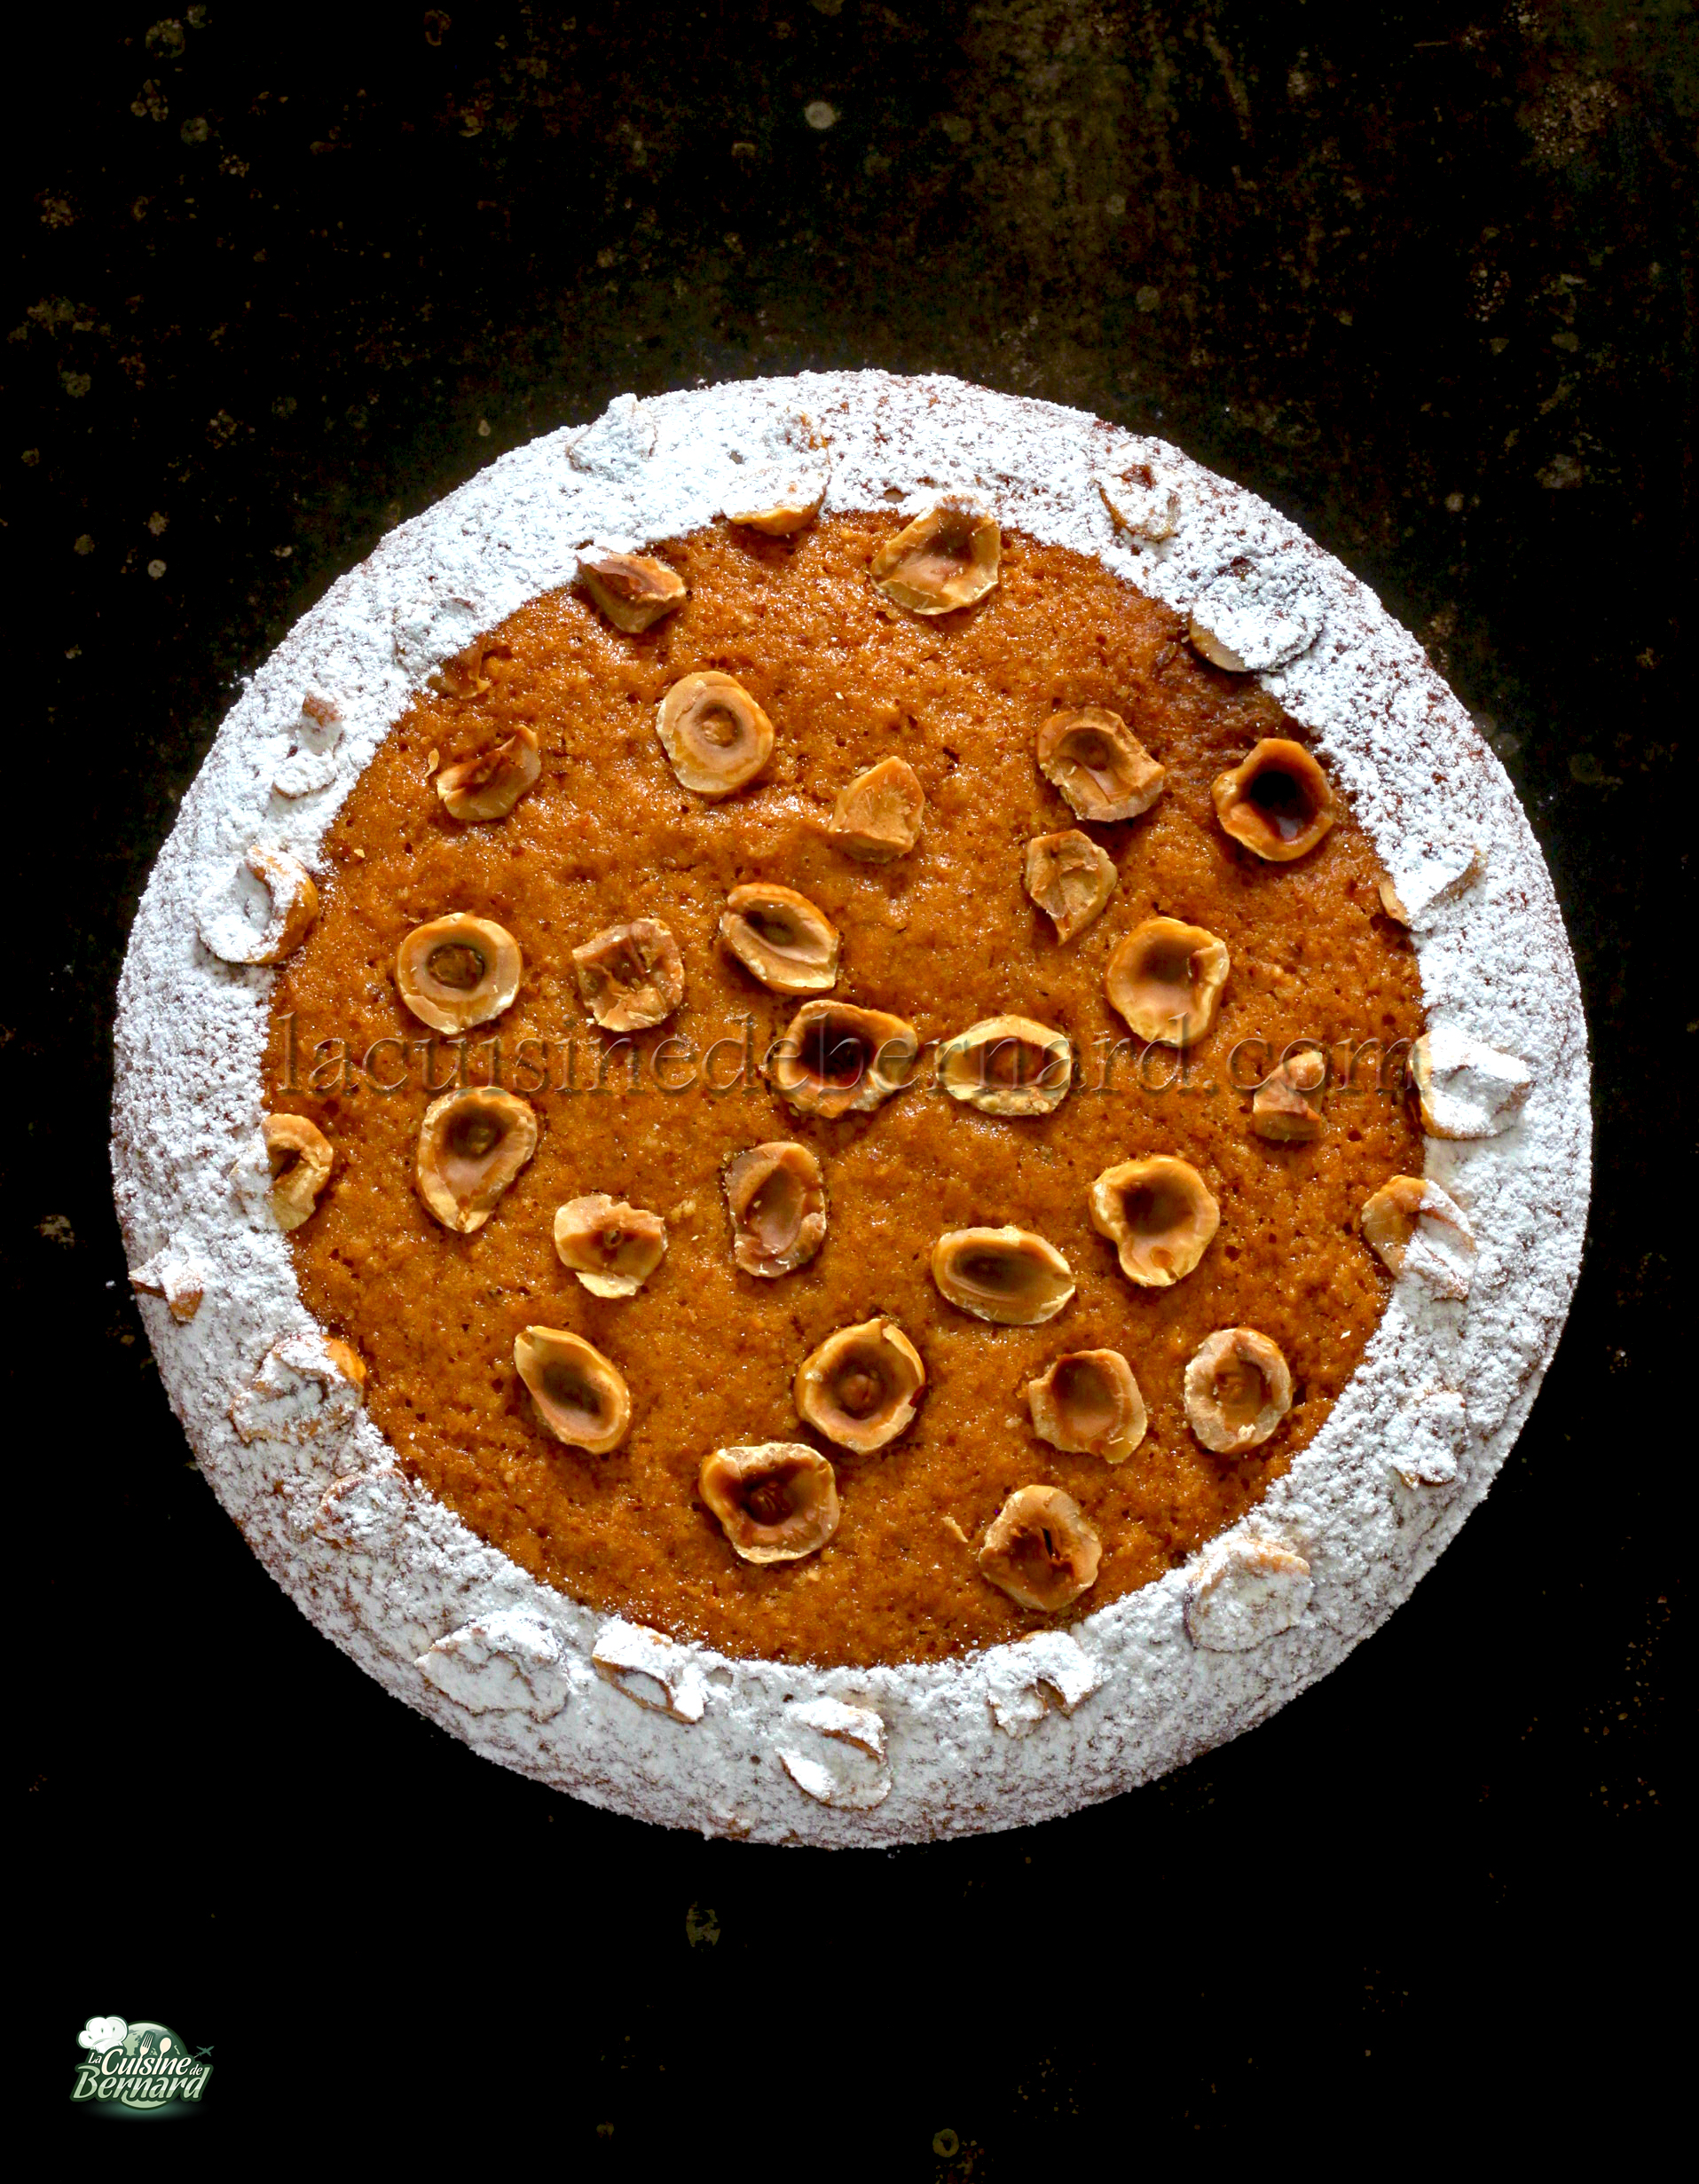
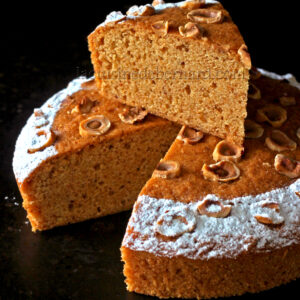
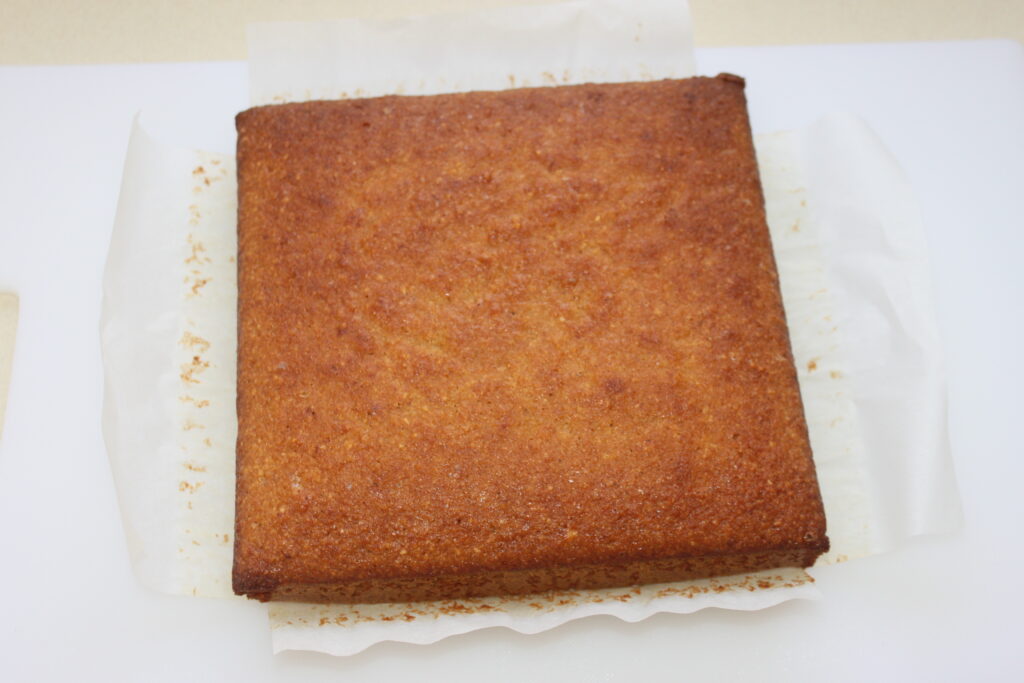
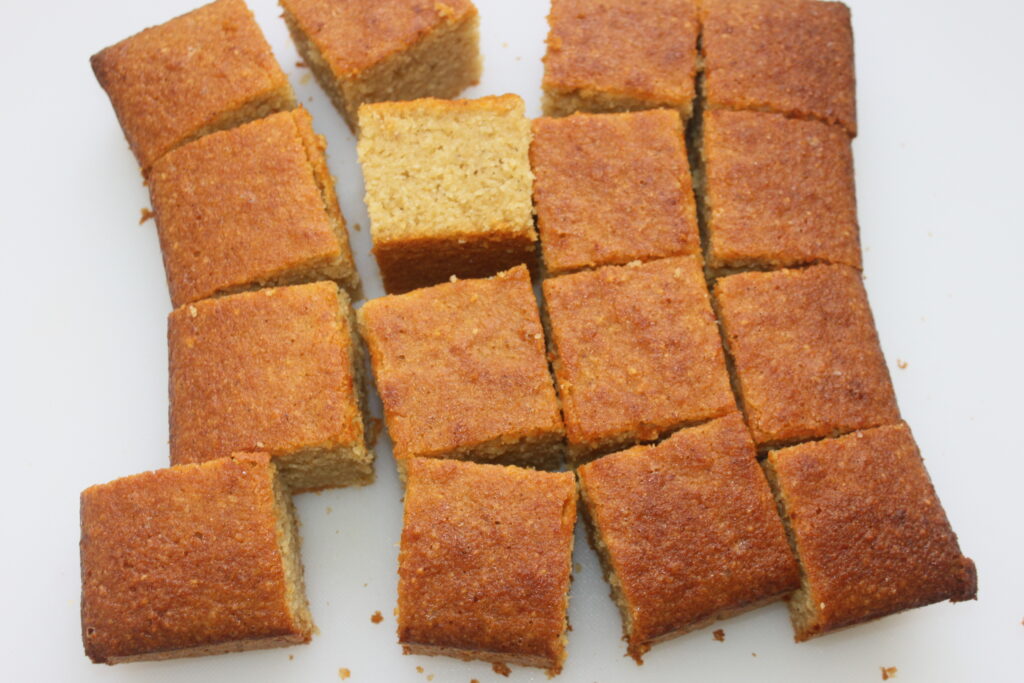
I really like the idea of travel cakes, these cakes that keep for quite a long time. It contains no cream or butter and reveals the intense taste of roasted hazelnuts. It’s very easy to prepare, but you’ll need to be a little early to toast the hazelnut powder that will be used to make this perfect tea-time cake!
For a 20cm mould:
- 100g whole raw hazelnuts
- 230g hazelnut powder
- 170g brown sugar
- 180g egg white
- 90g flour
- 4g baking powder
- 1/4 teaspoon of salt
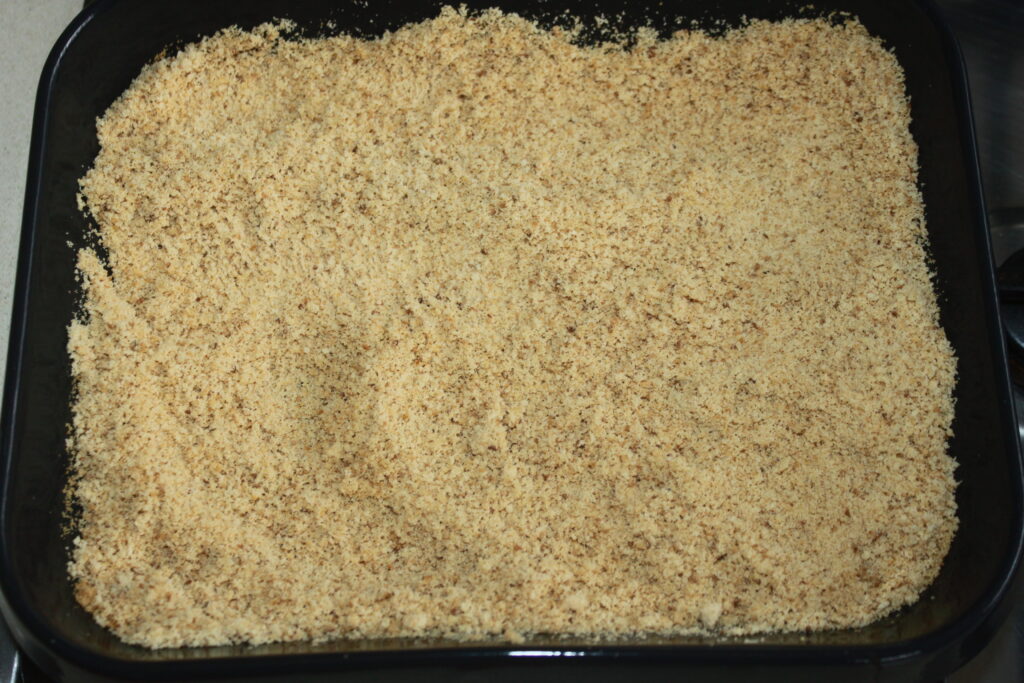
Place the whole raw hazelnuts in an ovenproof dish and do the same for the hazelnut powder.
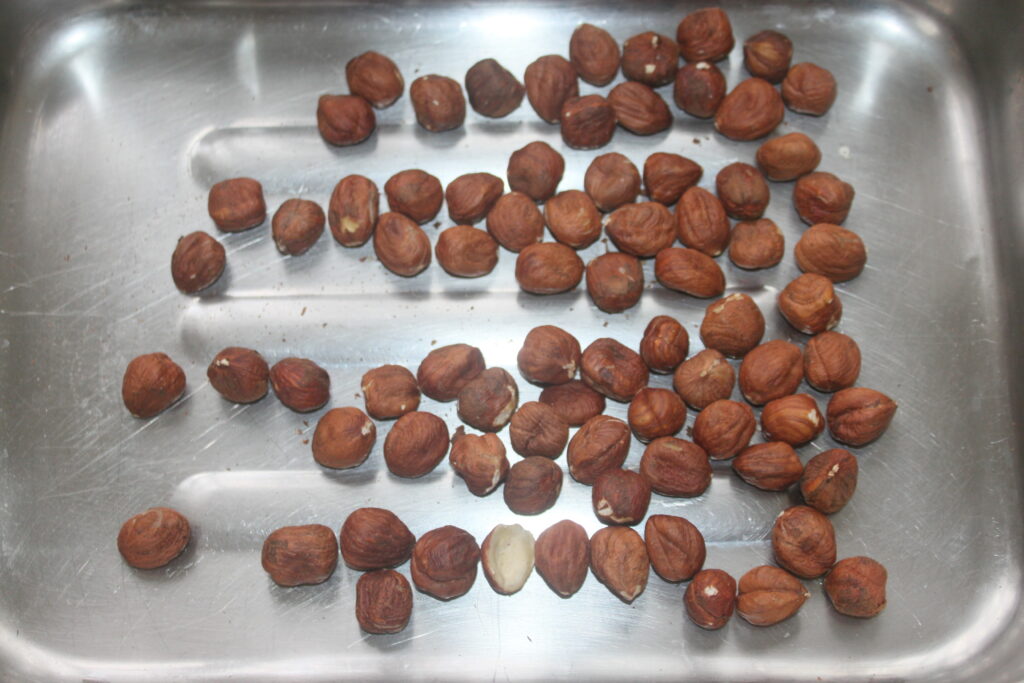
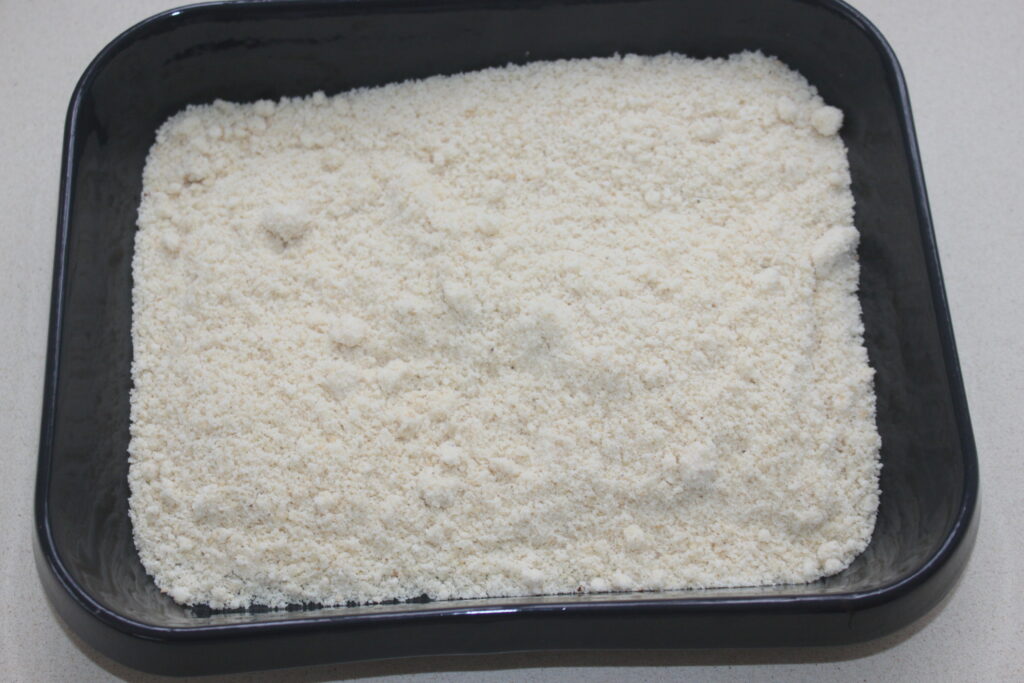
Bake at 170°C for a good 30 minutes. You’ll need to stir the hazelnut powder fairly regularly to ensure even roasting. At the end, the powder takes on a lovely caramel color.
For whole hazelnuts, the skin should crack and they should be nicely browned.

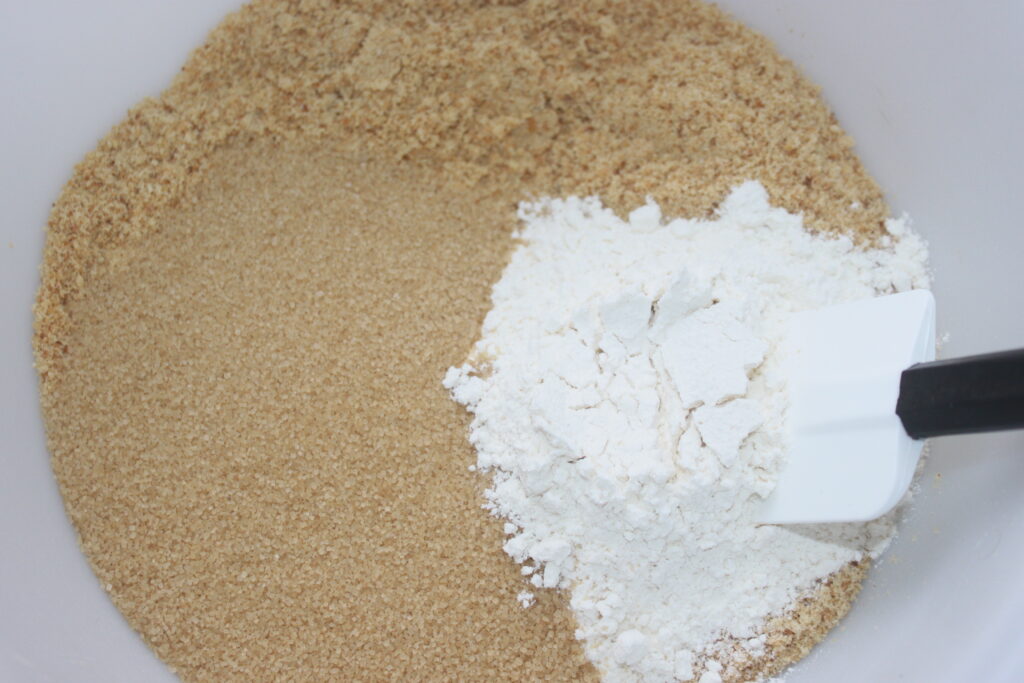
Pour the roasted hazelnut powder, brown sugar, flour, baking powder and salt into a bowl. Mix.
Pour in the 180g of egg white (to do this, collect the whites of 5 or more eggs, and weigh out the quantity required). Mix again.
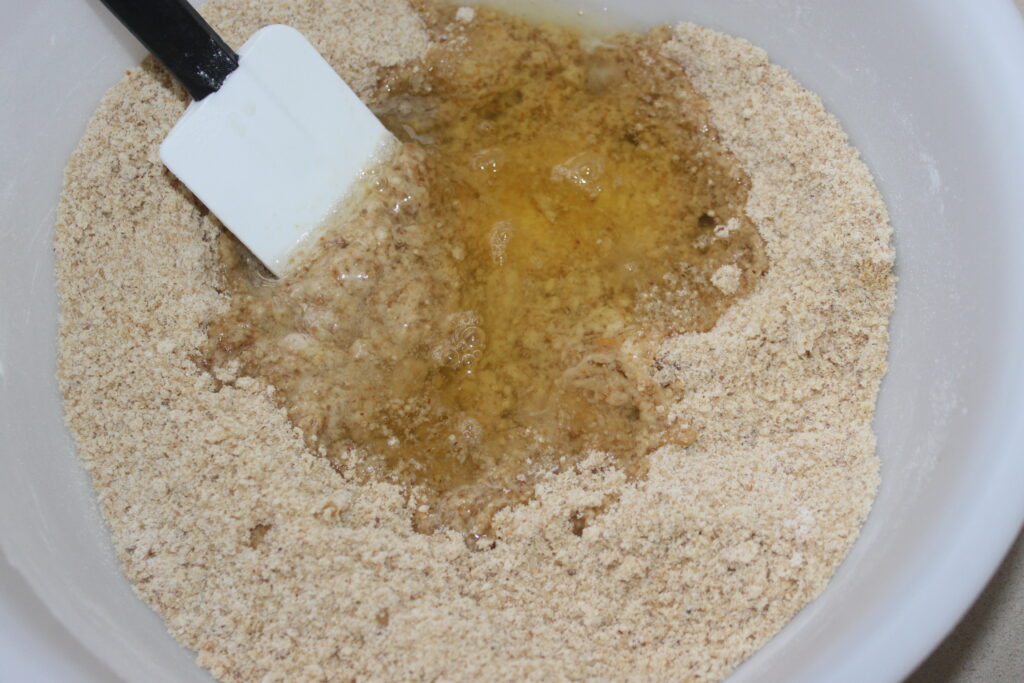
The dough should be homogeneous.

Pour into a mould lined with greaseproof paper and grease the inside edge. Pour in the dough, then arrange pieces of toasted hazelnuts on top.
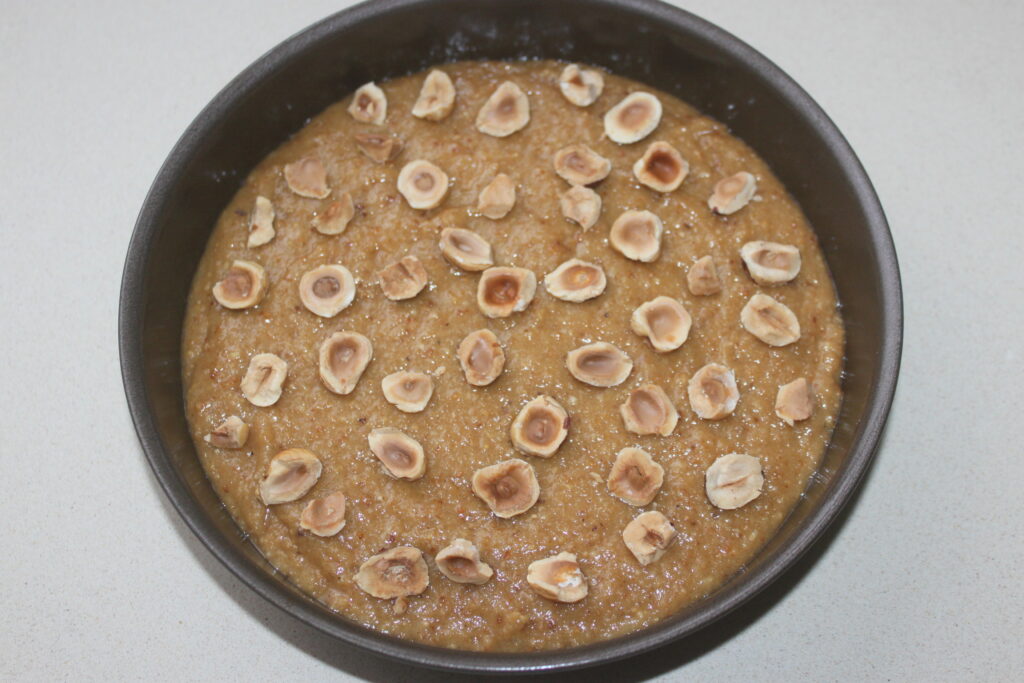
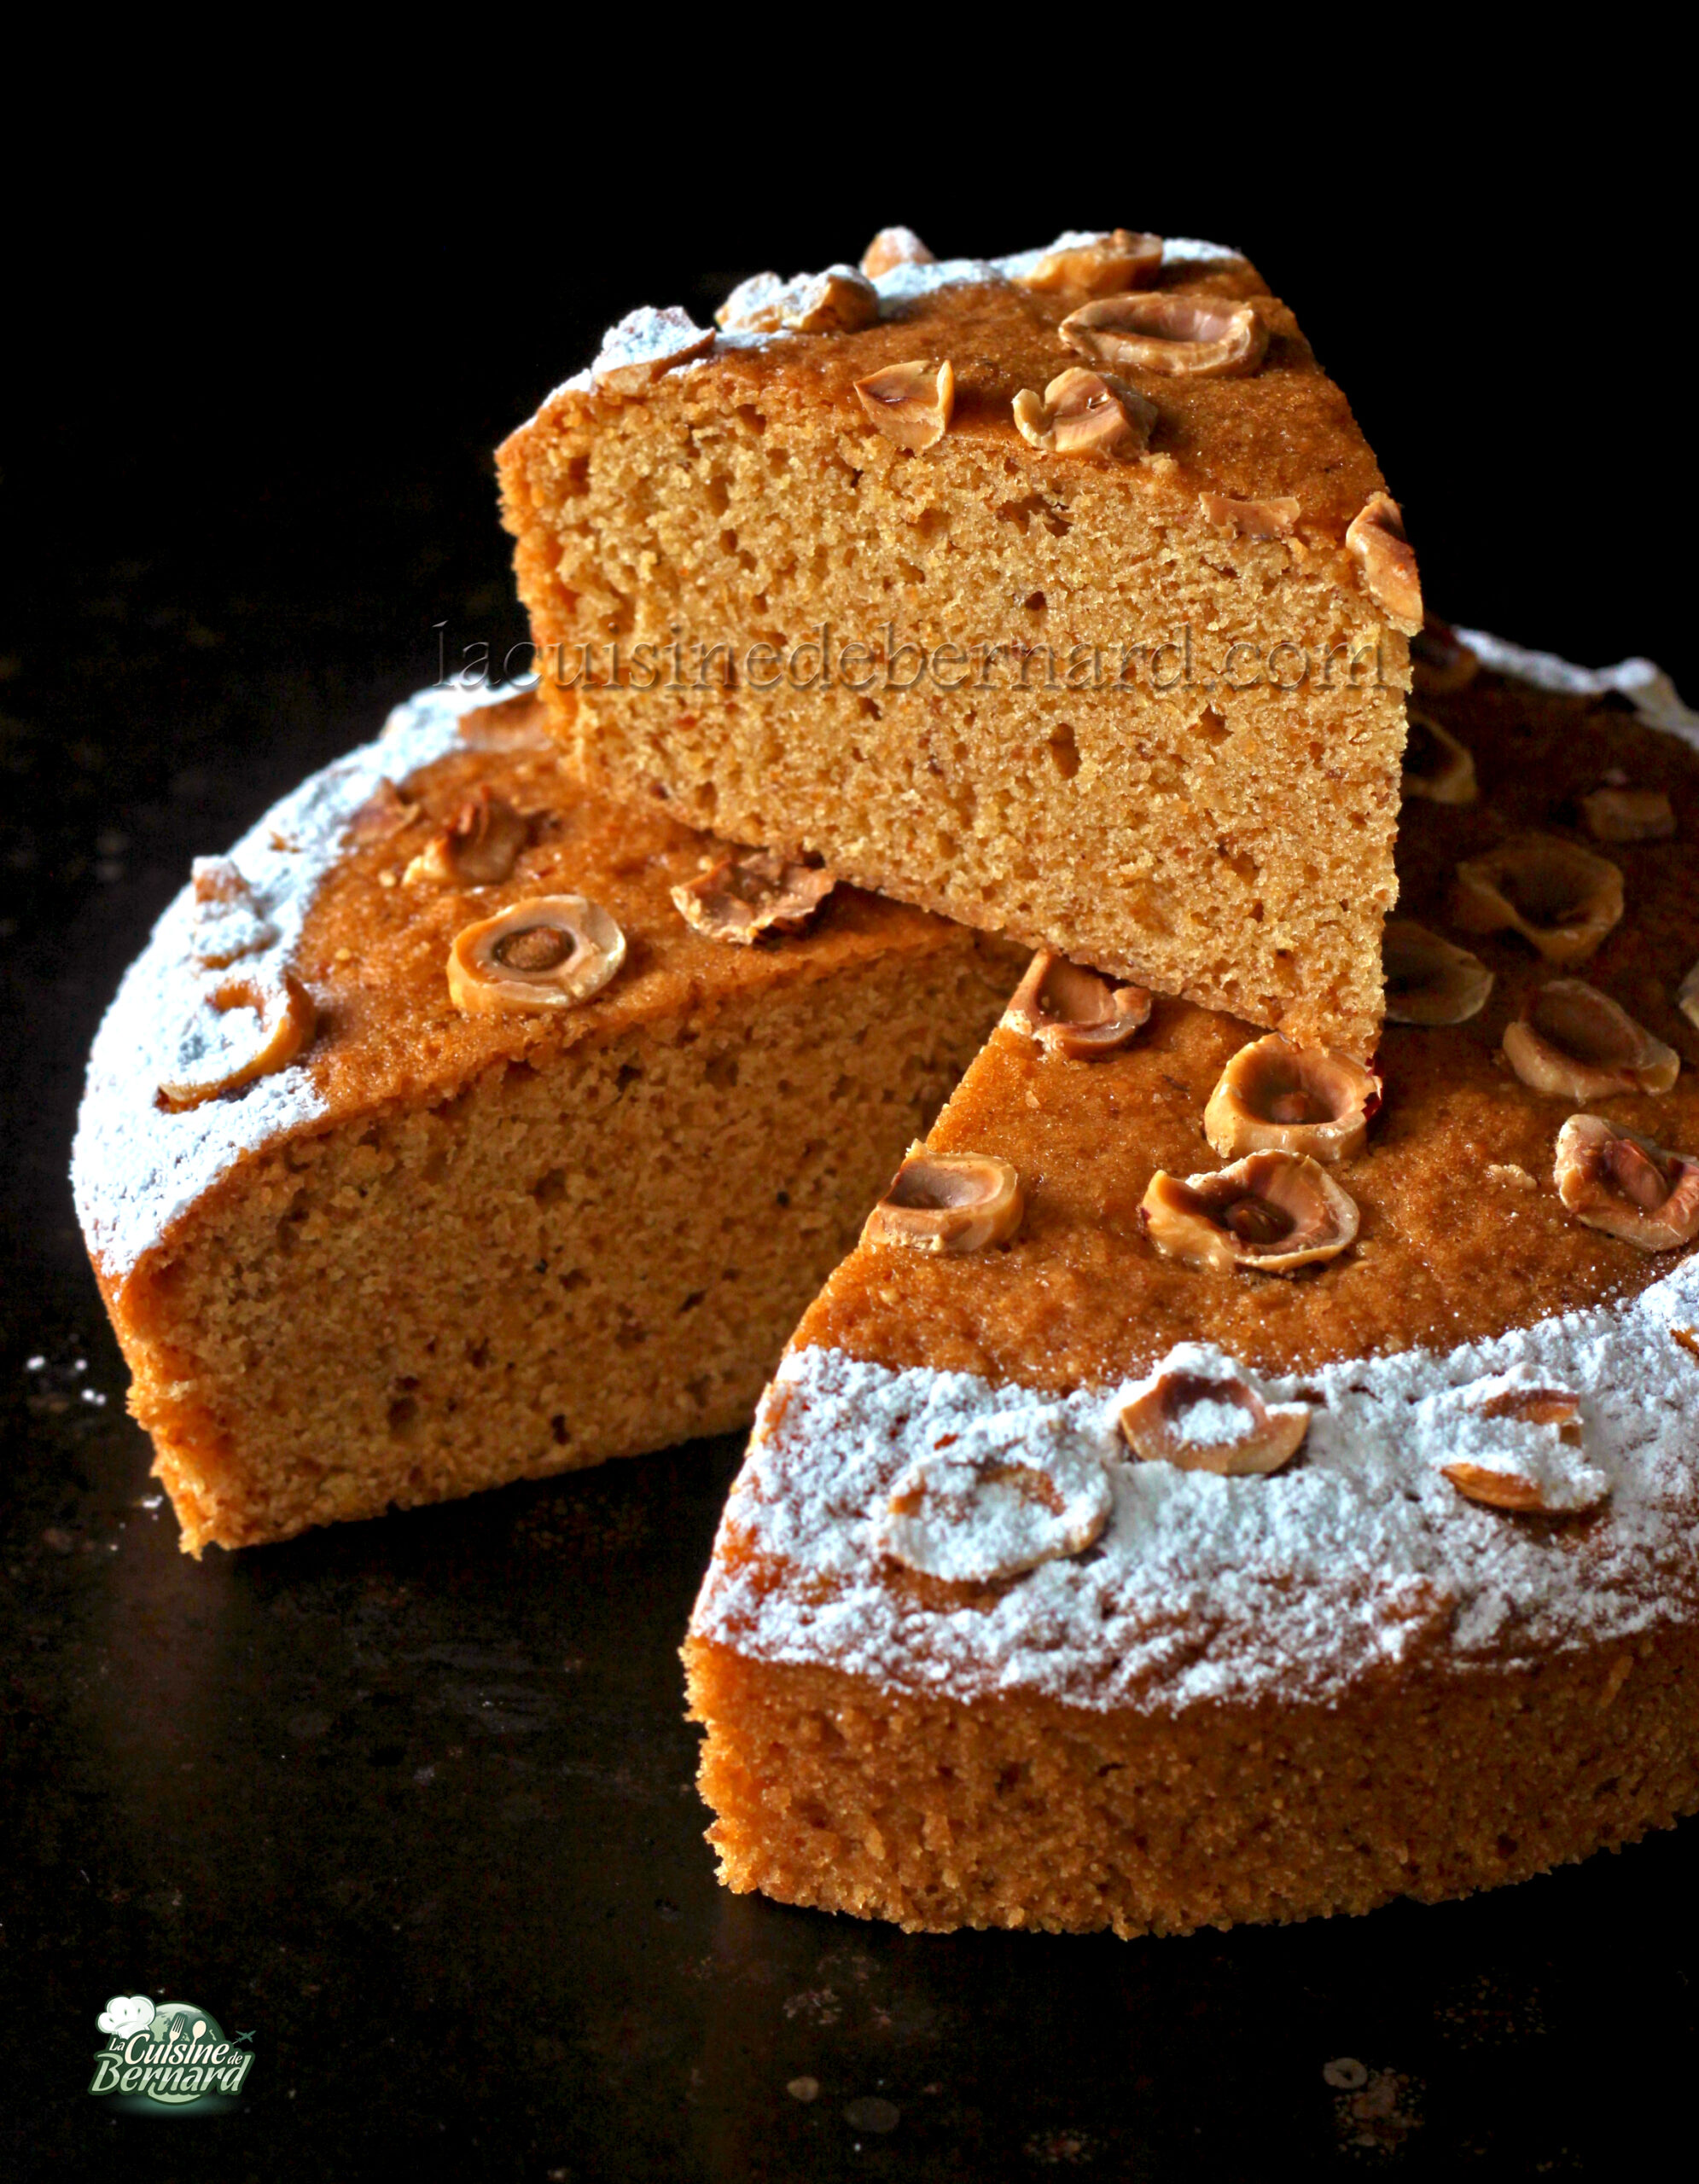
Bake for 40 minutes at 155°C over static heat (not convection heat), then lower the temperature to 120°C with steam function if you have this option, and bake for a further 30 minutes. Without the steam function, lower the temperature to 120°C by placing a dish of boiling water in the bottom of the oven and bake for 30 minutes. Leave the cake to cool, turn out carefully and sprinkle with powdered sugar as required.
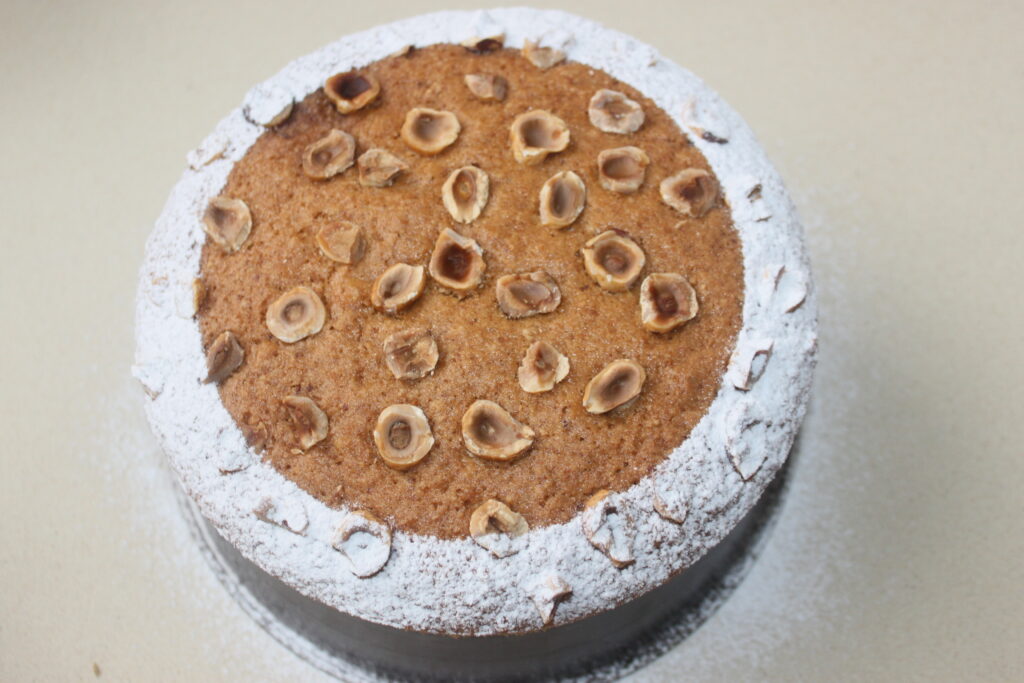
It will be perfect for a snack!
Gâteau noisette intense
Ingredients
- 100 g noisettes crues entières
- 230 g poudre de noisette
- 170 g sucre roux
- 180 g blanc d'œuf
- 90 g farine
- 4 g levure chimique
- 1/4 c. à café sel
Instructions
- Mettez les noisettes crues entières dans un plat allant au four et faites de même pour la poudre de noisette.
- Mettez au four à 170°C pendant une bonne trentaine de minutes. Il faudra mélanger la poudre de noisette assez régulièrement pour qu’elle torréfie de façon homogène. À la fin, la poudre prend une jolie couleur caramel.
- Pour les noisettes entières, il faut que la peau craque et qu’elles soient joliment dorées. Versez la poudre de noisette torréfiée, le sucre roux, la farine, la levure chimique et le sel dans un récipient. Mélangez.
- Versez les 180g de blanc d’œuf (pour cela, récupérez le blanc de 5 œufs ou plus, et pesez la quantité nécessaire). Mélangez de nouveau. La pâte doit être homogène.
- Versez dans un moule dont vous aurez tapissé le fond de papier sulfurisé et graissé le bord interne. Versez la pâte, puis disposez des morceaux de noisettes grillées concassées sur le dessus.
- Faites cuire 40 minutes à 155°C sur chaleur statique (pas chaleur tournante), puis baissez la température à 120°C avec fonction vapeur si vous avez cette option, et faites cuire 30 minutes de plus. Sans la fonction vapeur, baissez la température à 120°C en mettant un plat d’eau bouillante dans le bas du four et faites cuire 30 minutes. Laissez refroidir le gâteau, démoulez-le délicatement puis saupoudrez à l’envie de sucre glace.
Nutrition
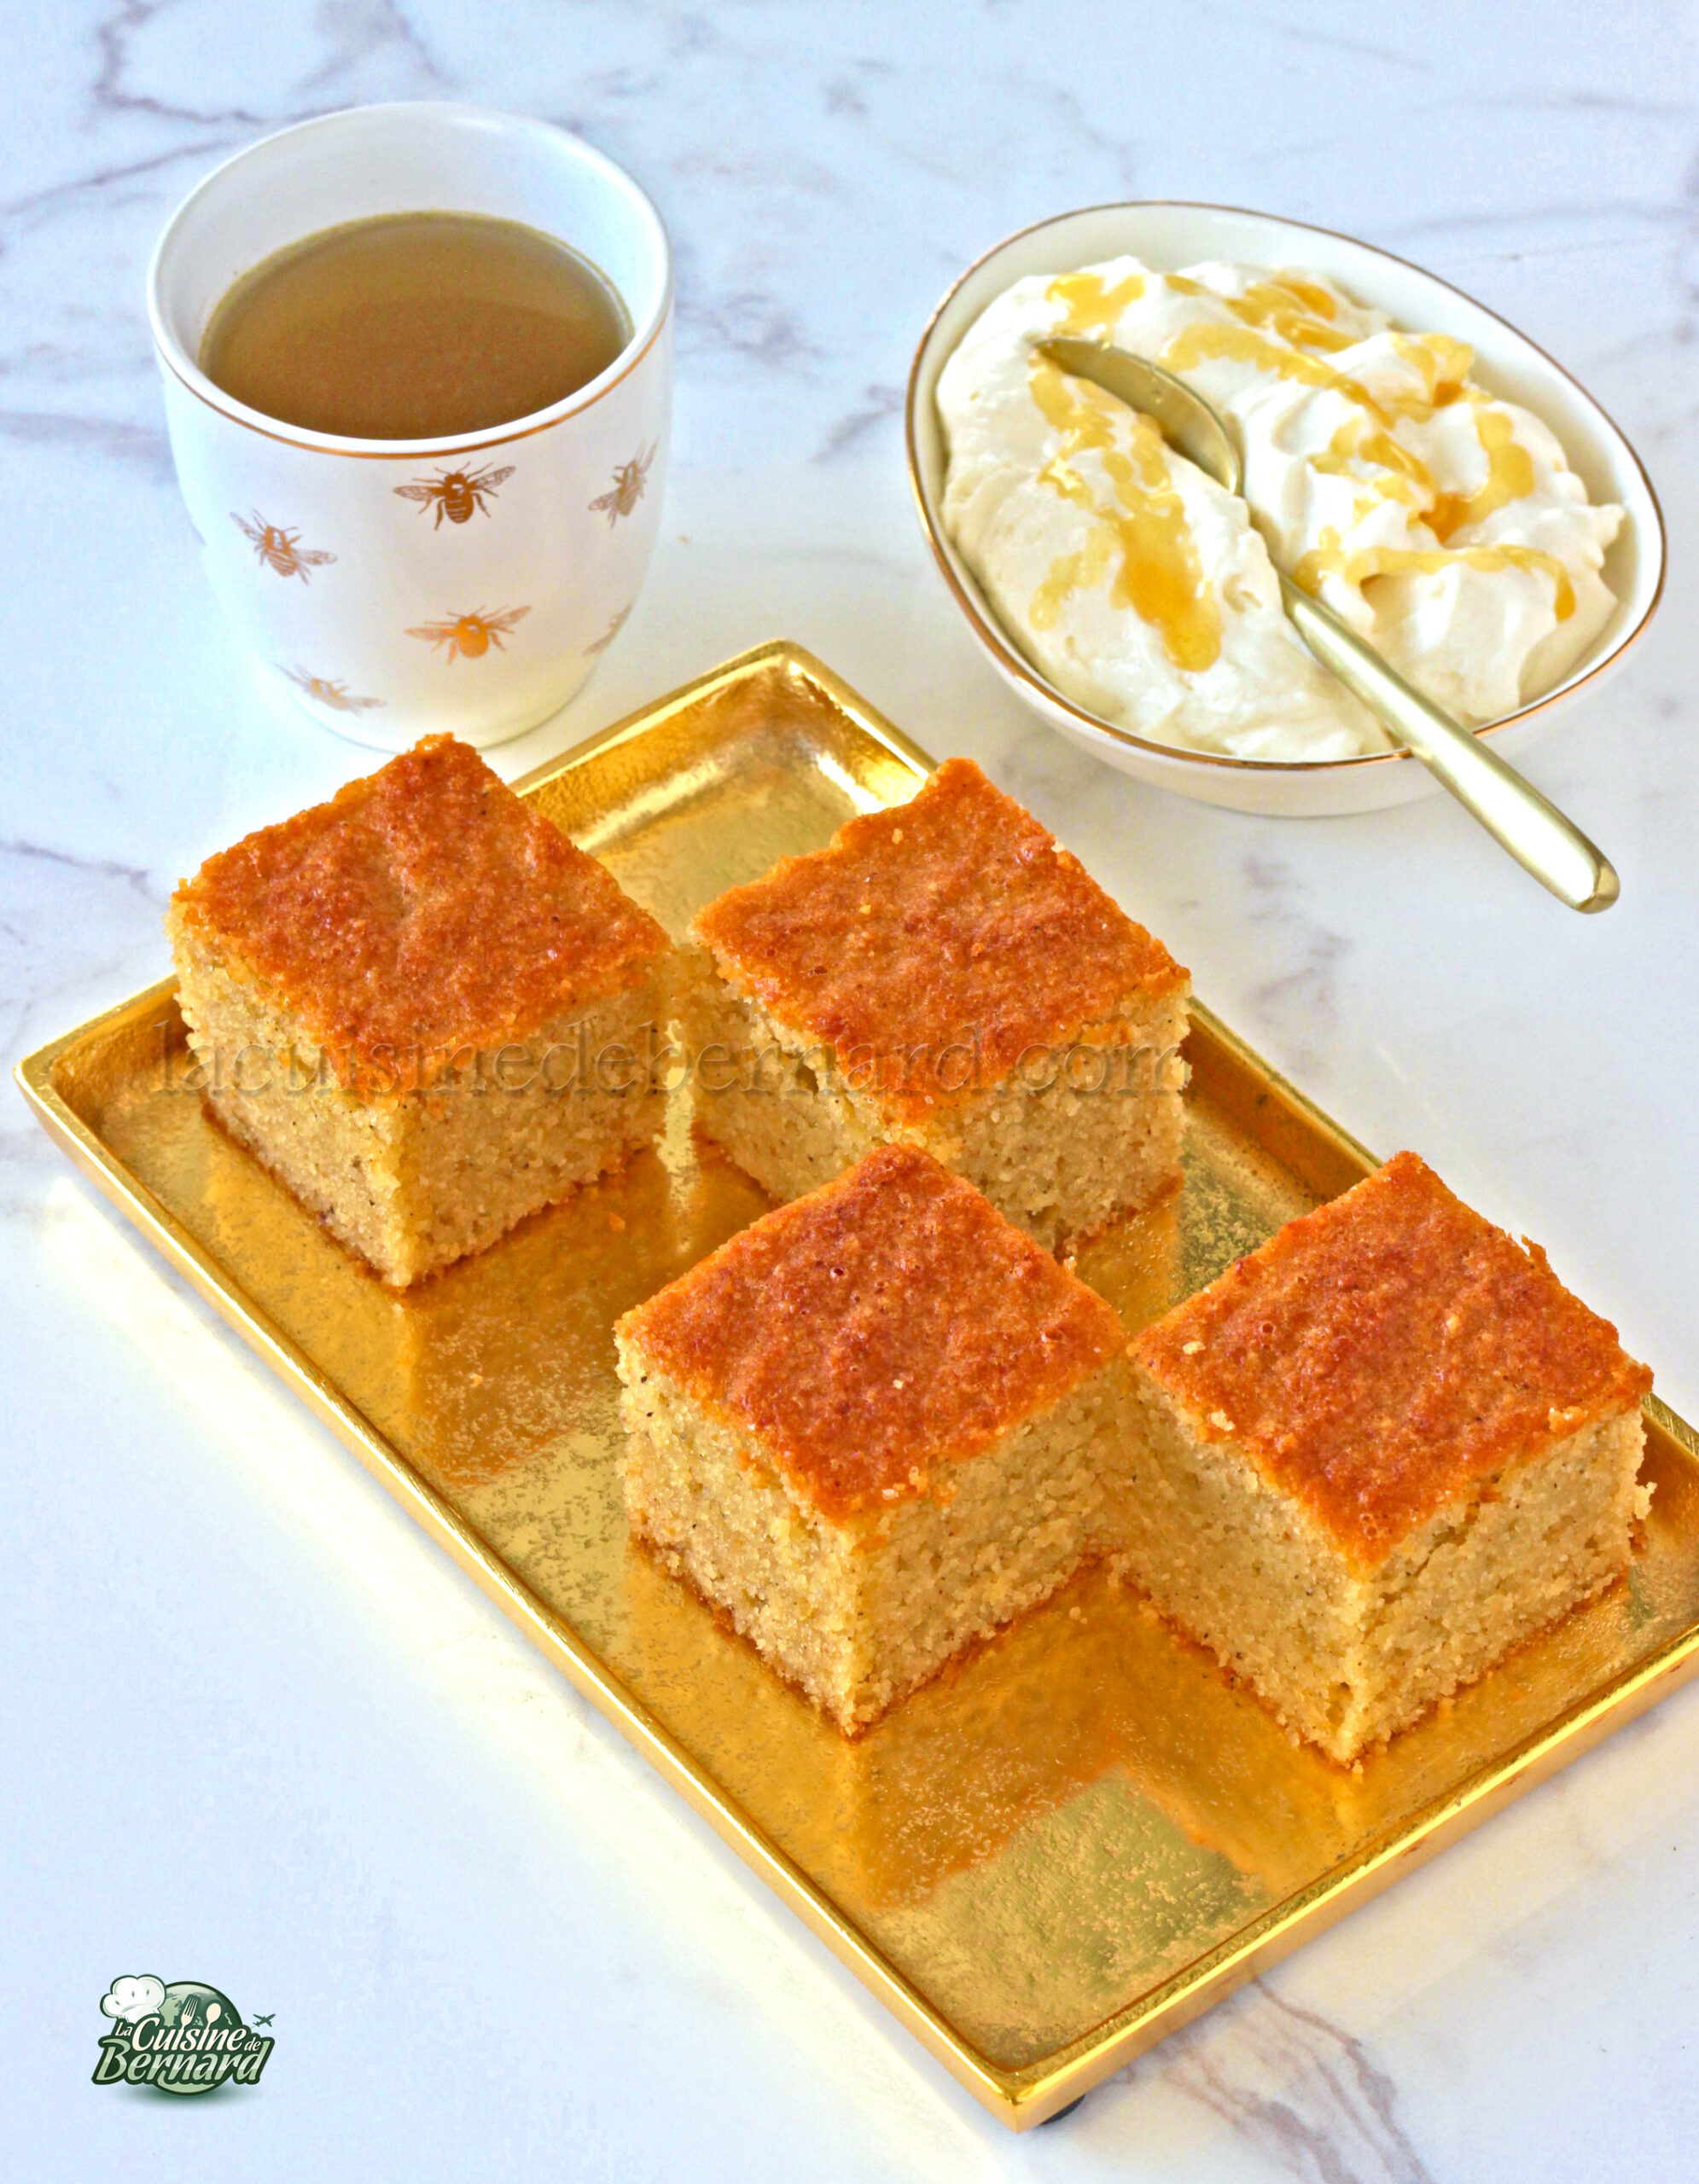
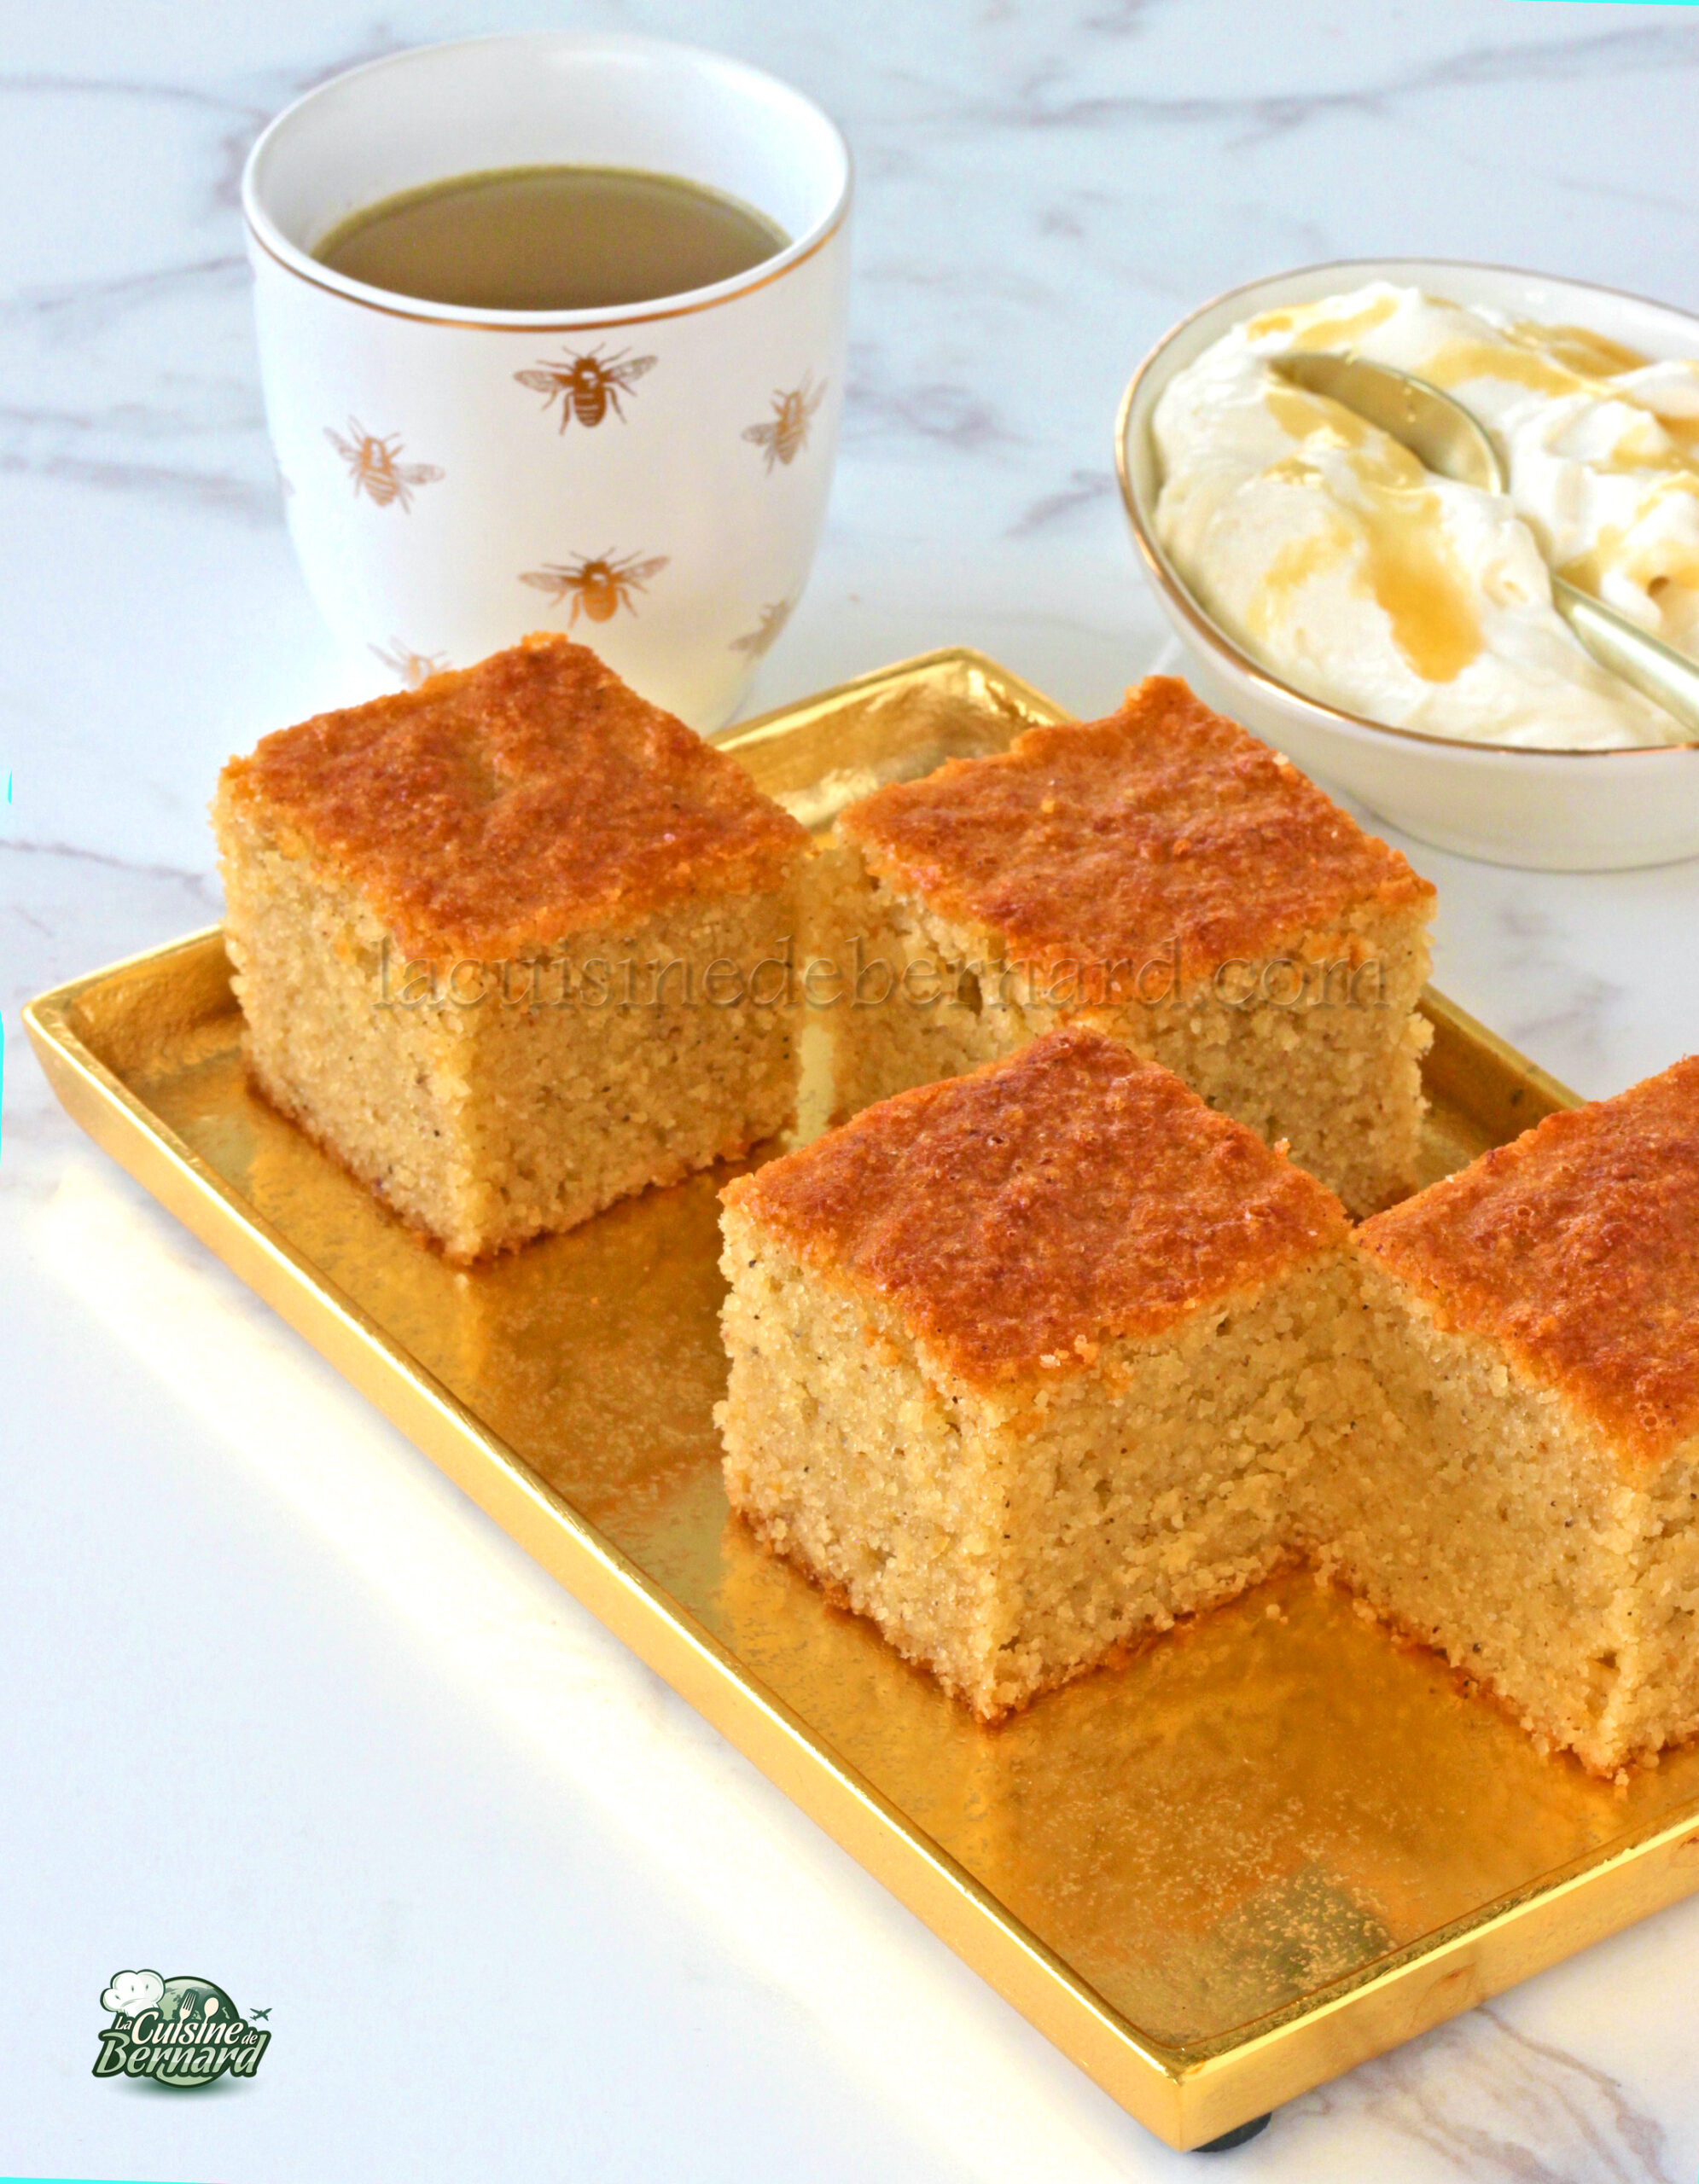
Here’s a delicious and surprising cake, with an almond base and a good taste of honey, but also with a rather unexpected ingredient that adds a lovely texture. It’s delicious on its own, well chilled or at room temperature, but even more so if accompanied by a totally addictive cream cheese and honey chantilly. It’s very simple, and takes just a few minutes to prepare.
For a 20 cm square mould :
- 300g of egg
- 150g liquid honey of your choice
- 175g rapeseed oil for cooking
- 35g brown sugar
- 250g almond powder
- 100g of breadcrumbs
- 1/2 teaspoon cinnamon powder
- 1/2 teaspoon baking powder
- 1/4 teaspoon of salt
For the honey and cream cheese chantilly :
- 300g cold cream cheese
- 150g cold full cream
- 70g of honey
- 25g chantifix
Pour the eggs, honey, oil and brown sugar into a bowl.
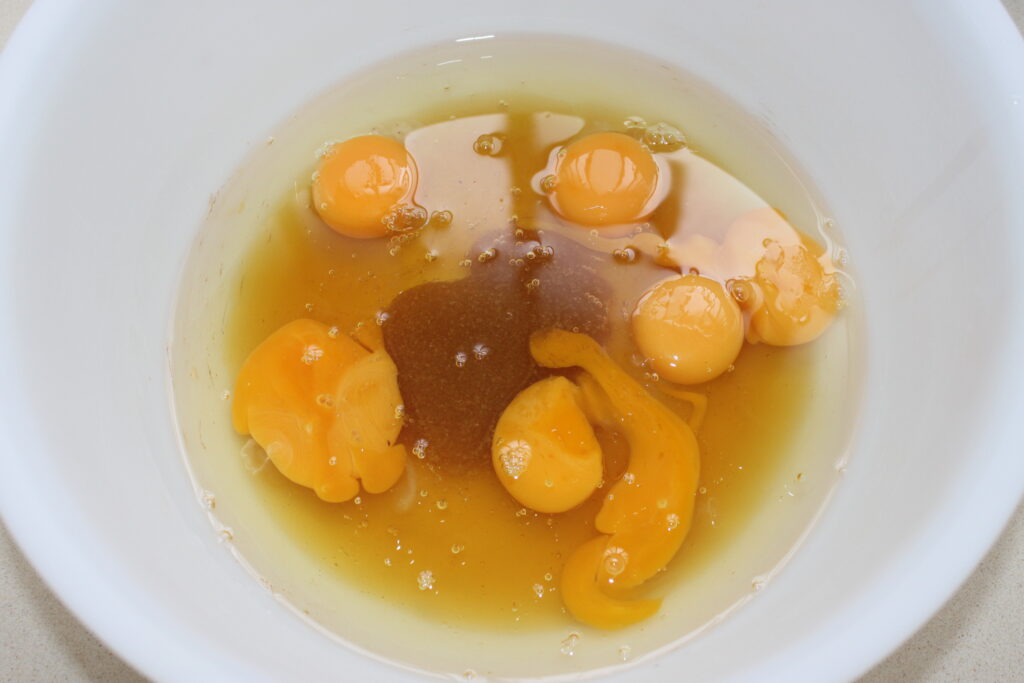
Mix, then add the almond powder, breadcrumbs, cinnamon, salt and baking powder.
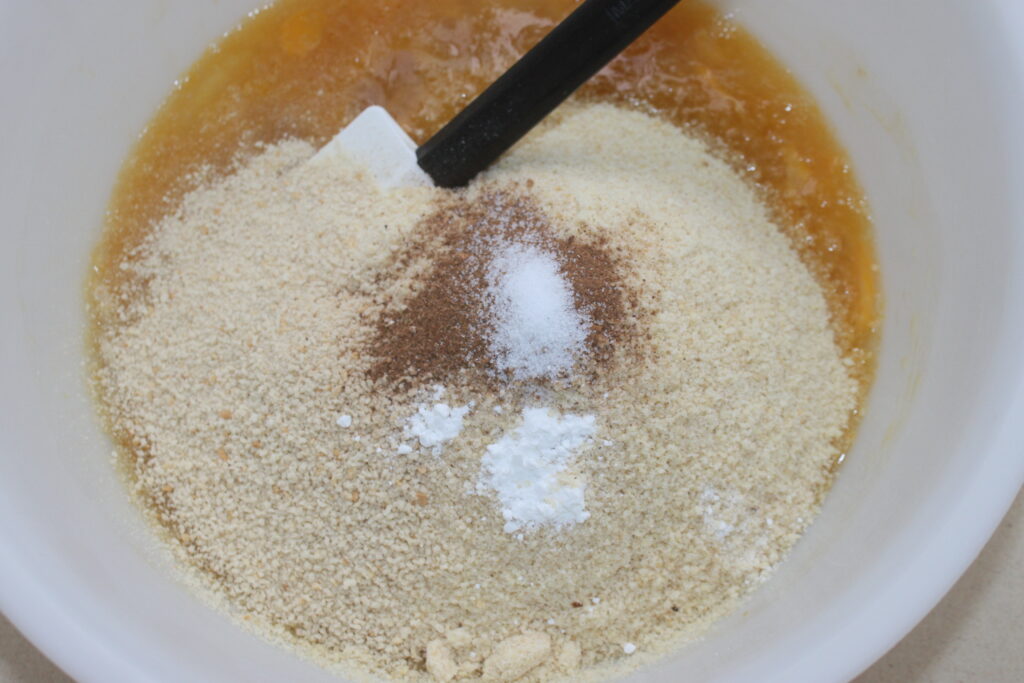
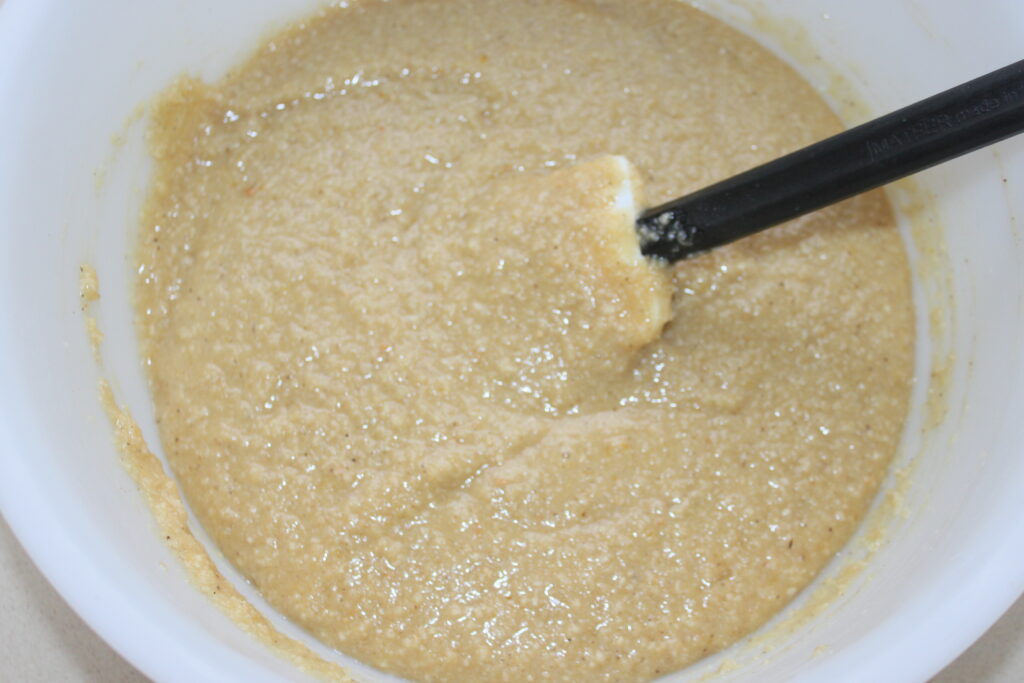
Mix well and leave to stand for 10 minutes.
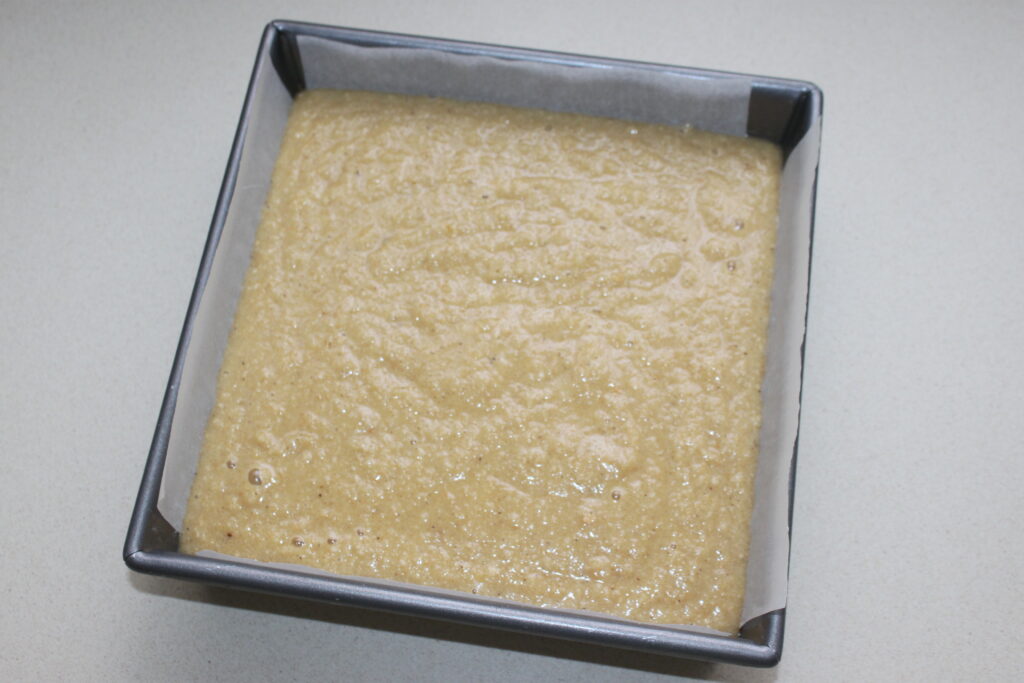
Pour into a square mould lined with baking parchment.
Bake at 170°C over static heat (not over revolving heat) for 40 minutes.
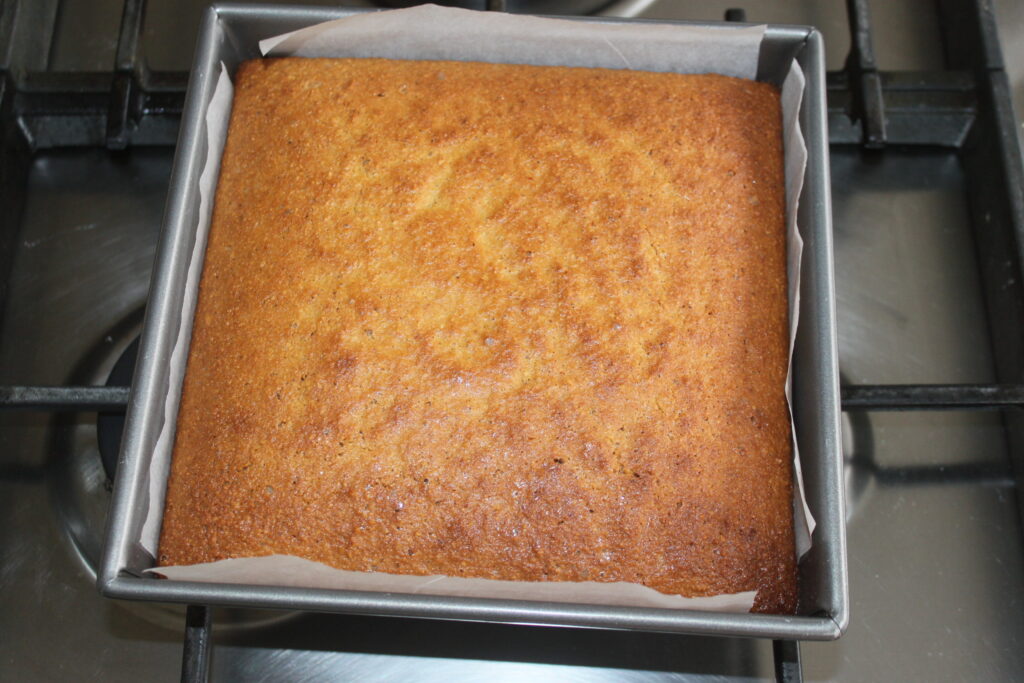
Turn out and leave to cool.
Then simply cut it into slices.
If you want to make the chantilly, pour all the ingredients except the chantifix into a container or into the bowl of your food processor.

Whip at high speed.
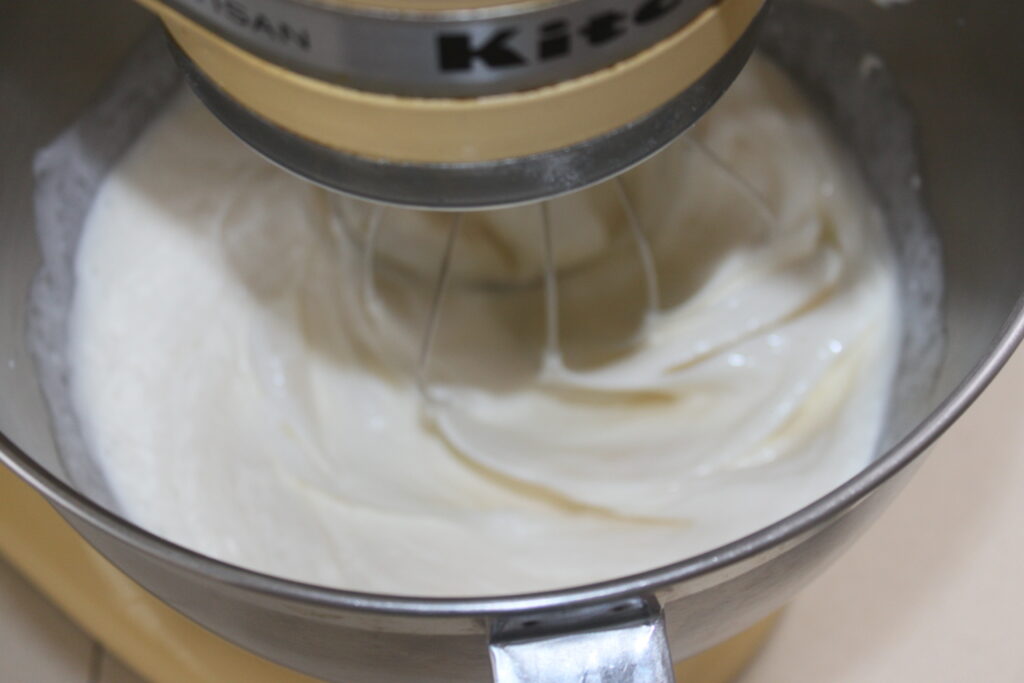
When the whipped cream has firmed, add the chantifix and whisk again to obtain a firm texture.

Serve the cake at teatime with whipped cream on hand!


Honey almond cake
Ingredients
For a 20 cm square mould
- 300 g egg
- 150 g liquid honey
- 175 g rapeseed oil for cooking
- 35 g brown sugar
- 250 g almond powder
- 100 g breadcrumbs
- 1/2 c. coffee powdered cinnamon
- 1/2 c. coffee baking powder
- 1/4 c. coffee salt
For the cream cheese and honey chantilly
- 300 g cream cheese nice and cold
- 150 g full-fat liquid cream very cold
- 70 g honey
- 25 g chantifix
Instructions
- Pour the eggs, honey, oil and brown sugar into a bowl.
- Mix, then add the almond powder, breadcrumbs, cinnamon, salt and baking powder.
- Mix well and leave to stand for 10 minutes.
- Pour into a square mould lined with greaseproof paper.
- Bake at 170°C over static heat (not over revolving heat) for 40 minutes.
- Turn out and leave to cool. Then simply cut it into slices.
- If you want to make the chantilly, pour all the ingredients except the chantifix into a container or into the bowl of your food processor. Whip at high speed.
- When the whipped cream has firmed, add the chantifix and whisk again to obtain a firm texture.
- Serve the cake at teatime with whipped cream on hand!
Nutrition
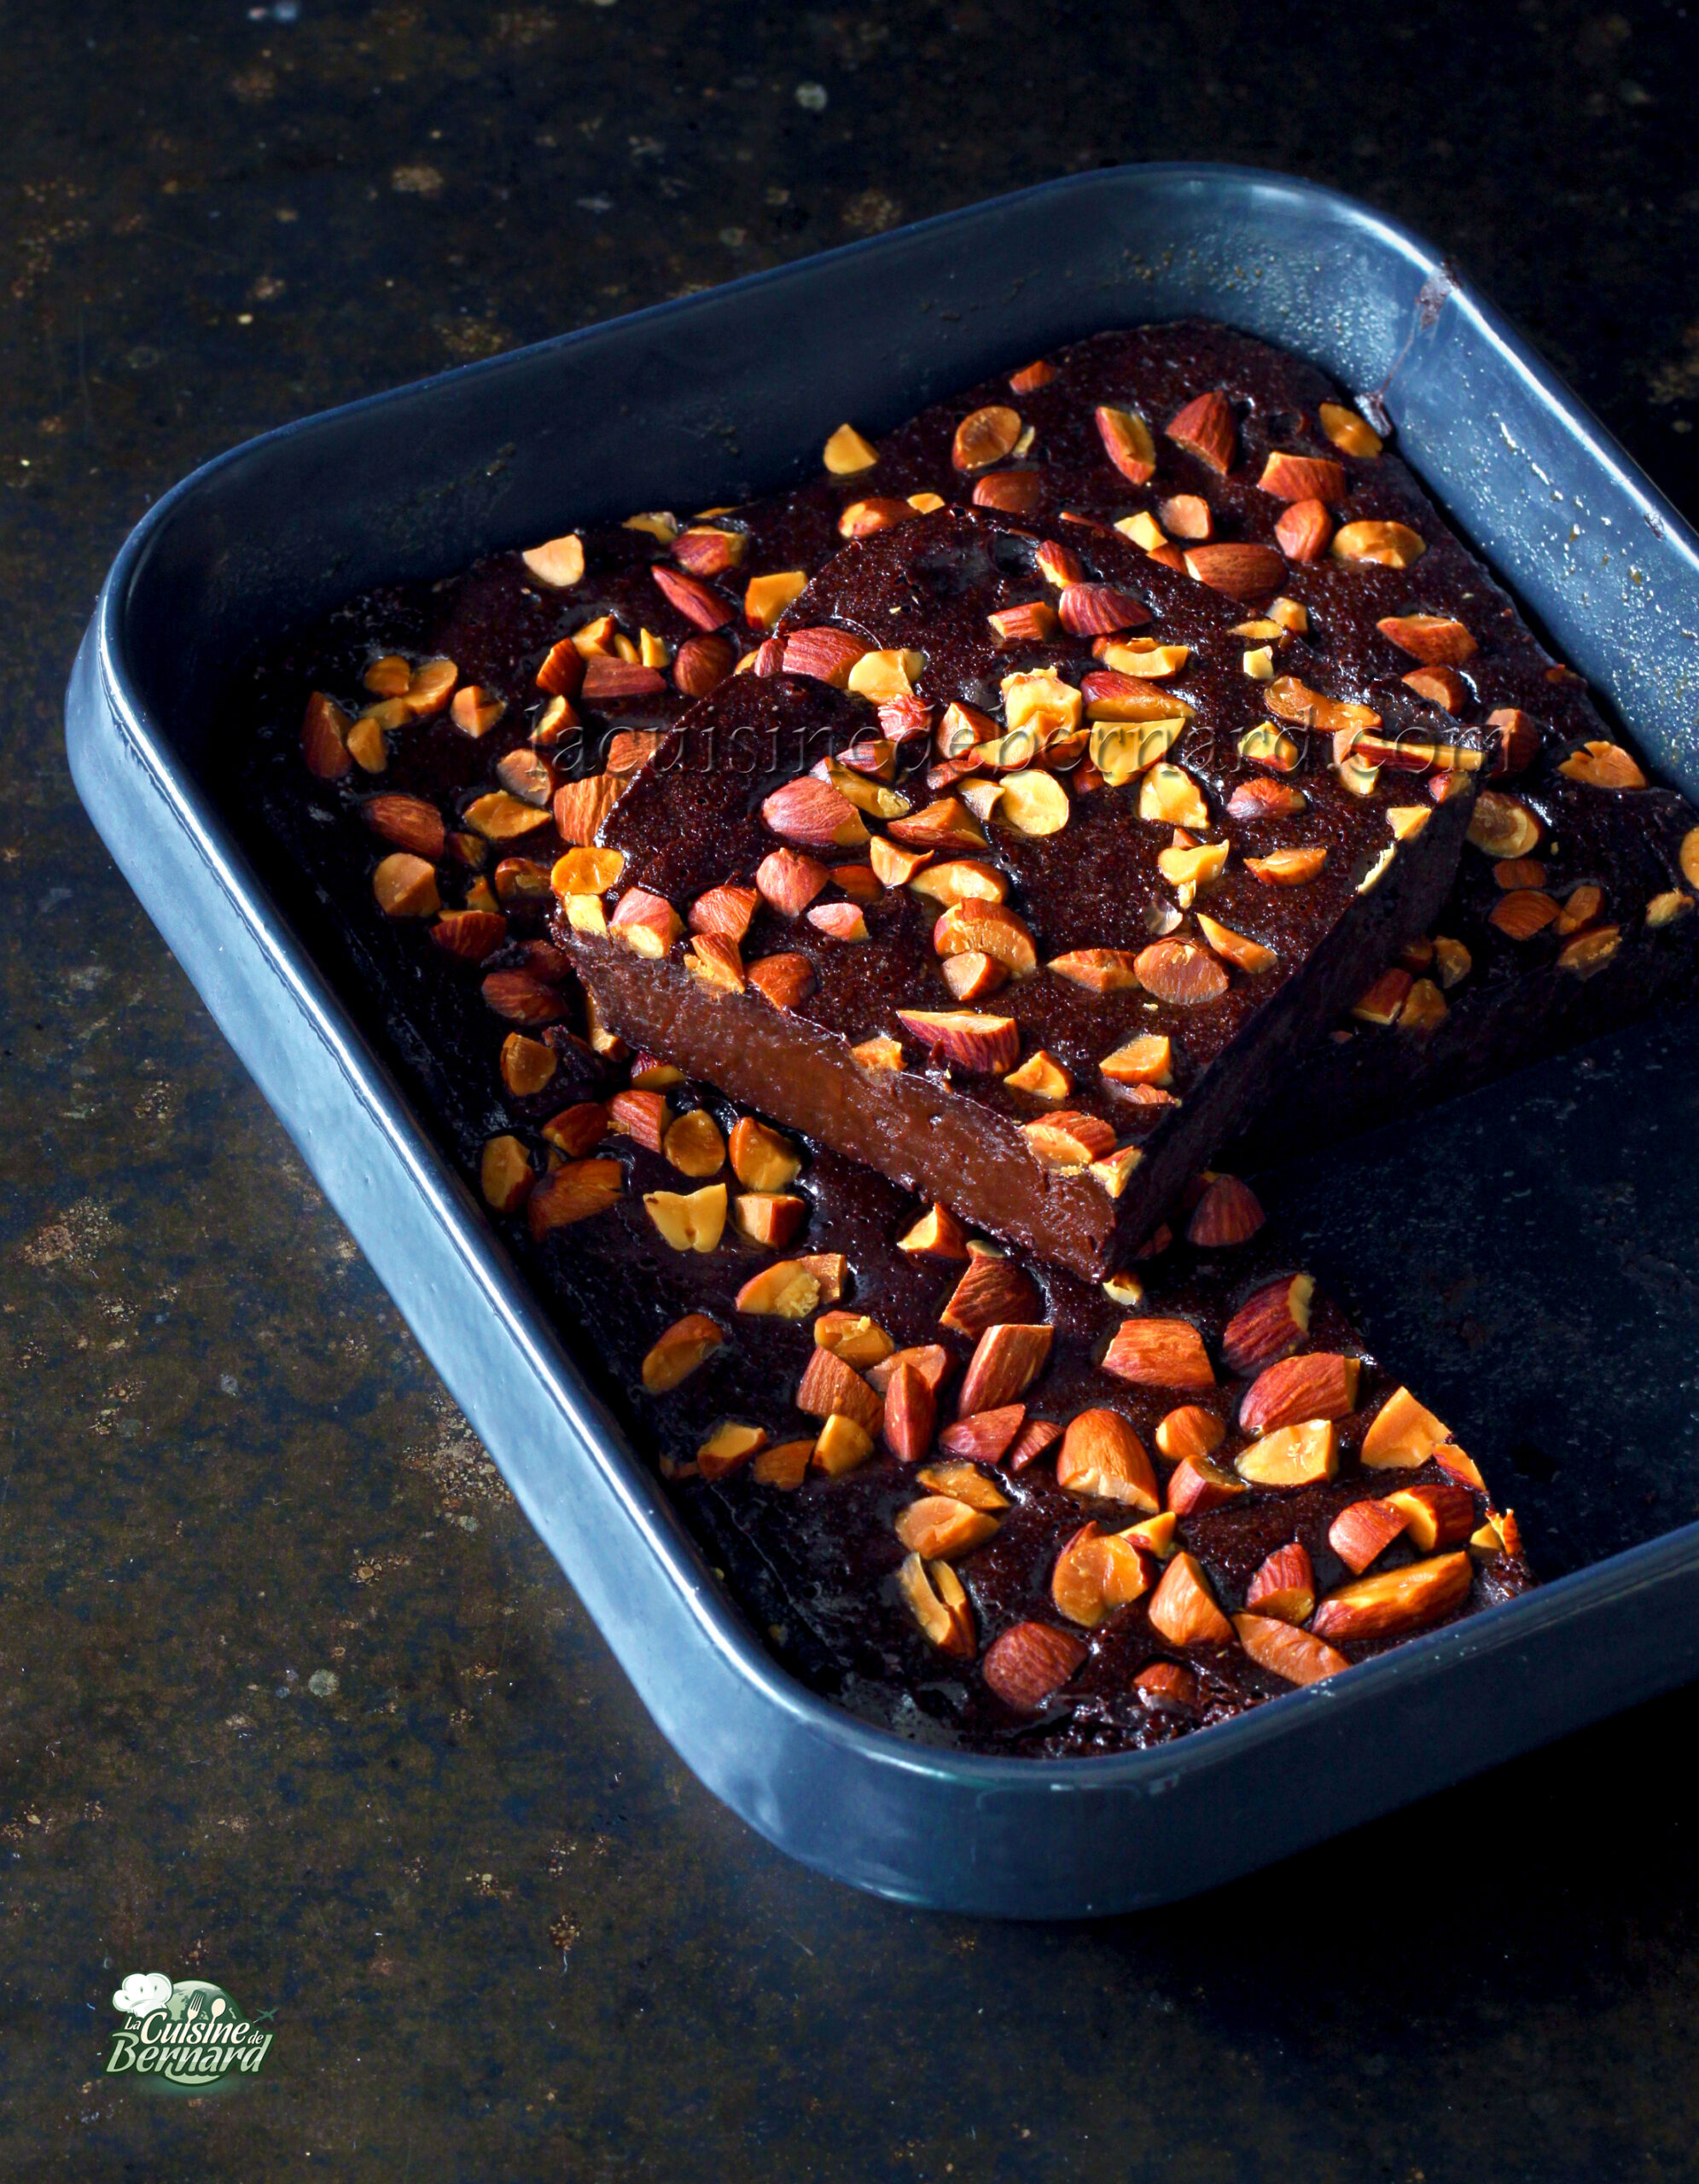
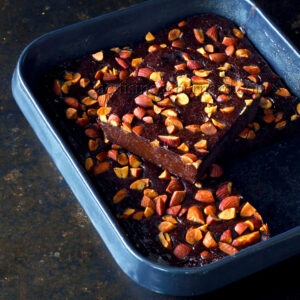
It’s been a long time since I made a chocolate cake on my cooking site. Here’s an ultra-chocolate fondant with roasted almonds. This is a low-sugar cake, with 70% cocoa chocolate, and naturally gluten-free, as it’s flourless. So yes, it’s rich and very, very chocolatey! Enjoy it in small slices with coffee.
For a 20x25cm rectangular mould (or a 22 square mould or a 24cm round mould):
- 230g of semi-salted butter
- 200g 70% cocoa dark chocolate
- 230g of egg
- 90g cane sugar
- 50g raw almonds
Melt together the semi-salted butter and dark chocolate.

I make it in the microwave, heating to 900w for 1 minute 30. You can also do it in a bain-marie.

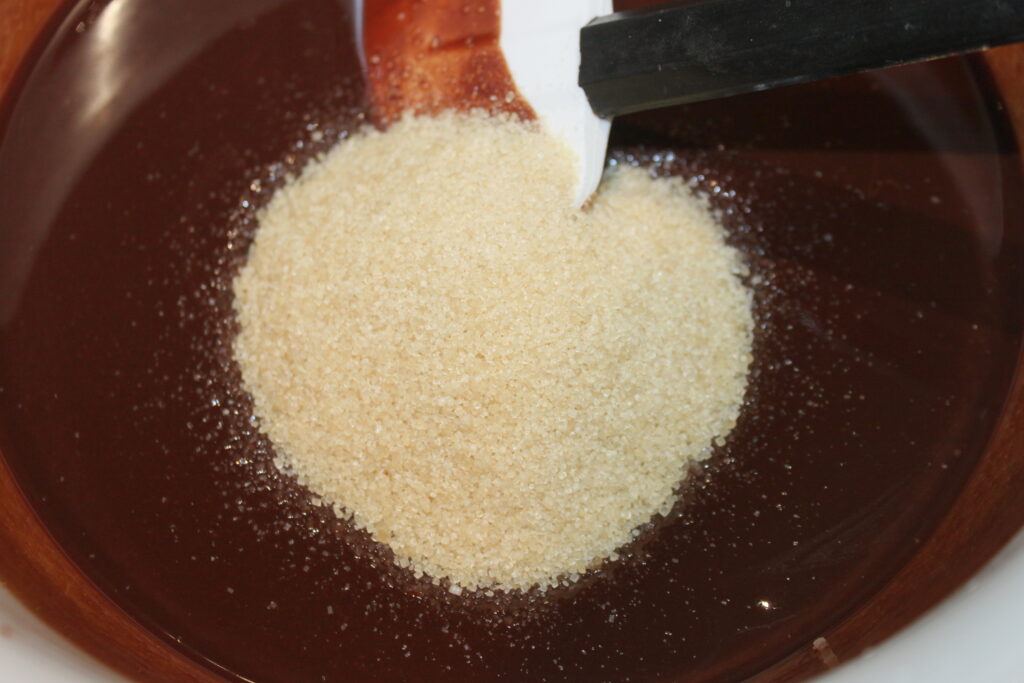
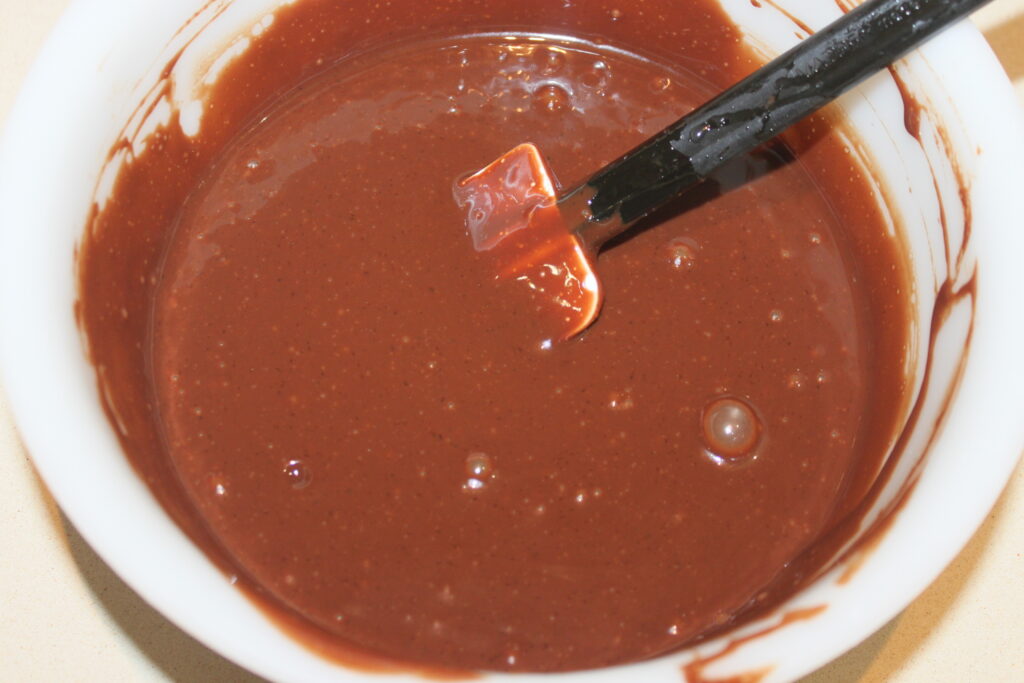
Mix well, then add the 90g cane sugar and mix again.
Add the 230g of egg (to do this, beat 4 large eggs or 5 medium eggs into an omelette and weigh out the quantity required). In the photo, I have 4 whole eggs that total 205g, but I’ve added 25g as an omelette.

If the butter doesn’t mix well, keep stirring briskly, as it will eventually become homogeneous.
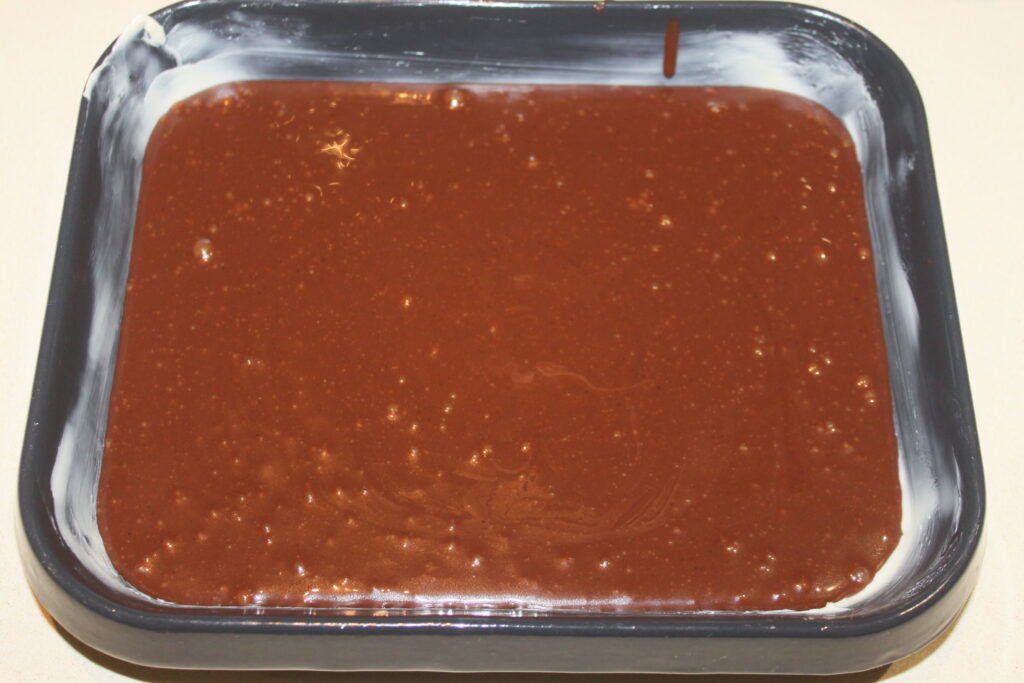
Butter the mould, then pour in the batter.

Chill the mold, while pouring the almonds into a baking tray and bake at 180°C over fan assisted heat for 17-18 minutes.
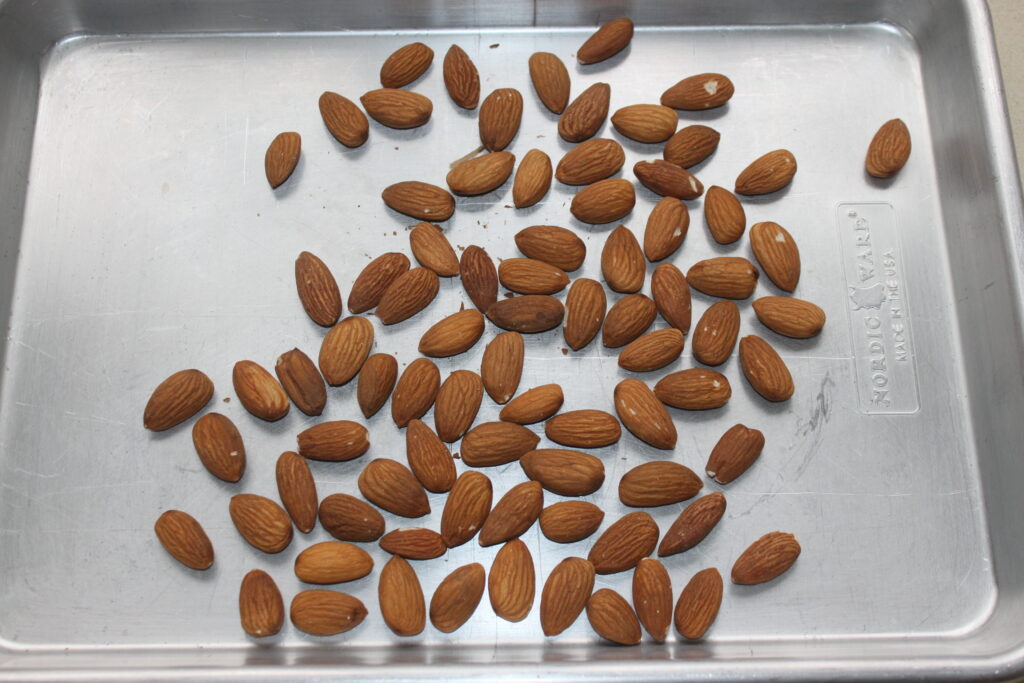
Once out of the oven, cut the almonds into fairly coarse pieces.
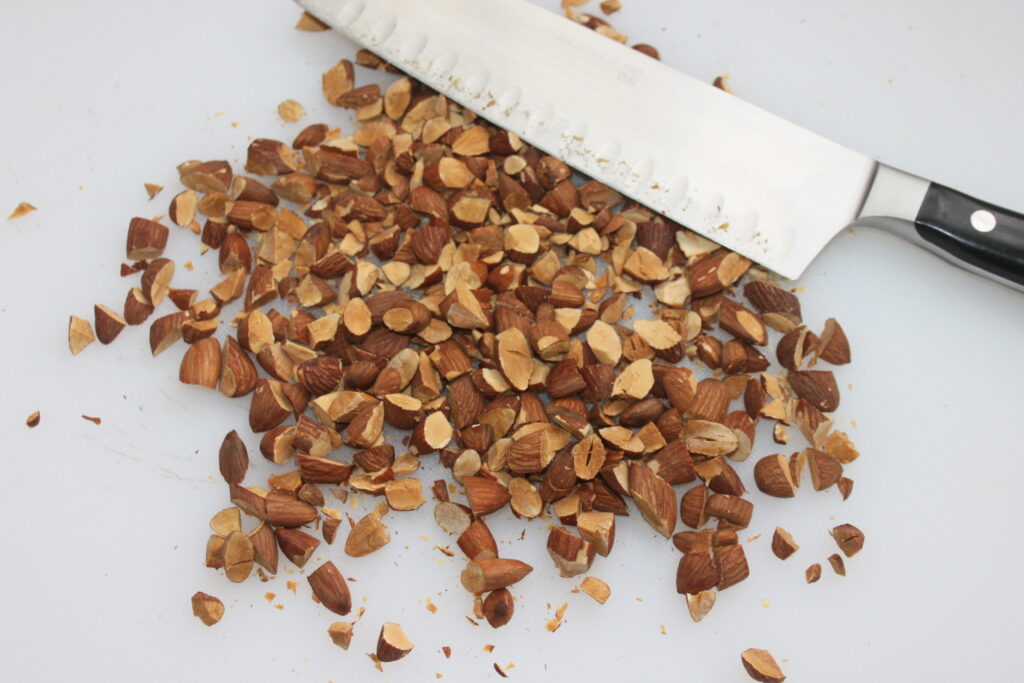
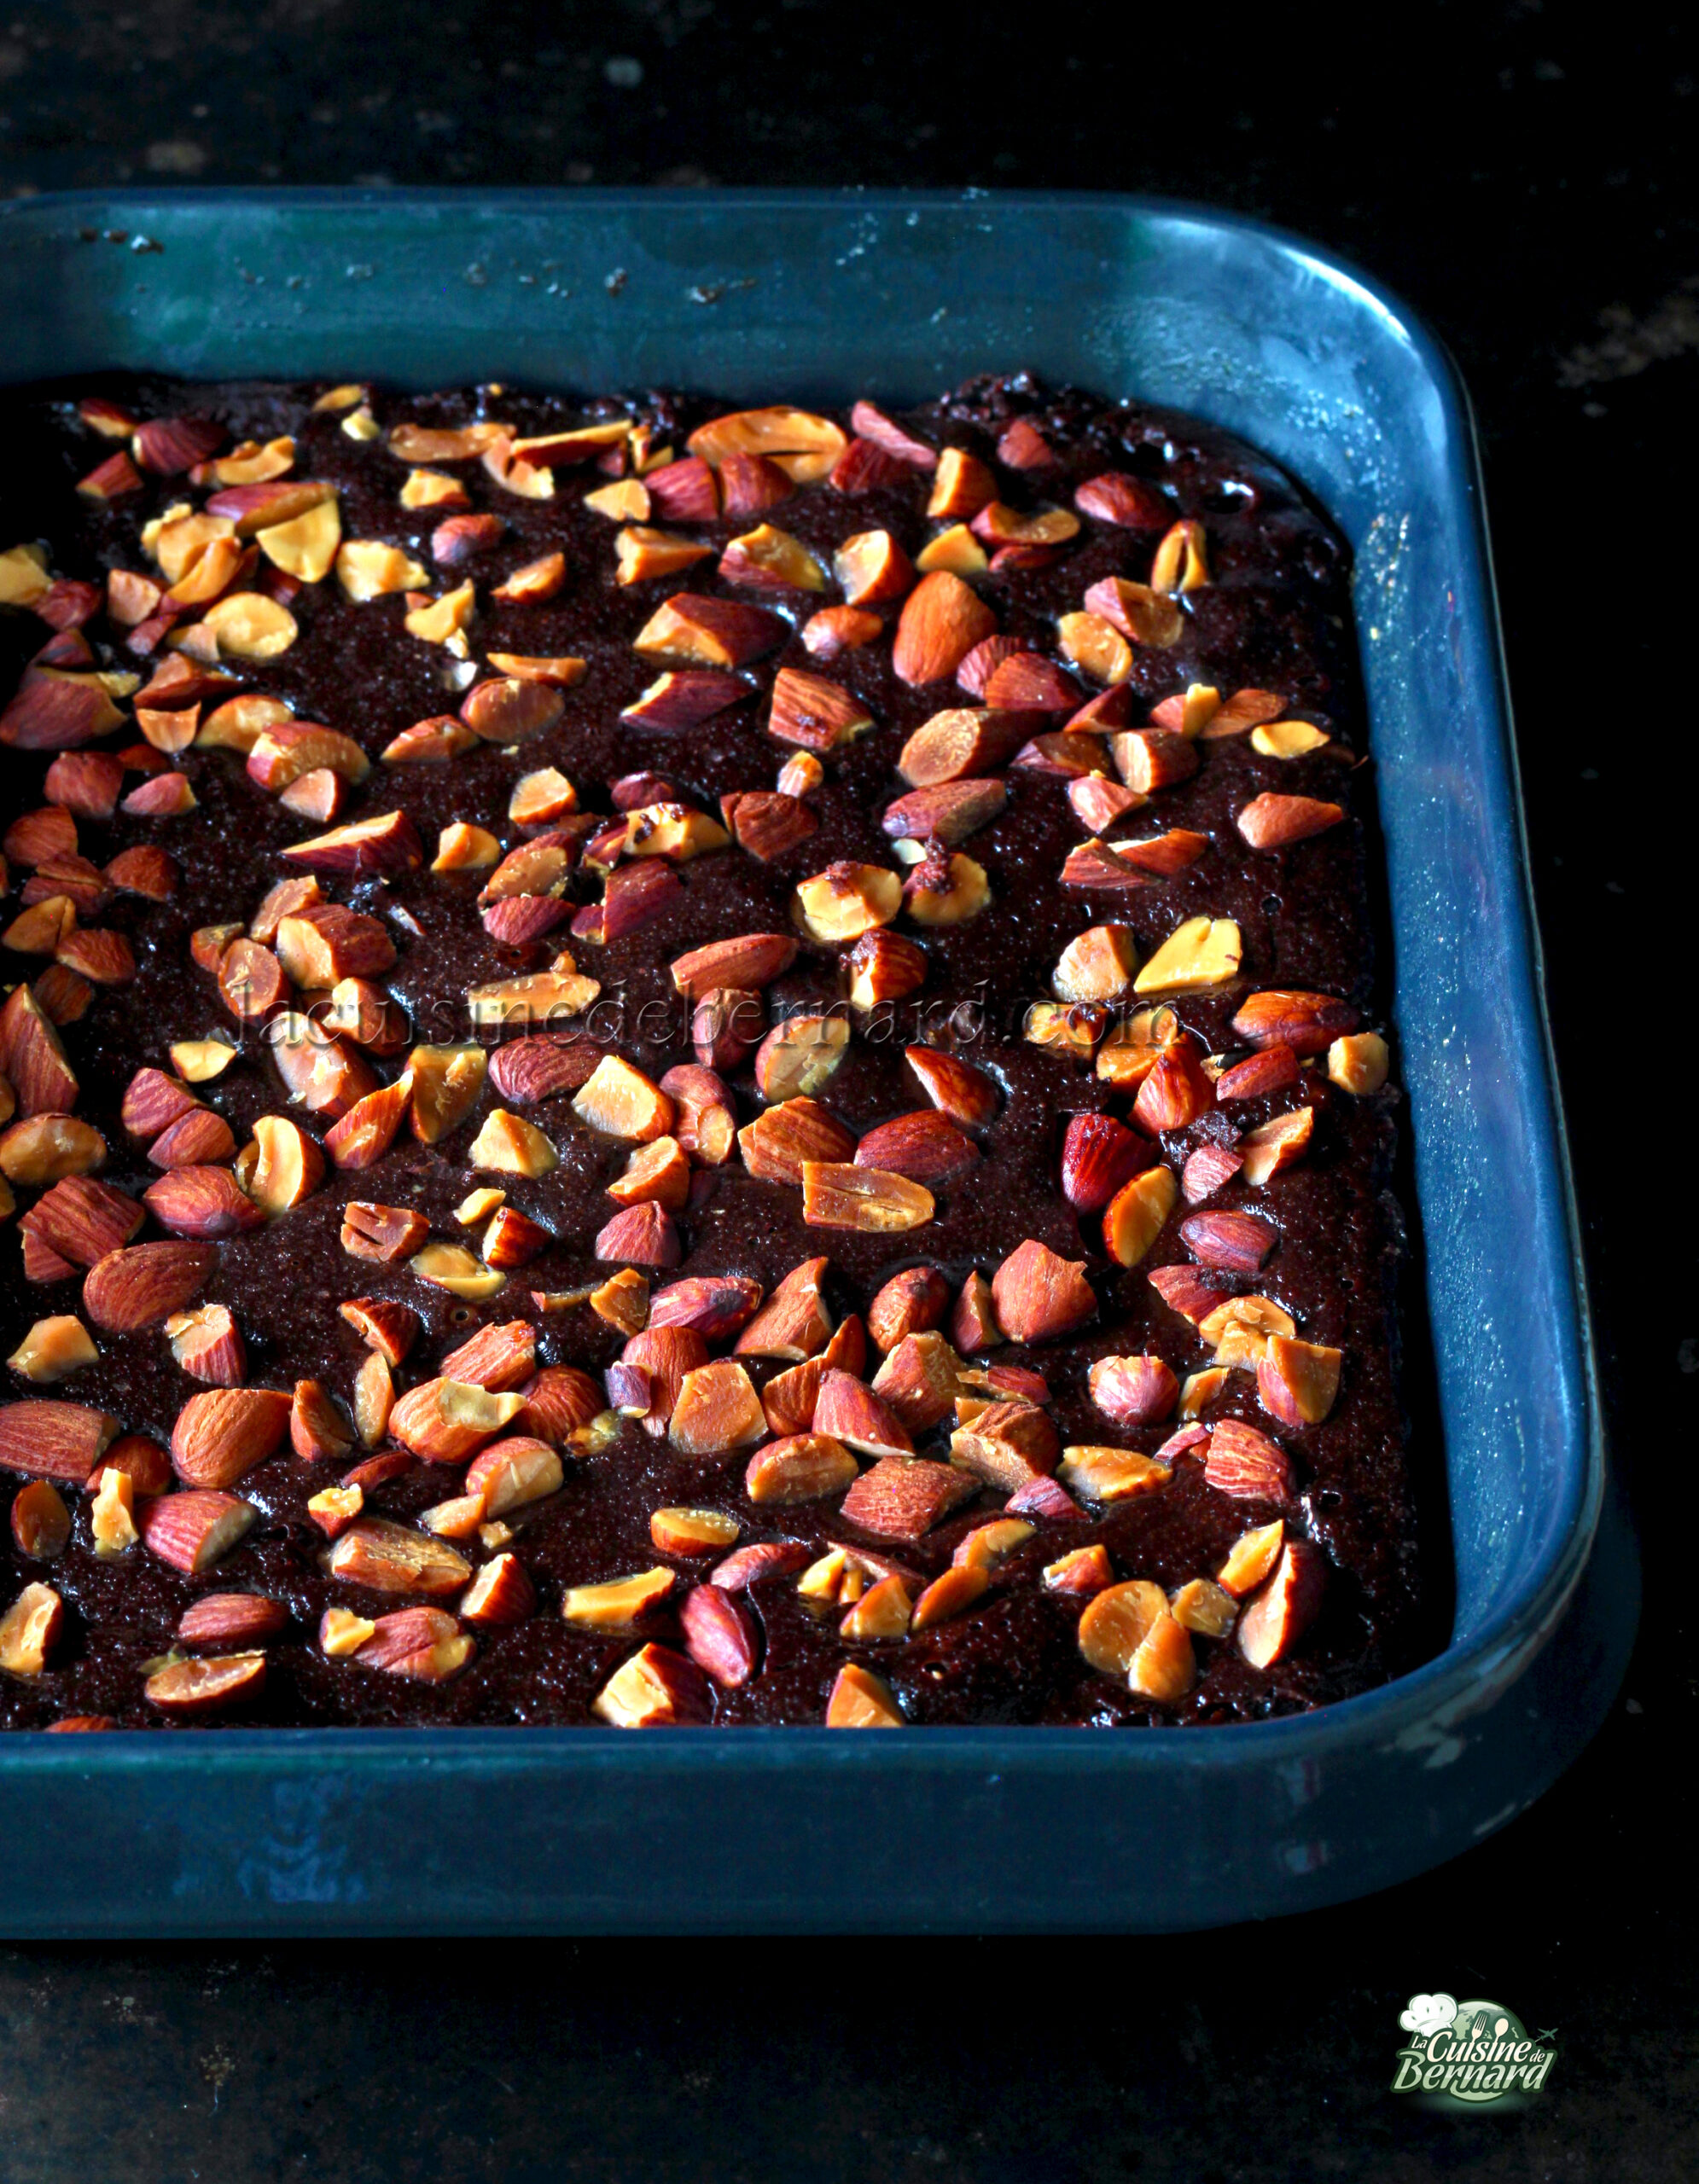
Remove the mould from the fridge and sprinkle the surface with crushed almonds.

Place in the oven, still at 180°C, for 20 minutes.
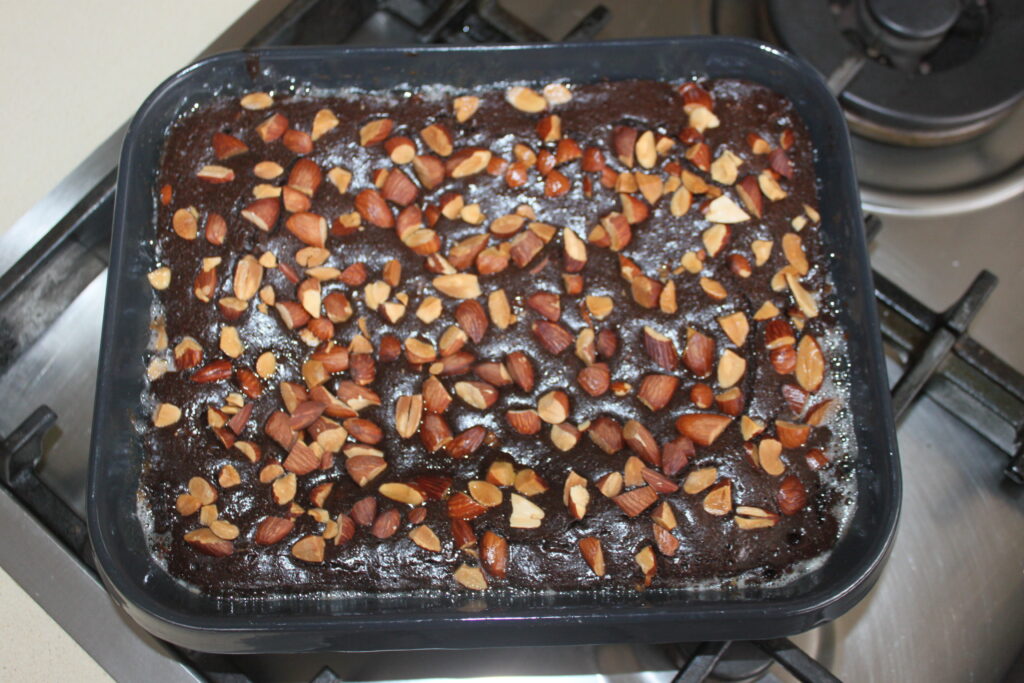
Leave to cool and enjoy at room temperature or fresh from the fridge!
Fondant ultra chocolat et amandes grillées
Ingredients
Pour un moule de rectangulaire de 20x25cm (ou un moule carré de 22 de côté ou un moule rond de 24cm de diamètre) :
- 230 g beurre demi-sel
- 200 g chocolat noir à 70%
- 230 g œuf
- 90 g sucre de canne
- 60 g amandes crues
Instructions
- Mettez à fondre ensemble le beurre demi-sel et le chocolat noir.
- Je le fais au four à micro-ondes, en chauffant à 900w pendant 1 minute 30. Vous pouvez le faire aussi au bain-marie.
- Mélangez bien puis versez les 90g de sucre de canne et mélangez de nouveau.
- Ajoutez les 230g d’œuf (pour cela battez 4 gros œufs ou 5 moyens en omelette et pesez la quantité nécessaire). Si le tout tranche, c’est à dire que le beurre ne se mélange pas bien, continuez de bien mélangez, de façon assez vive, cela finira toujours pas devenir homogène.
- Beurrez le moule, puis versez la pâte.
- Mettez le moule au froid et pendant ce temps, versez les amandes dans une plaque et faites cuire à 180°C sur chaleur tournante pendant 17-18 minutes.
- À la sortie du four, coupez les amandes en morceaux assez grossiers.
- Sortez le moule du réfrigérateur et parsemez la surface d’amandes concassées.
- Mettez au four, toujours à 180°C pour 20 minutes.
- Laissez refroidir et dégustez à température ambiante ou bien alors bien frais sortant du réfrigérateur !
Nutrition
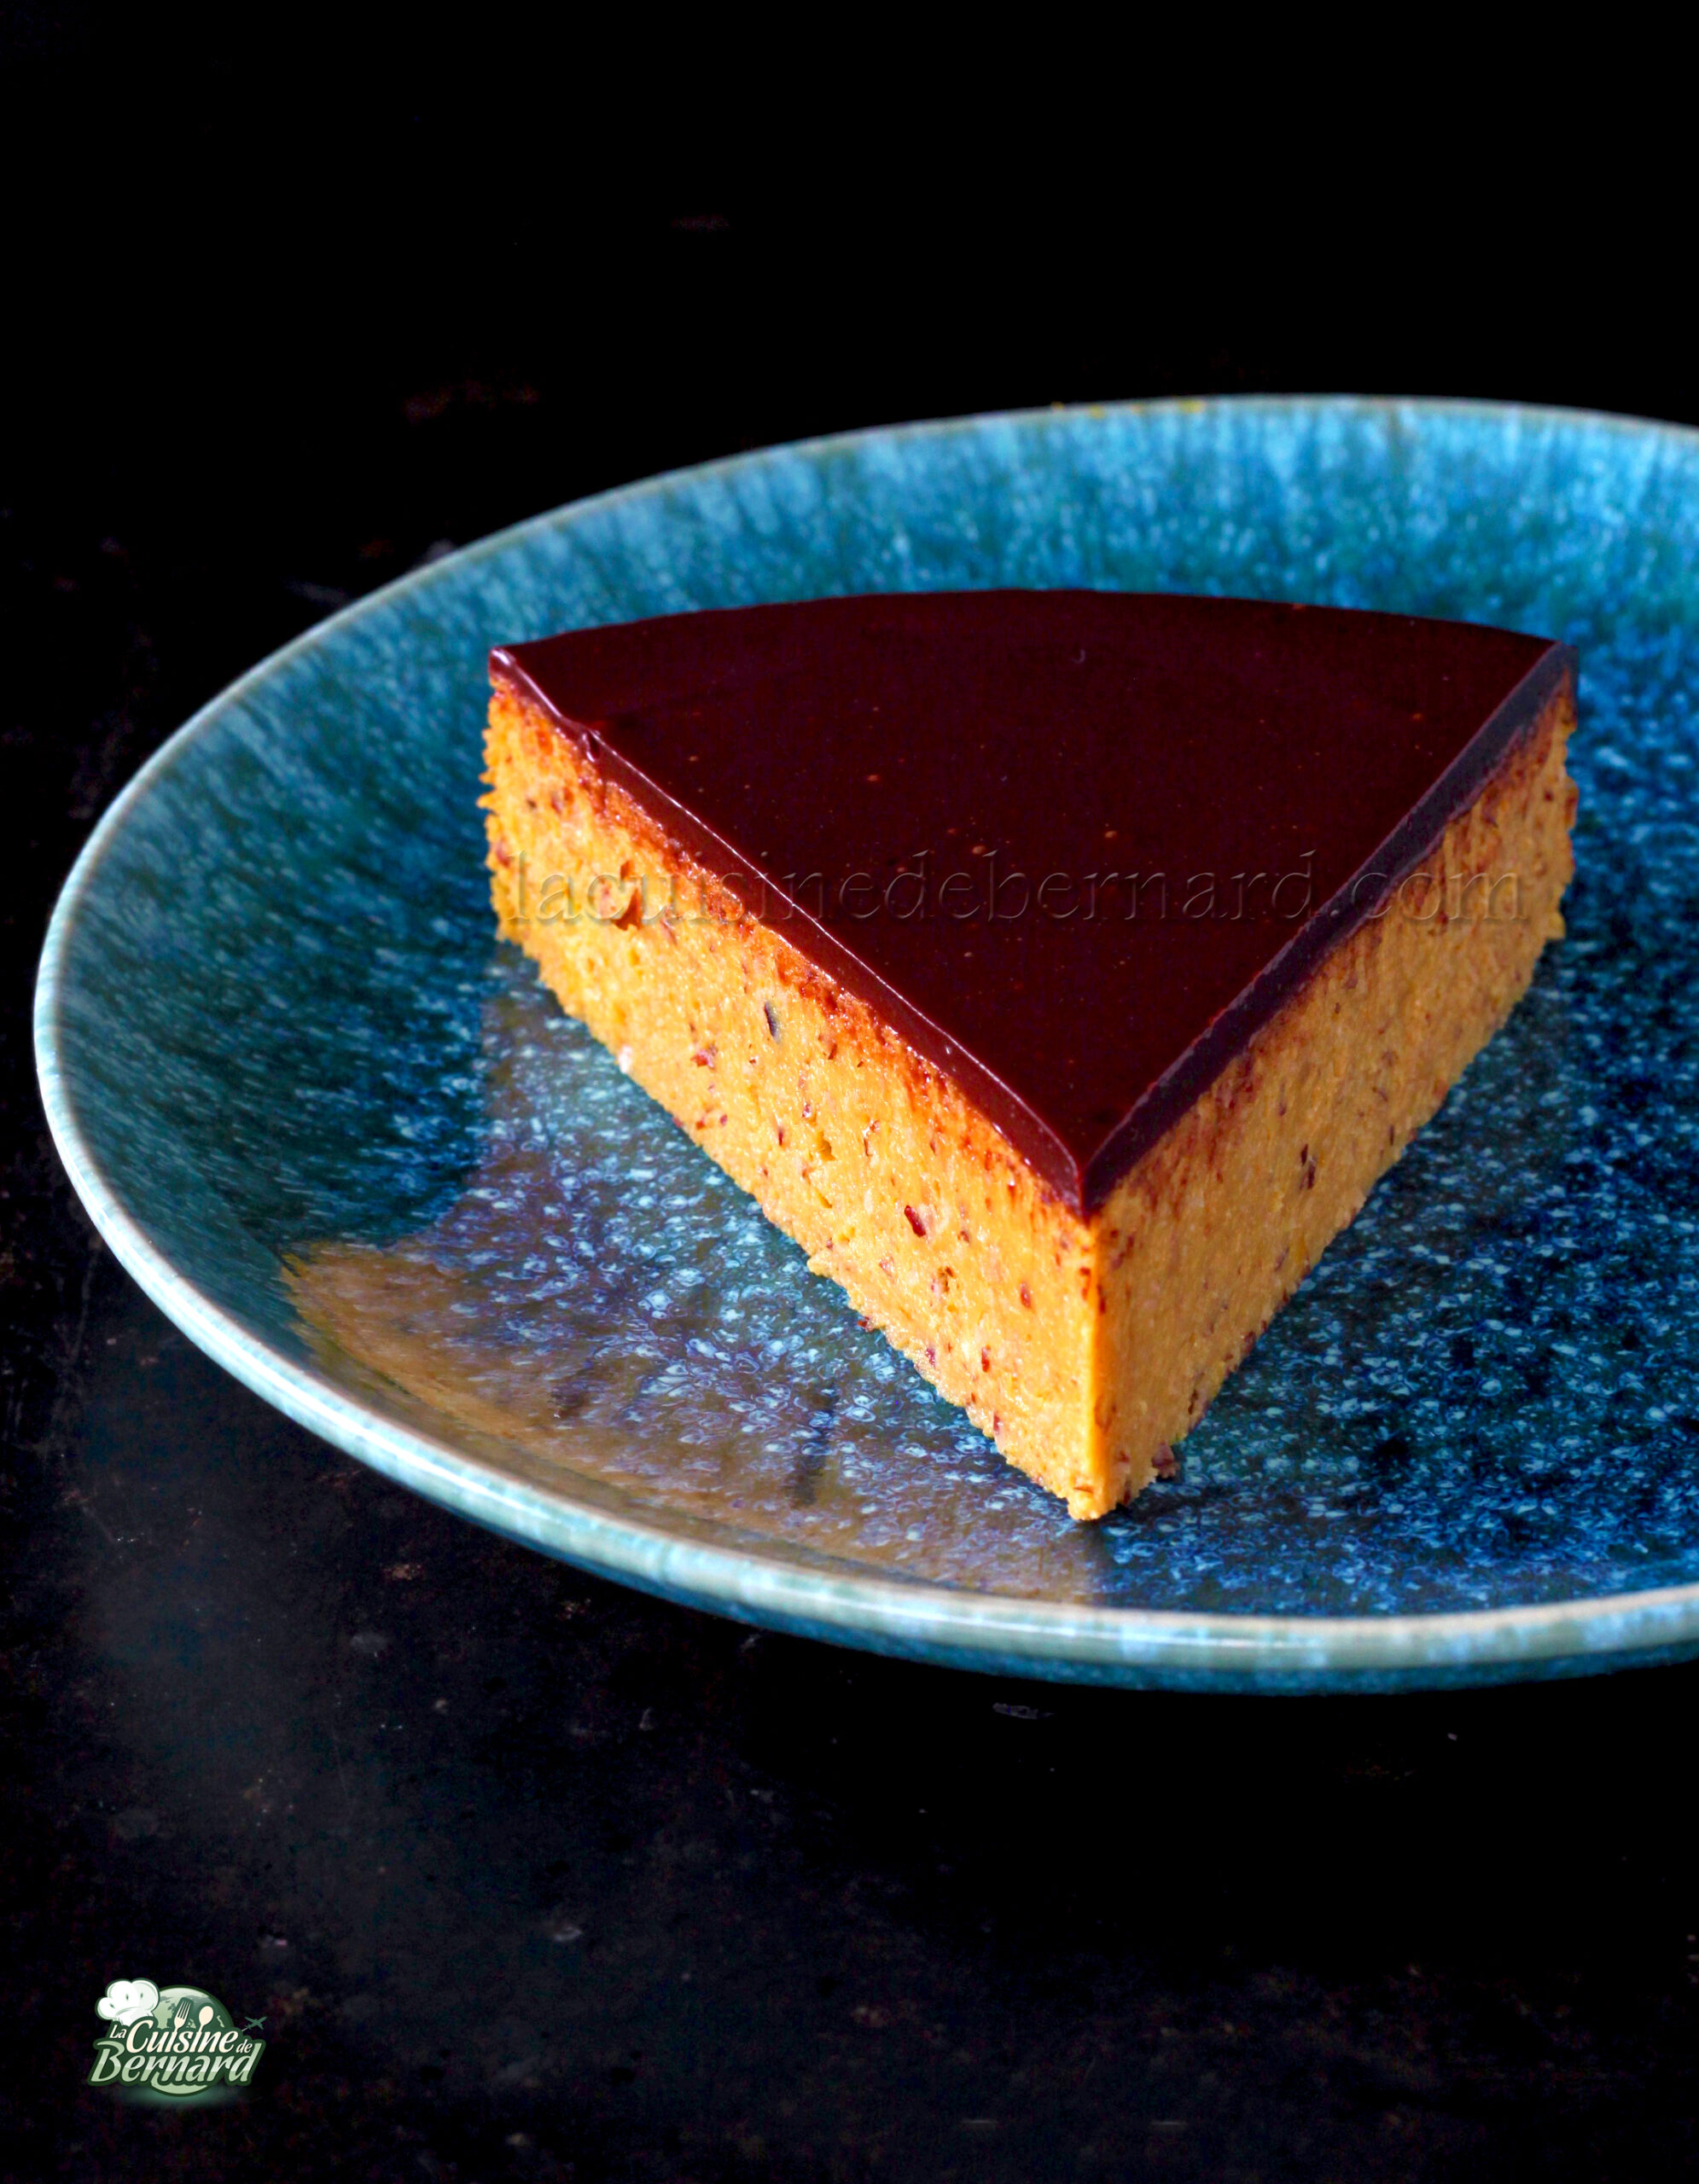
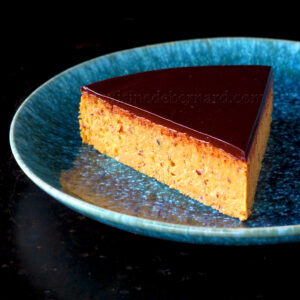
My friend Gaëlle, a pianist by trade, is also a fine cook, and if you have my latest book “La cuisine de Bernard” published by Flammarion, you’ll find her recipe for salmon and tuna tataki. It’s not the first time she’s agreed to share one of her delights on my site. So a thousand thanks to Gaëlle for this delicious orange cake. Here, the orange is cooked, then blended whole with the peel (organic oranges are essential) and mixed with other ingredients, including almond powder previously roasted in the oven. Once baked and cooled, then topped with a chocolate icing/ganache, this cake has an incredible consistency and taste! A must-try!
For a 23cm cake:
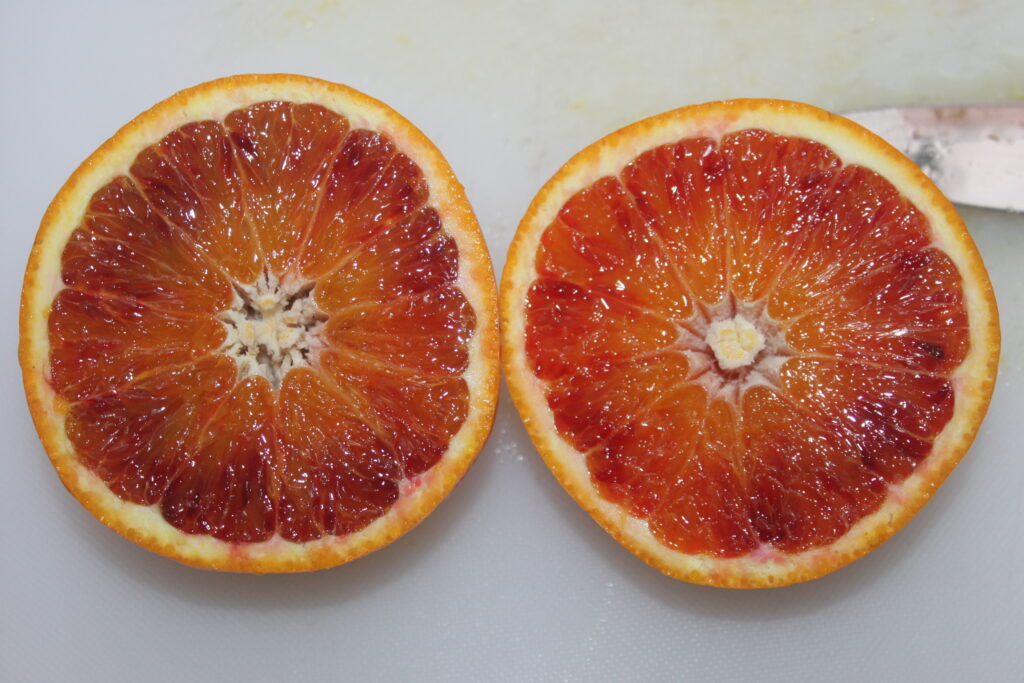
- 2 organic table oranges (about 180g each)
- 2 organic blood oranges (same weight as the others)
For the cake
- 600g cooked orange (this is the total of 3 of the 4 oranges above)
- 170g almond powder
- 120g whole cane sugar
- 280g egg (about 5 large eggs)
- 70g blood orange juice
- 55g deodorized coconut oil (or not for “deodorized”, it’s up to you)
For the chocolate ganache :
- 120g dark chocolate
- 80g full cream
Start by cooking three oranges (2 table and 1 blood) in boiling water for 1 hour. You can put a lid on during cooking. You’ll be left with a blood orange, which can then be squeezed.
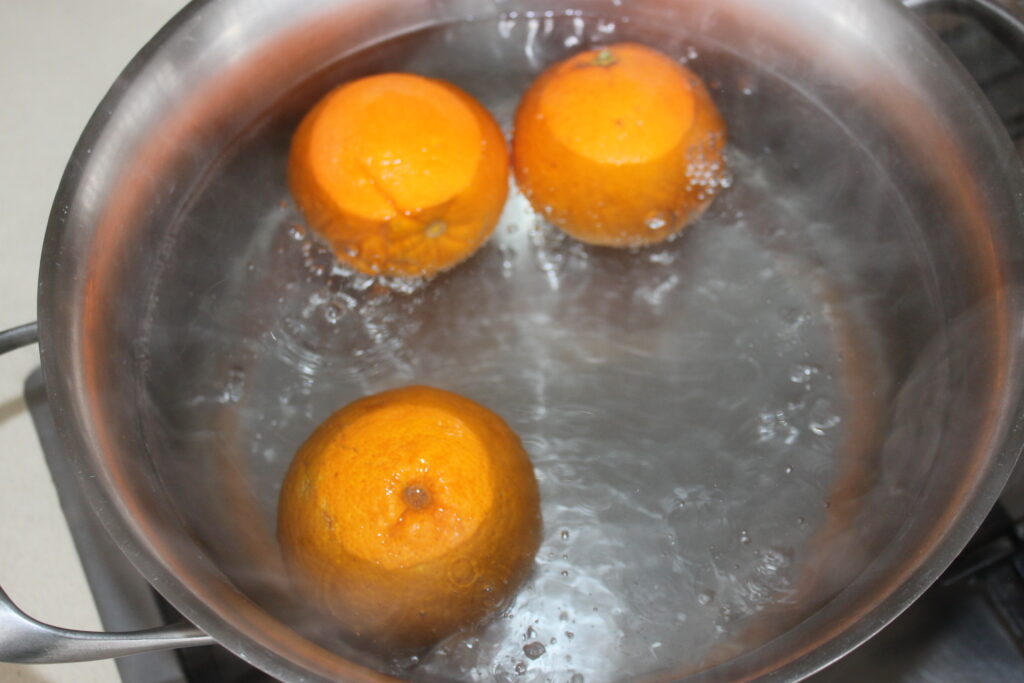
The oranges become soft after this treatment.
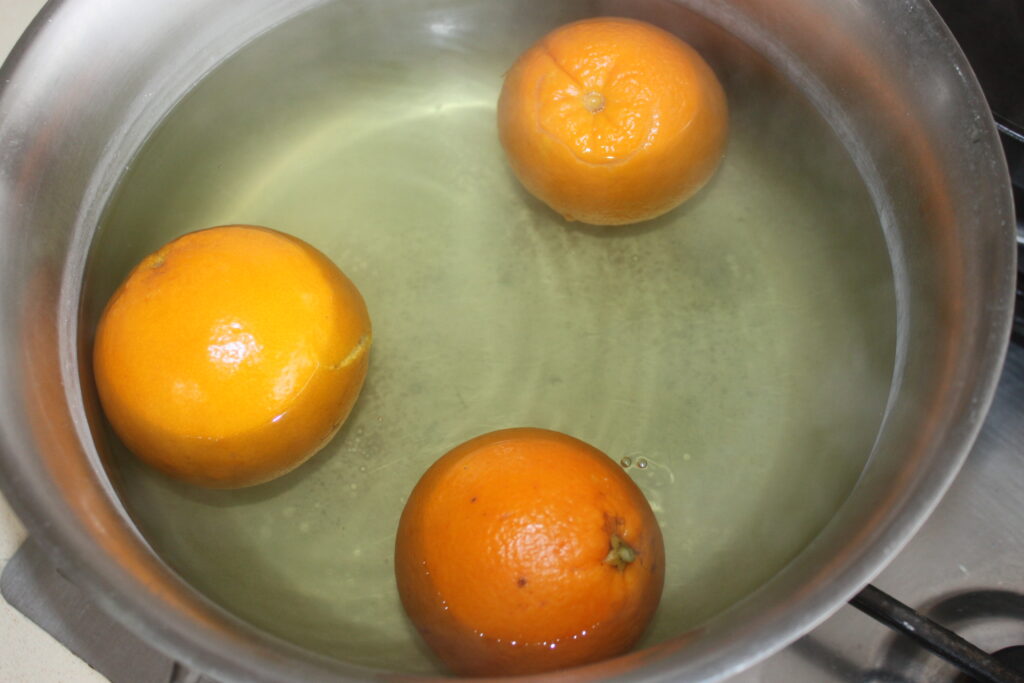
Let them cool out of the water.

Meanwhile (or while the oranges are cooking), bake the almond powder at 170°C for 16 minutes.

Slightly tinted.
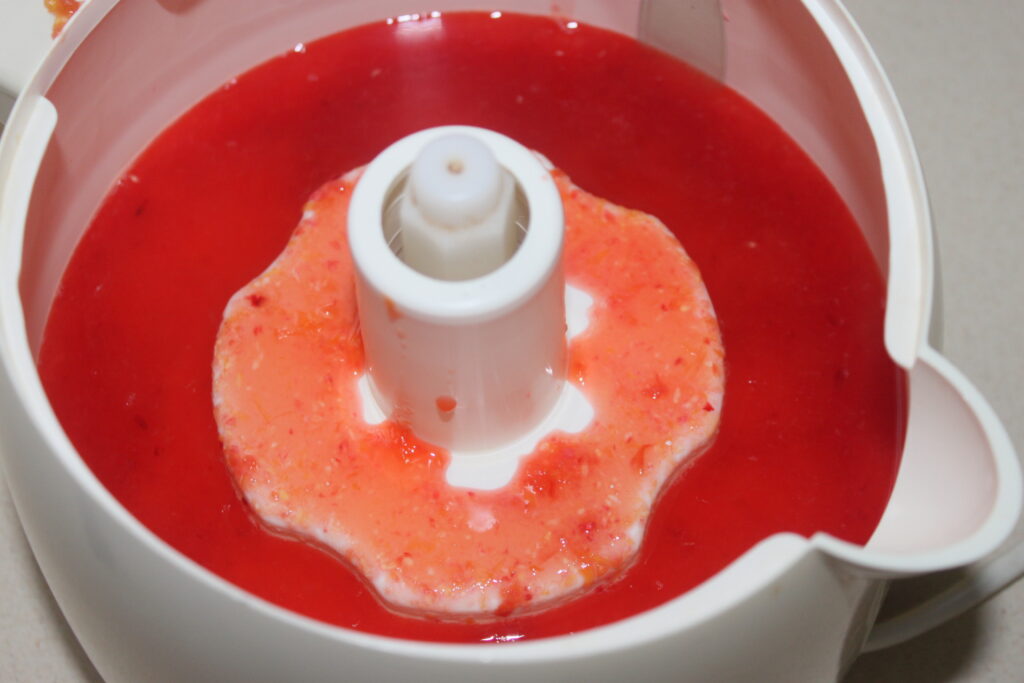
When oranges can be handled, cut them into pieces and remove any seeds.
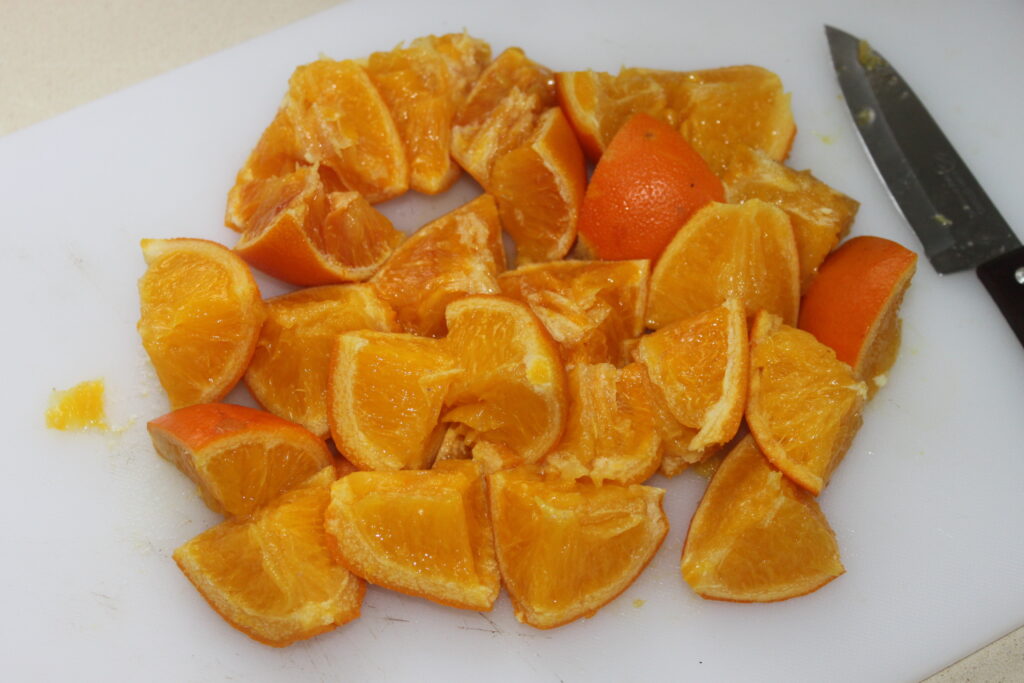
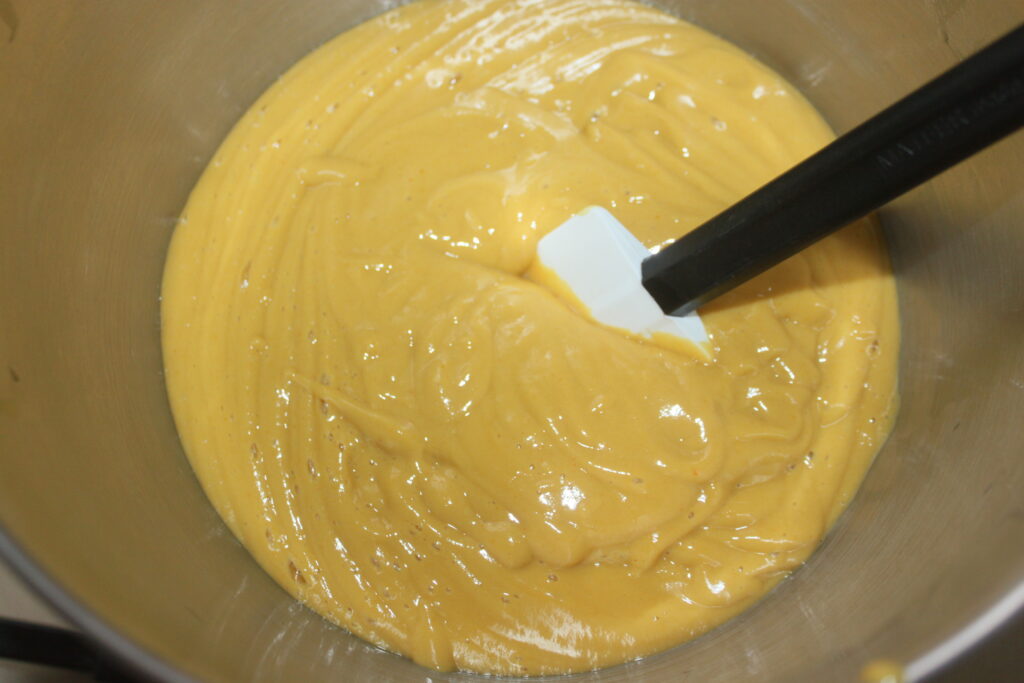
Weigh out 600g and place in a blender with the wholegrain cane sugar and eggs.

Blend to a creamy consistency. Pour into a container.
Squeeze the last blood orange.
Pour 70g of the juice into the dough.
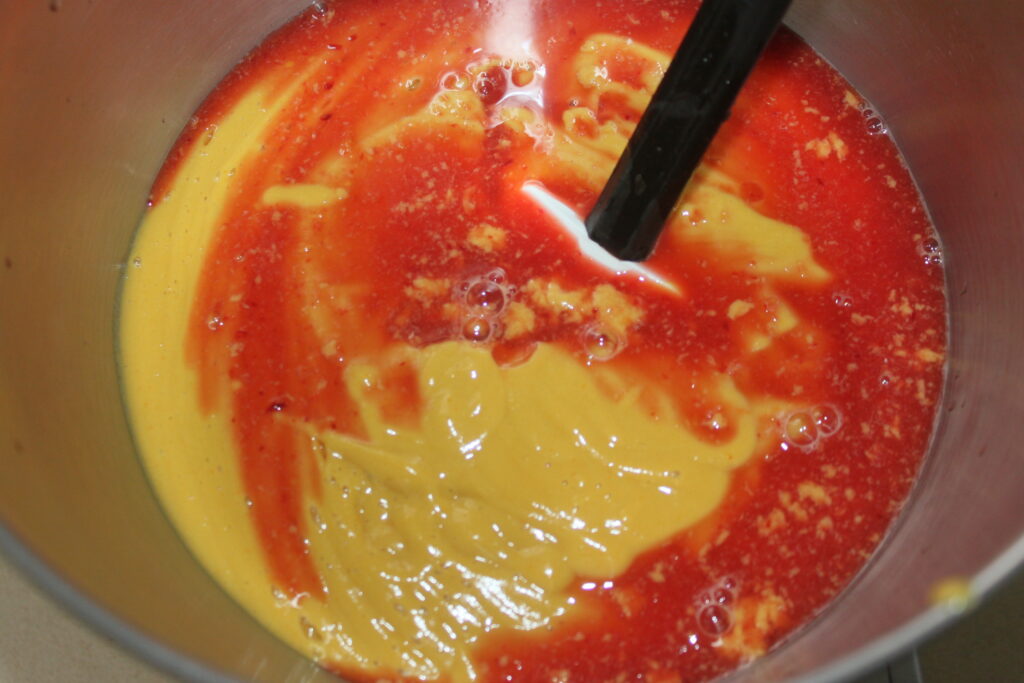
Pour in the melted coconut oil and almond powder.
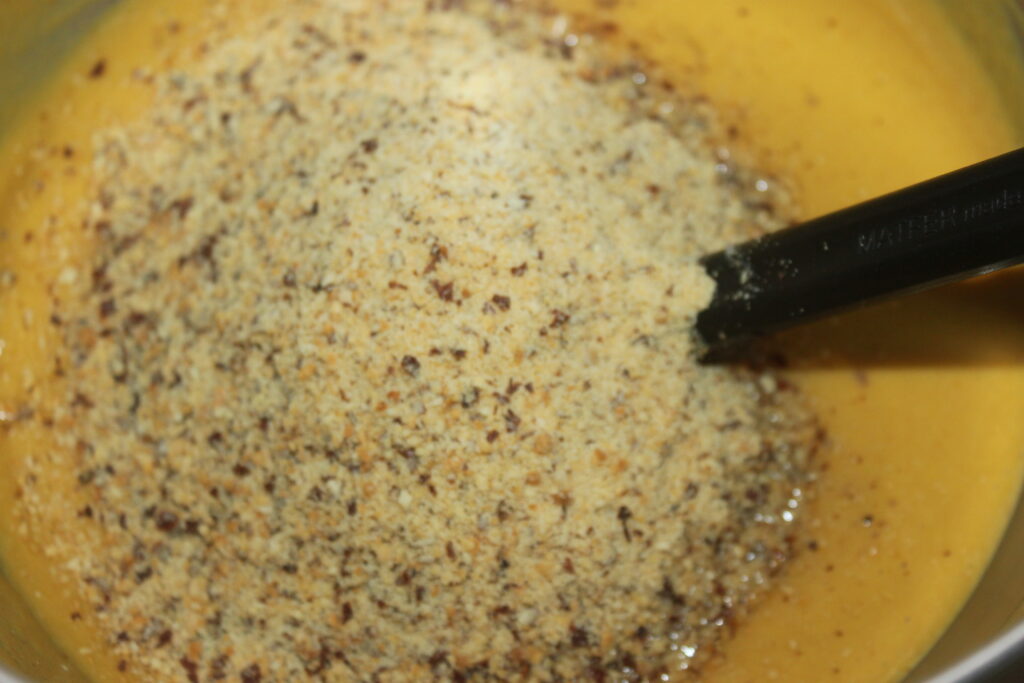
Mix well, then pour into a mold (in this case, a removable springform pan) lined with parchment paper. You can also apply grease to the inner edge.

Bake at 175°C for 45 minutes over static heat (not fan assisted).

Leave to cool, then make the ganache by melting the cream and chopped dark chocolate together in a microwave oven. Mix well, then pour over the cake and shake to smooth. You can also tap the mold on the work surface to even out the surface.

Leave to cool before chilling for at least 4 hours before serving. Eat well chilled.

Orange and almond cake
Ingredients
For a mould of 23cm :
For the cake
- 600 g baked orange (this makes a priori the total of 3 of the 4 oranges above)
- 170 g almond powder
- 120 g whole cane sugar
- 280 g eggs 5 large eggs
- 70 g blood orange juice
- 55 g coconut oil
Ganache:
- 120 g dark chocolate
- 80 g full-fat liquid cream
Instructions
- Start by cooking three oranges (2 table and 1 blood) in boiling water for 1 hour. You can put a lid on during cooking. You’ll be left with a blood orange, which can then be squeezed.
- Oranges become soft after this treatment. Let them cool out of the water.
- Meanwhile (or while the oranges are cooking), bake the almond powder at 170°C for 16 minutes. Slightly tinted.
- When oranges can be handled, cut them into pieces and remove any seeds.
- Weigh out 600g and place in a blender with the wholegrain cane sugar and eggs.
- Blend to a creamy consistency. Pour into a container. Squeeze the last blood orange. Pour 70g of the juice into the dough.
- Pour in the melted coconut oil and almond powder.
- Mix well, then pour into a mold (in this case, a removable springform pan) lined with parchment paper. You can also apply grease to the inner edge.
- Bake at 175°C for 45 minutes over static heat (not fan assisted).
- Leave to cool, then make the ganache by melting the cream and chopped dark chocolate together in a microwave oven. Mix well, then pour over the cake and shake to smooth. You can also tap the mold on the work surface to even out the surface.
- Leave to cool before chilling for at least 4 hours before serving. Eat well chilled.